Hiking Mount Langley - California 14er 2025 Trail Guide

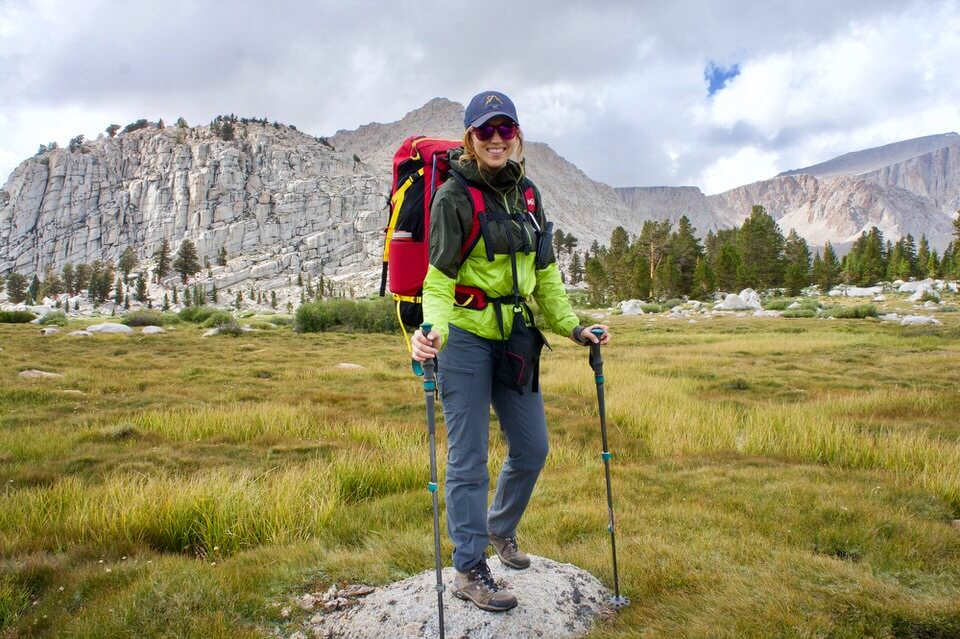
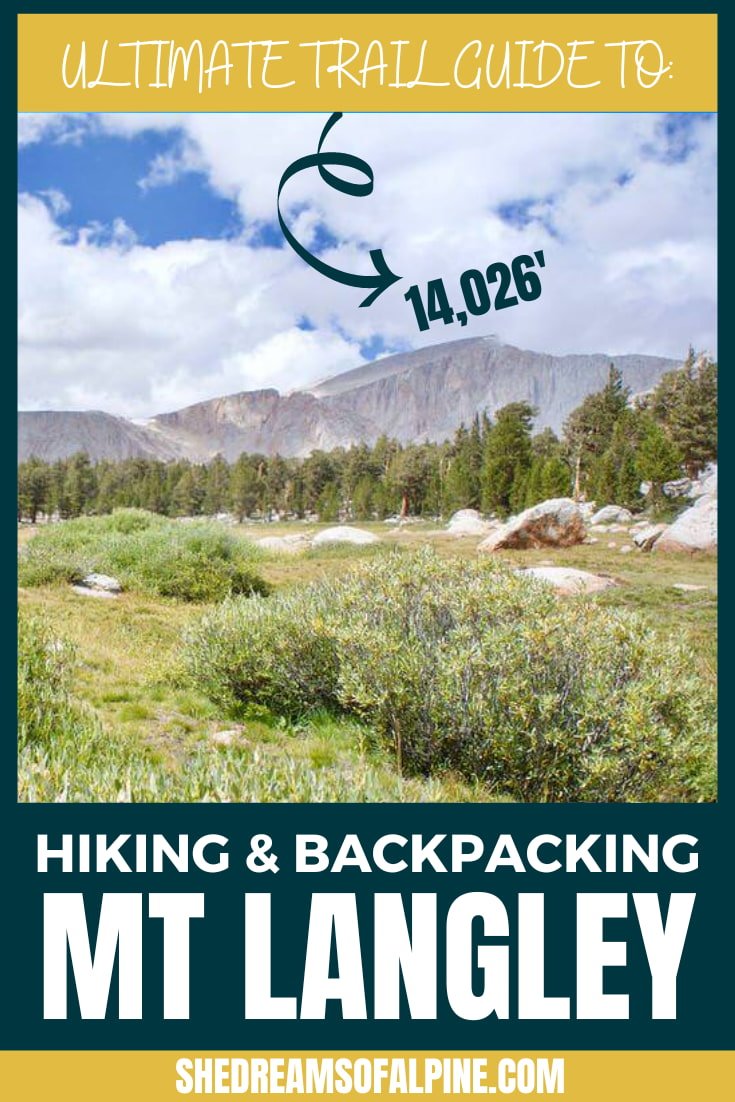
Hiking Mount Langley should most definitely be at the top of your Sierra Nevada hiking bucket list. Not only is Mount Langley one of the tallest peaks in California (also known as a California “14er”), but in my opinion, it’s one of the most beautiful hiking and backpacking areas in the Sierra Nevada mountains.
The Mount Langley hike often gets overshadowed by its nearby neighbor, the more famous, peak of Mount Whitney, but if you’re looking to get away from the crowds (and still have a challenge) then Mount Langley is the way to go.
If you have the time, I also highly recommend backpacking Mount Langley versus day hiking, so that you can spend more time at the Cottonwood Lakes. These lakes are arguably some of the most beautiful alpine lakes in the Sierra Nevada, yet are surprisingly easy to get to!
And if I haven’t convinced you that you need to hike Mount Langley, then watch this quick video which I filmed with my best friend when we hiked the Mount Langley trail together!
When hiking Mount Langley, you will have to battle its over 5,900 feet of elevation gain over 26 miles all while adapting to the altitude of its high summit at 14,026 feet.
Many hikers choose to attempt Mount Langley in 2-3 days, camping near the base of New Army Pass or scattered among the Cottonwood Lakes, but some extra-ambitious hikers will attempt to achieve its summit in a 1-day push.
For the rock climbers out there, there are even a couple of more technical routes leading to the summit of Mount Langley.
However you tackle it, Mount Langley makes for a great beginner 14,000 foot peak hike, and should definitely be on your peak-bagging list!

For me, hiking Mt Langley was actually my second California 14er summit. I first climbed the Mountaineers Route up Mount Whitney, the tallest peak in the lower 48 states, and then went after Mount Langley.
Ironically though, it took me two attempts to get to the summit of Mount Langley. Back in 2015, I attempted Mount Langley as my first solo backpacking trip. Long story short, I had a great solo backpacking trip, but had to turn around because there was too much snow on the summit, and I wasn’t prepared for that at the time.
In my second attempt on Mount Langley, I went back with a friend a bit earlier in the season and the coveted Mount Langley summit was achieved!
GRAB MY [FREE] OUTDOOR BACKPACKER STARTER KIT
I created the Ultimate Outdoor Backpacker Starter Kit for you (and it's FREE)! This starter kit is filled with 14 pages of my best hiking and backpacking tips to help you learn what it takes to become a safe, confident, and self-sufficient outdoor backpacker!
WHAT WE WILL COVER IN THIS MOUNT LANGLEY TRAIL GUIDE
This guide goes into great detail on everything you need to know logistically about the Class 1 Mount Langley hike, so that you can plan your own successful summit of Mount Langley and go backpacking on the Cottonwood Lakes Trail.
More specifically, we will cover the following topics to help you plan and prepare for your very own successful Mount Langley hiking adventure:
Mount Langley Hike Stats - All the nitty-gritty details for the trail in one spot. How many miles, elevation gain, & more.
How to get a Mount Langley Permit - Needed for backpacking on the Cottonwood Lakes Trail.
Day Hiking Mount Langley vs Backpacking Mount Langley – Explore which option is best for you!
Best Time to Hike Mount Langley – Details about the best time to hike Mount Langley and typical Mt. Langley weather to expect on your trip.
Mt. Langley Trail Map & GPX Files - I've created a map detailing the whole trail that you can explore, including a look at the elevation gain/profile of the hike. You can also download this file as a GPX file to upload into your own personal GPS device.
How to get to the Mount Langley Trailhead – Driving and parking recommendations to get to the Mt. Langley Trailhead (aka the Cottonwood Lakes Trailhead).
Mt. Langley Camping – Where to camp on and off the trail when hiking.
Itinerary for Hiking Mt. Langley - I’ll walk you through my experience and suggested itinerary for backpacking the Mt. Langley Trail.
Important Mount Langley Safety Tips – Tips about the top hazards to expect along the trail.
What to Bring on Your Mt. Langley Hike – The essential packing list for the hike. Don’t hit the trail without these things!
If you’re looking for something specific, feel free to skip ahead to the section you’re looking for!
And don’t forget check out the bottom of this post to find more hiking trail guides in the Sierra Nevada and other additional hiking, camping and backpacking resources!
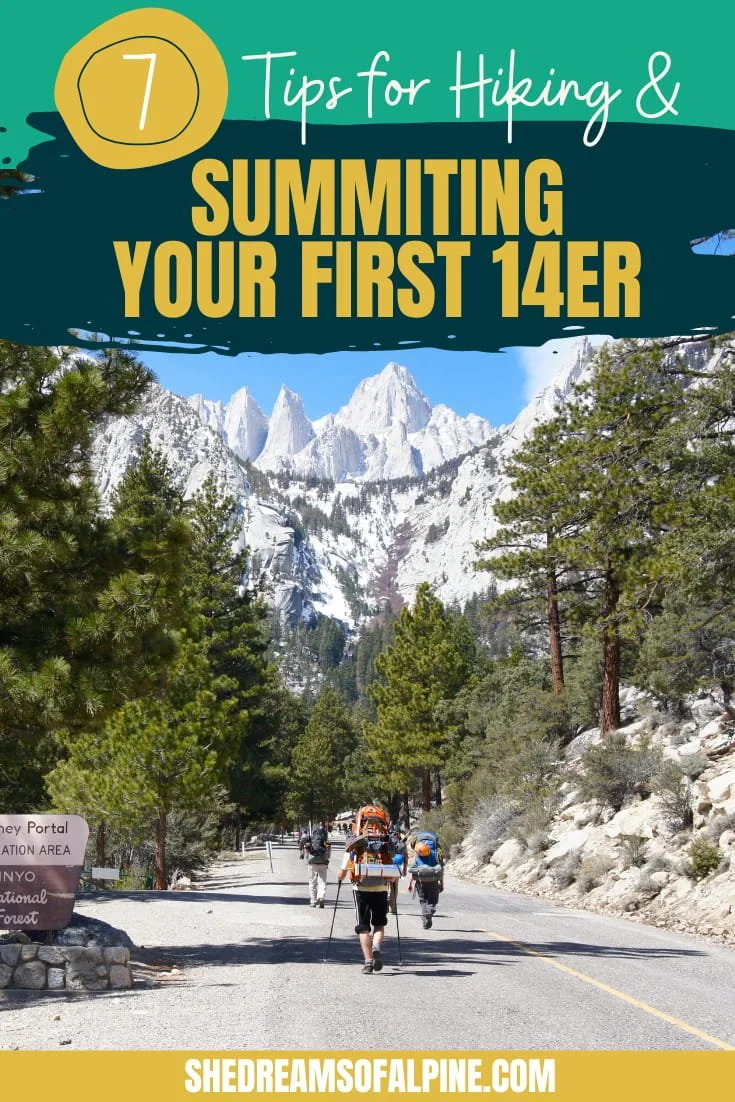
>> Also be sure to check out my post on 7 crucial tips to hiking and summiting a 14er, especially if this is your first 14,000-foot peak hike.

1. MOUNT LANGLEY HIKE STATS
Mount Langley is located just south of the Mount Whitney hike and is the southernmost California fourteener in the Sierra Nevada mountain range.
Mount Langley is the 9th tallest mountain in California and one of three California 14ers that can be accessed via a Class 1 hiking trail which makes it one of the “easiest” California 14ers to summit.
MOUNT LANGLEY TRAIL QUICK FACTS
Mount Langley Summit Elevation: 14,026 feet
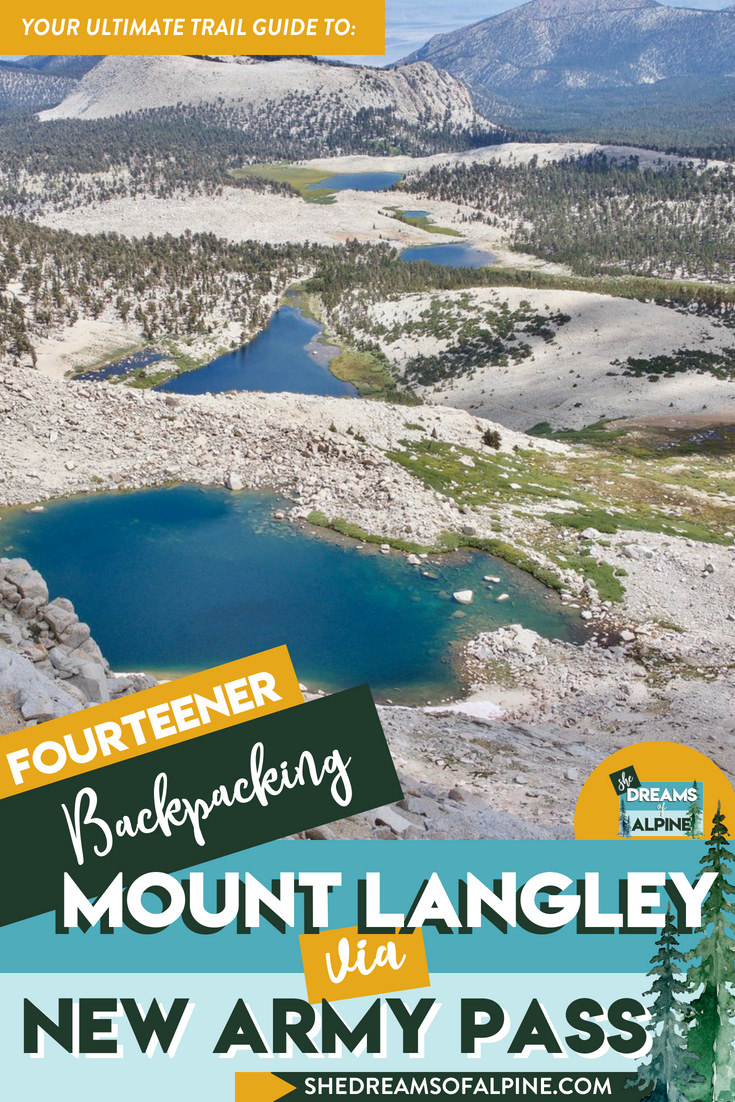
Easiest Trail to Summit: Most people hike the Class 1 trail that starts up from the Cottonwood Lakes Trailhead and either goes up Old Army Pass (steeper but more direct) or New Army Pass (with switchbacks and more well-defined path).
Type of Trail: Out and Back
How long is the Mount Langley hike? ~26.5 miles round trip (Check out Section 5 ‘Mt. Langley Trail Map & GPX File’ for more details.)
Mount Langley Elevation Gain: ~5,940 feet total elevation gain
Mt. Langley Trailhead Name: Cottonwood Lakes Trailhead
Trailhead Elevation: 10,066 feet
How long does it take to hike Mount Langley? 2-3 days backpacking, or a full day hike if feeling ambitious
How difficult is the Mount Langley hike? Moderate to difficult (mostly because of the high altitude)
Do you need a permit to hike Mt. Langley? Yes, if staying overnight you must have a permit!
Crowd Factor: Not too bad! You’ll run into people while hiking or backpacking this trail, but it’s nowhere near as busy as the Mount Whitney hike.
Is there drinking water available along the Mt. Langley trail? There are reliable water sources at the different lakes. Make sure to fill up with water at Cottonwood Lakes or Long Lake before going up one of the passes (there’s no water above the pass). Oh, and ALWAYS filter your water!
Is Mount Langley dog-friendly? Dogs are only allowed on part of this trail (the National Forest portion). They are not allowed in the National Park portion. So if you plan to summit Mount Langley, leave your pup at home.
PRO TIP: Spend some time enjoying this area! It's one of the most beautiful trails in the Sierra. The hike in to the base of New and Old Army Pass is fairly easy, so make an effort to see all the different lakes in the area!
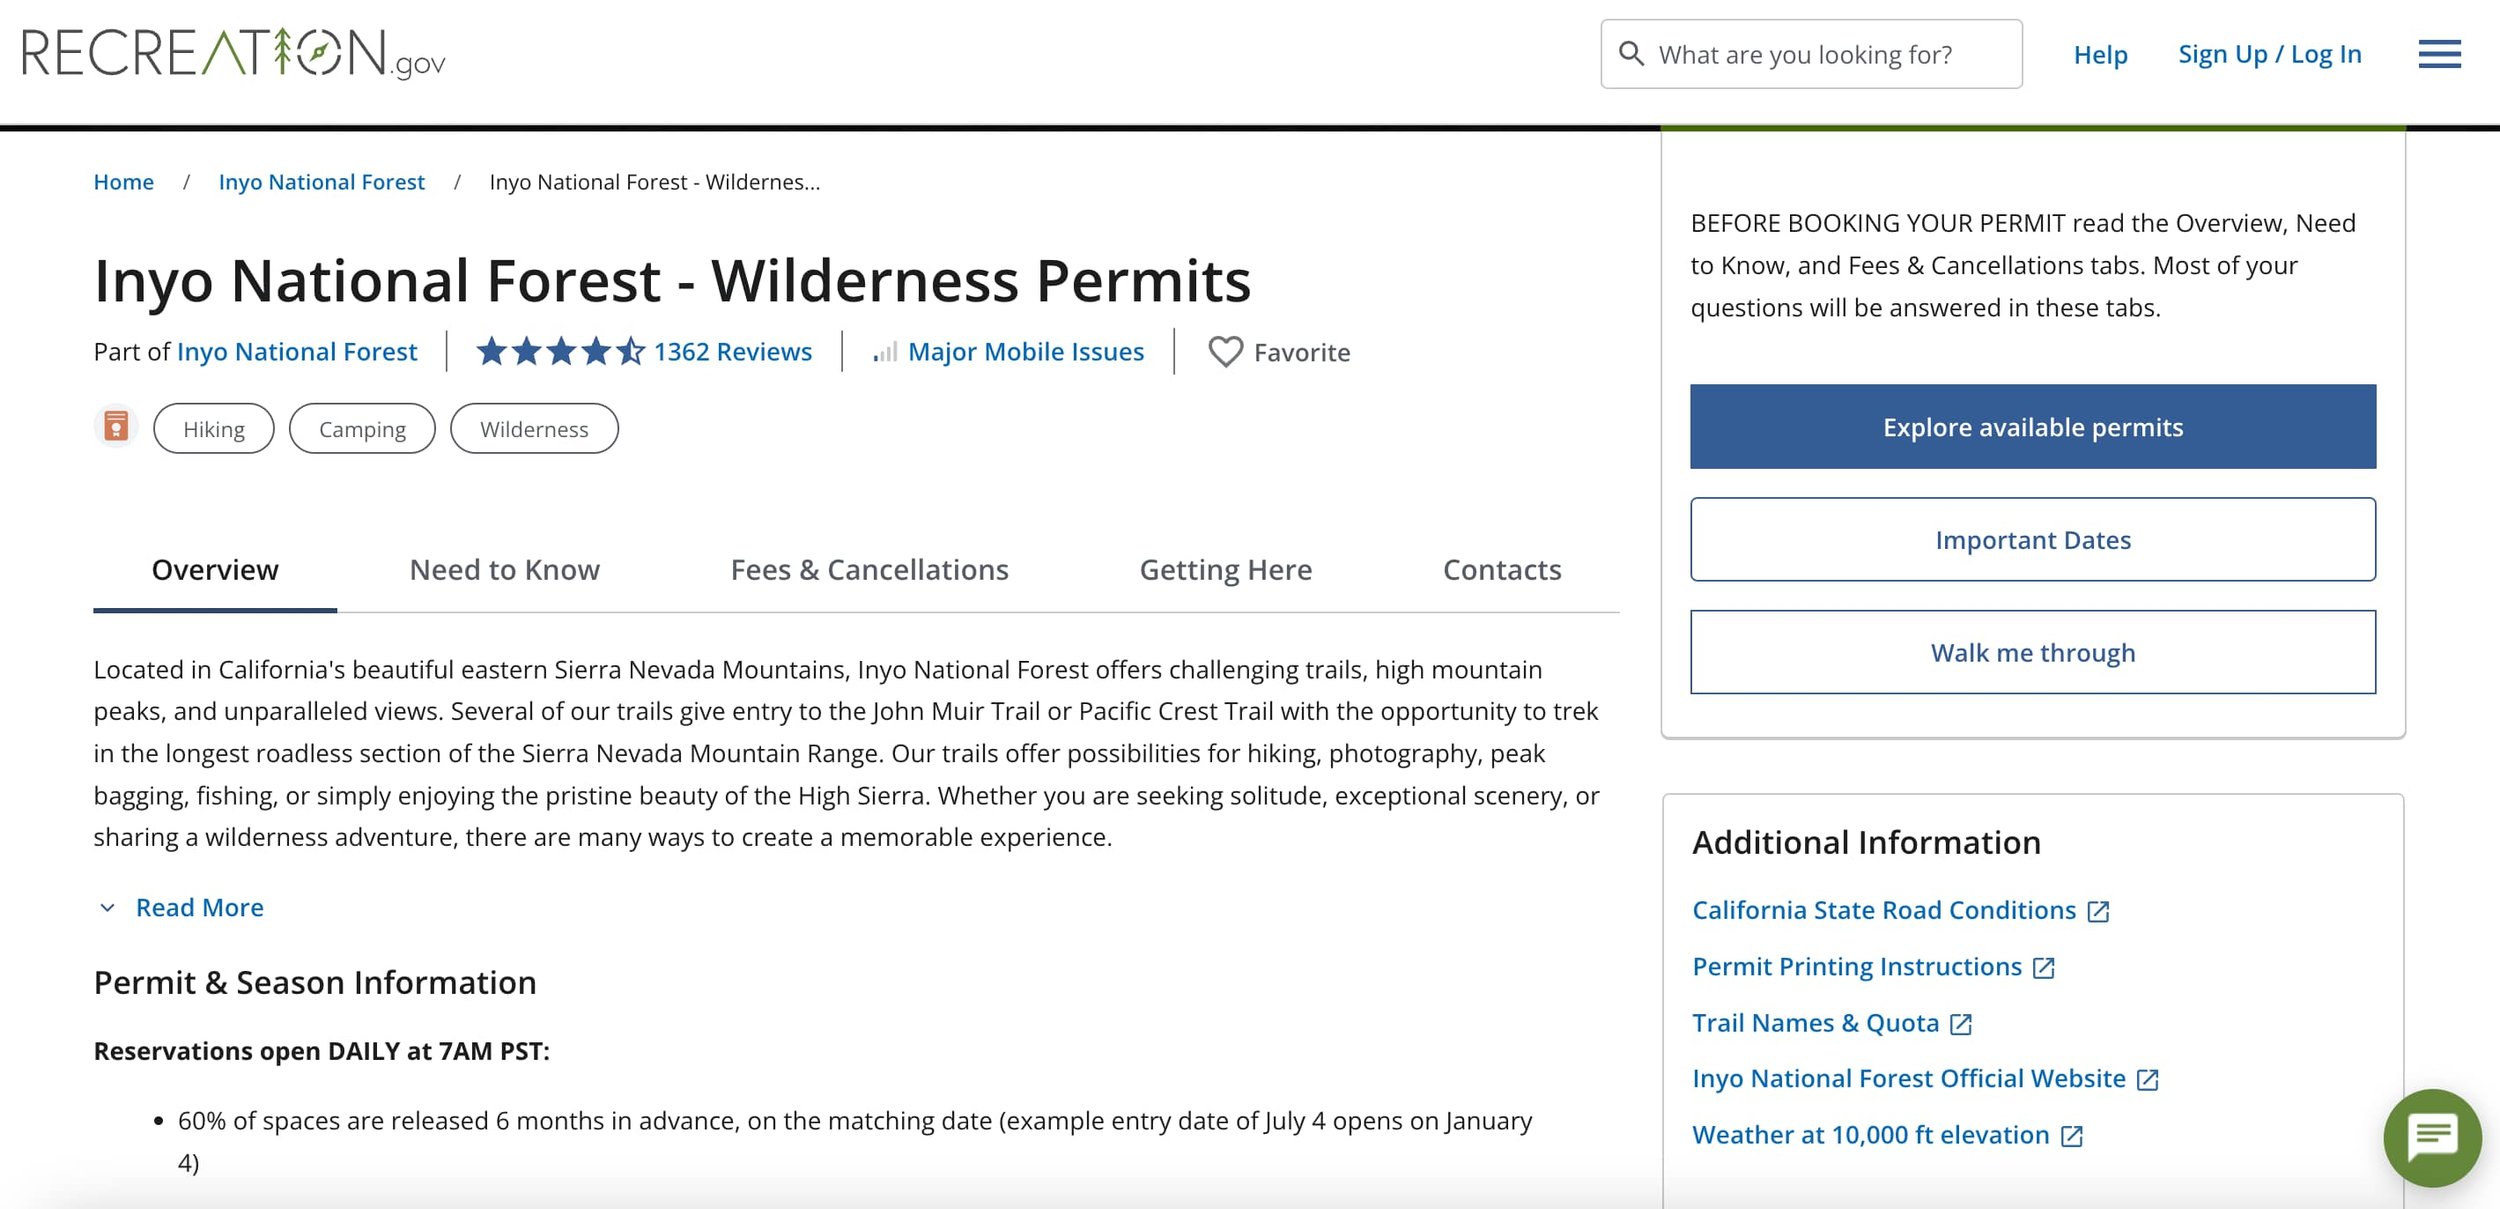
2. HOW TO GET A MOUNT LANGLEY PERMIT
If you plan to camp along the Cottonwood Lakes Trail for your Mount Langley hike, you will need an overnight Inyo National Forest Wilderness permit.
WHEN TO APPLY?
Most trails can be reserved up to 6 months in advance. So for reservations in the summer months (July through October), you will be looking to make reservations starting in January to April.
There is a 60 person (36 reservation and 24 walk-in) trail quota for the Cottonwood Lakes Trail from June to mid-September. More details can be found here.
WHERE TO APPLY?
A wilderness permit is required for overnight trips in the national forest. Online reservations can be made here. You’ll need to sign up for an account if you don’t already have one.
The “Trail Code” you’ll be applying for is Cottonwood Lakes - JM39
HOW TO APPLY?
1) Go to Recreation.gov and search for Inyo National Forest Wilderness permits.
2) Click “Explore Available Permits”
3) You will be taken to a huge list of trailheads, availability, and quotas. To narrow your search, enter info to filter. Input “Overnight”, put your start date, group size, and filter further by typing in “Cottonwood” or “JM39” into the filter search box. (Also, mark if this is a guided trip or not.)
Then you’ll be shown a list of available permits. If there are permits available, they will show up as numbers, otherwise they show “W” meaning “walk-in” only. You can scroll through a list of dates to see alternative availability if your original start date isn’t available.
4) If you find a date you want that is available, click on the date, and then “Book Now.”
5) At this point, you’ll be taken to a page where you fill in all your info.
6) And then, finally, you’ll check out and pay for your Mt. Langley permit!
HOW MUCH DOES A MT. LANGLEY PERMIT COST?
For reservations, you’ll pay a $6 non-refundable reservation fee plus an additional $5 per person recreation fee.
>> Read more about popular California hiking & camping permits here.
3. DAY HIKING MT. LANGLEY VS BACKPACKING MT. LANGLEY
While I know it can be tempting to day hike Mount Langley, especially to avoid dealing with permits, I still highly recommend backpacking this trail instead.
DAY HIKING MT. LANGLEY
Attempting Mount Langley as a day hike should only be considered by those who are in really great physical condition and are familiar with how their bodies adapt to altitude. Remember this is a 14,000-foot peak, so altitude sickness is a BIG risk, especially if you’re coming from sea level.
This hike is also nearly 26 miles long with over 5,900 feet of elevation gain... meaning... it’s an absolutely epic hike if attempted in a day.

BACKPACKING MT. LANGLEY
I think backpacking Mount Langley makes the whole trip so much more doable – even if you only split it up into 2 days. Backpacking Mt. Langley will also give you time to acclimate to the altitude, which is really important for a successful summit.
While you will have to bring a heavier pack and backpacking gear for the beginning of the trail, once you set up camp, you can leave most of your gear behind, and make a summit push with just a light daypack.
>> See the Itinerary section below (section 8) for more details on backpacking itineraries for Mt. Langley.
Even if you aren't interested in summiting Mount Langley, just hiking to the Cottonwood Lakes is a worthwhile trip all on its own. Getting to the lakes is an easy 6-mile, relatively flat hike, and you can easily spend several days there exploring the lakes and nearby peaks. There are also excellent fishing and camping opportunities!
The Cottonwood Lakes Basin is probably one of my favorite areas in the Sierra Nevada, and I find myself coming back to this trail time and time again. I've camped both at the base of Old Army Pass and New Army Pass, and to be honest, you can't go wrong with either one.
If you only have one weekend to explore this area, I suggest hiking into the base of Old Army Pass and exploring the Cottonwood Lakes, and then take a connecting trail over to the base of New Army Pass and camp your first night at Long Lake.
4. BEST TIME TO HIKE MOUNT LANGLEY – MOUNT LANGLEY WEATHER
September is my favorite time of the year to backpack or hike peaks in the Sierra Nevada area. The weather is perfect and there are less mosquitos (which can be really bad when it is warm). But nowadays, you do have to be aware that September is wildfire season, and that can definitely impact your hike (Michale & I got kicked off the JMT one year because of wildfires).
You could also plan to go in July or August, but expect the weather to be a bit warmer (with a chance of relentless mosquitos). June and October are hit or miss on the Cottonwood Lakes Trail. If it was a big snow year in California, there may be too much snow on the trail in June, and in October, the mountains can start to get their first snowfalls of the season.
Check out the Mount Langley weather average temperature map below for reference:

Be prepared before you go. Just like I teach my students in my backpacking program. It’s important that you research your weather conditions before you go, weeks, and days before your trip. You can check the weather conditions here:
Mountain Forecast – One of my favorite sources for mountain weather forecasts when checking a few days before a trip
Snow on Mt. Langley: I had to turn around on my first Mt. Langley attempt due to snow on the summit in October (and not having the right gear for those conditions with me). If there is a chance of light snow, opt to take New Army Pass over Old Army (it gets more sun). Definitely call the ranger station before heading out on your trip to get weather and snow updates.
5. MT. LANGLEY TRAIL MAP & GPX FILES
The easiest trail to the summit is the Class 1 route that starts at the Cottonwood Lakes trailhead.
You can choose to either hike up New Army Pass or Old Army Pass. Either route is fine, but here is some more information if you are having trouble making up your mind:
New Army Pass - This route will add a bit more mileage onto your overall trip because it is less direct than Old Army Pass. However, as the name suggests, this route is more maintained and follows a series of easy switchbacks to the top of the pass. If hiking earlier or later in the season, this pass is also least likely to have snow on it since it sits more directly in the sunlight. If you are concerned about snow, choose New Army.
Old Army Pass - This route is more direct, and thus the quicker route to the Mount Langley summit. However, it is also steeper, less maintained, and less traveled than New Army Pass. When it is early or late season, this area also tends to hold more snow.
The Cottonwood Lakes Trail is pretty well-maintained and easy to follow. Once you get to the top of either New Army or Old Army Pass, the trail will become a bit less distinct, but still easy to spot. Just make sure you are hiking towards the Mount Langley summit and not hiking out into the backcountry of the Sierra Nevada.
I always recommend downloading a GPX file onto a GPS device, that way you can check in from time to time to be sure you’re on the right trail.

Really, I can only remember one portion of the trail (closer to the summit) feeling a bit confusing, but we quickly found the first giant cairn (shown in photo above) that marks a steady path toward the summit of Mount Langley.
Below is the Mt. Langley trail map showing the route we took to hike to the top of Mount Langley via the Cottonwood Lakes Trail:
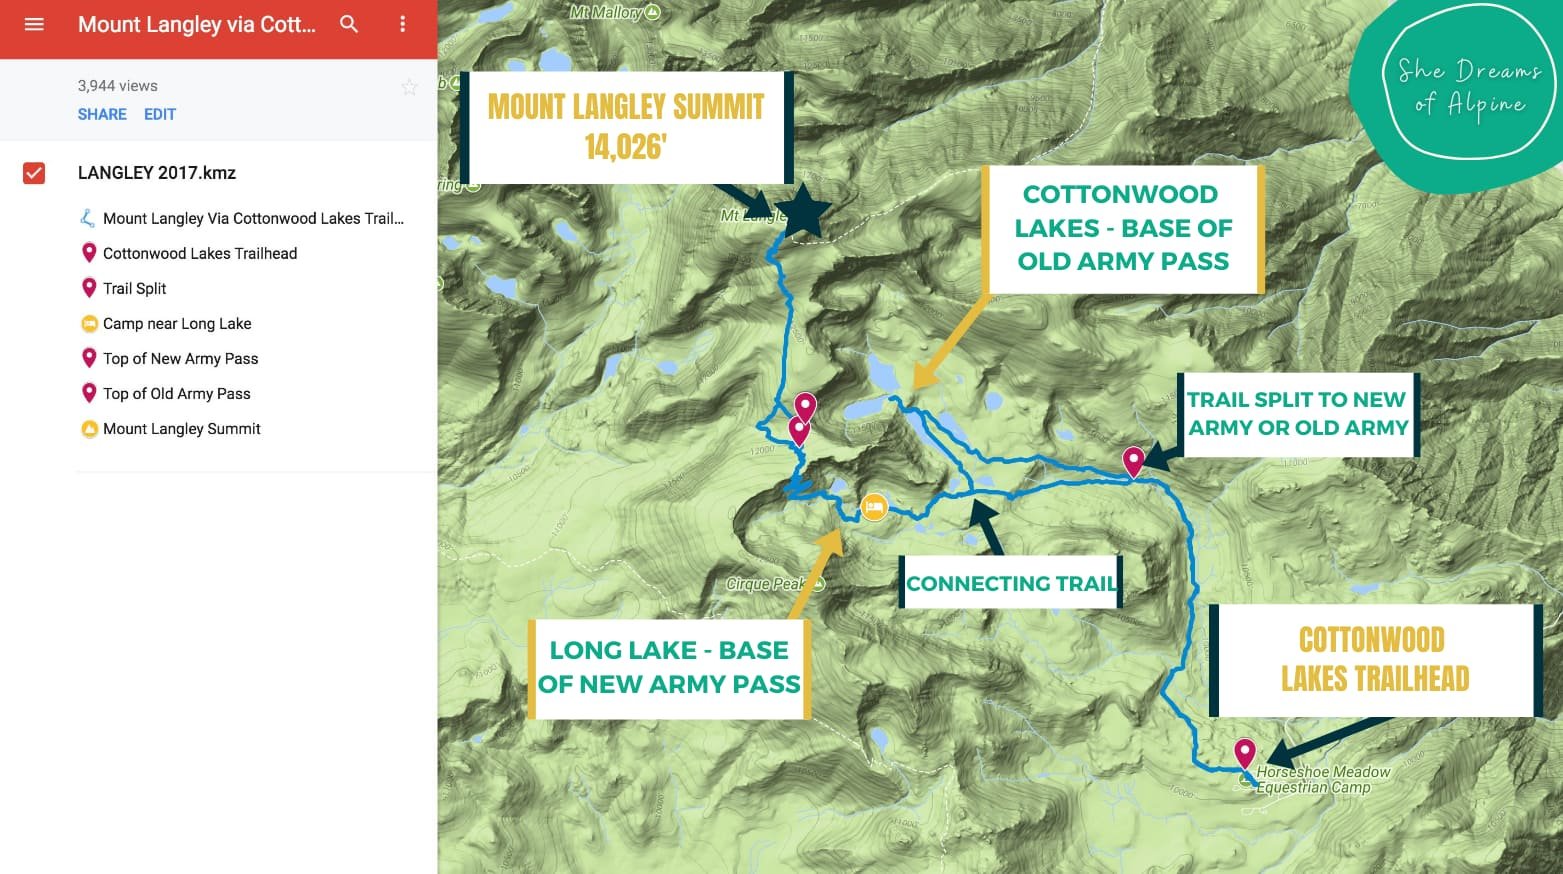
Since we did our Mount Langley hike over two days, we decided to explore Cottonwood Lakes on our first day and then connect over to Long Lake where we eventually made our camp. The hike in is easy on the first day, so if you have some time to kill, I definitely recommend exploring the area.
On our second day, we took New Army Pass up to the summit of Mount Langley and then hiked it back down (since all of our camping stuff was still at Long Lake).
DOWNLOAD THE MOUNT LANGLEY GPX FILE FOR THIS TRAIL!
Get access below to the Mt Langley hike GPX file PLUS my library of GPX files with tracks and waypoints for all the trails loaded onto the She Dreams of Alpine blog.
Load this puppy into your trusted GPS and rest easy knowing you have tracks to follow on your next hike or backpacking trip.
DON’T HAVE A GPS? YOU SHOULD.
I believe every hiker and backpacker should strive to be self-sufficient, and that includes knowing how to practice smart navigational skills in the outdoors.
This is an important safety skill set that I teach in-depth inside of my backpacking program. There’s no reason to risk getting lost in the outdoors.
Here’s what I recommend to get started:
(Note: This list contains affiliate links)
Gaia is offering a special 10% discount on a premium account to those who subscribe online through my link.
Don’t know where to start? If you need help with some Gaia GPS basics, download my quick Gaia GPS navigation 101 guide.
2) Get an SOS Device: Once you are able to, I recommend investing in some sort of SOS communication device like the Garmin inReach Mini or the Garmin inReach Explorer+ . These devices provide not only GPS tracking capabilities, but also an SOS satellite search and rescue communicator and text communication abilities in the backcountry.
My Go-To Trail Setup: The Gaia GPS app (premium subscription) + the Garmin inReach Mini.
Alternative to Garmin: Pair your Gaia GPS App with the Zoleo SOS device . With this set up, the Gaia GPS App serves as your GPS navigation device, and the Zoleo serves as an SOS/communication device.
Learn more about the best GPS devices for hiking here.
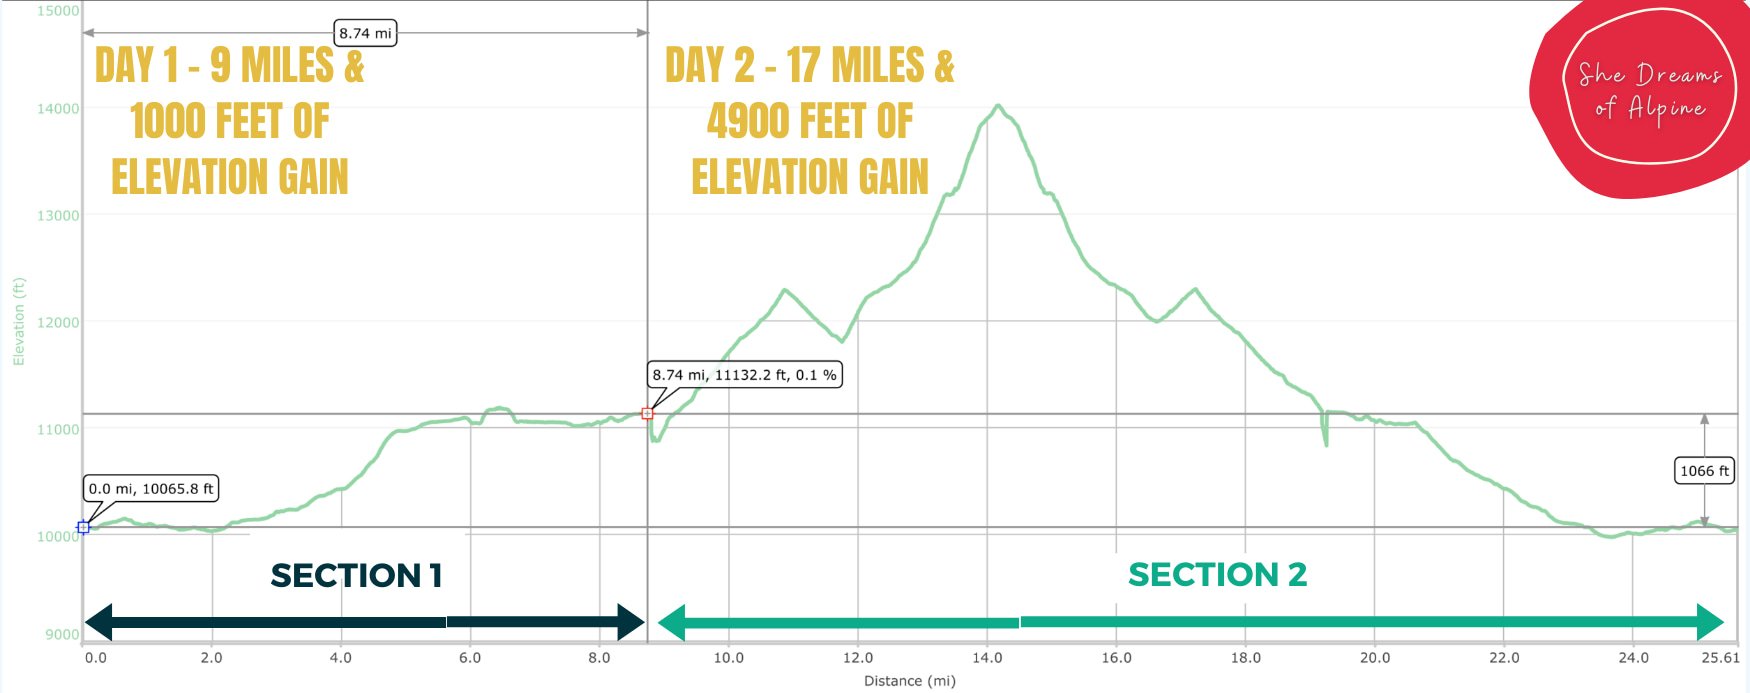
MOUNT LANGLEY HIKE ELEVATION PROFILE
Below you can see the elevation profiles for each day of our trip:
>> JUMP TO SECTION 8 FOR A SUGGESTED MT. LANGLEY TRAIL ITINERARY.
6. HOW TO GET TO THE MOUNT LANGLEY TRAILHEAD
Getting to the Cottonwood Lakes Trailhead is fairly straight forward. We simply typed in “Cottonwood Lakes Walk In Campground” into Google Maps and it got us to the trailhead without a hitch.
If you want more specific directions, here ya go! From Highway 395 in Lone Pine, CA, turn west onto Whitney Portal Road. At about the 3 mile mark, turn left onto Horseshoe Meadow Road. Continue on Horseshoe Meadow Road for about 20 miles, and then turn right at the sign towards Cottonwood Lakes.

Park anywhere near the trailhead. The whole drive up takes about a half hour to 45 minutes from Lone Pine to Cottonwood Lakes Trailhead. The road is steep and sometimes windy, but it is a well-maintained road.
7. MOUNT LANGLEY CAMPING
There are many options for backcountry wilderness free camping along the Cottonwood Lakes Trail during your Mount Langley hike.
CAMPING ALONG THE COTTONWOOD LAKES TRAIL
1) Wilderness Camping at the Cottonwood Lakes - These are the first 5 lakes you will come across on the Cottonwood Lakes Trail. The best camping options are around the eastern portions of Cottonwood Lake Four and Five.
There aren't really any good camping options near Cottonwood Lakes One and Two. Choose to camp here if you are hoping to access Mount Langley from Old Army Pass. The above photo shows a camp set up at Cottonwood Lake Number Four.
2) Wilderness Camping at Long Lake - This is where most backpackers will camp if they are planning to summit Mount Langley via the New Army Pass. There are a ton of great options for dispersed camping here.
3) Wilderness Camping at High Lake - Some may choose to camp here, but there aren't as many good spots and it is a bit higher elevation (which makes it colder at night). I don't think it's necessary, and it doesn't save you much more time. Long Lake is the better camping area in my opinion.

CAMPING NEAR THE TRAILHEAD (PRE-HIKE)
Camping the Night Before Your Hike - If you want to spend the night at the trailhead before your hike you can camp at the Cottonwood Lakes Trailhead Campground in the Horseshoe Meadow Recreation Area.
This campground is walk-in only and has about 13 sites for $10 a night (with a one night limit). It is a self-register system and sites include bear boxes, tent pads, fire pits, and toilet facilities. There is typically water on site, but sometimes it isn’t working, so you should be prepared to bring your own.
8. ITINERARY FOR HIKING MOUNT LANGLEY
If you’re backpacking Mount Langley, I suggest you tackle it in either 2 or 3 days depending on how much time you have.
EXAMPLE MT. LANGLEY VIA NEW ARMY PASS ITINERARY
This is a possible two-day itinerary featuring a visit to Cottonwood Lakes, and ultimately planning a summit via New Army Pass.
Day 1 - Easy Hike into "Base Camp" + Explore Cottonwood Lakes
Start at Cottonwood Lakes Trailhead
Take a right at the fork in the trail toward Old Army Pass and the Cottonwood Lakes
Have lunch at Cottonwood Lake Number Four and admire Old Army Pass (or stay here and make camp if you plan to hike up Old Army Pass to the Mt. Langley Summit)
Hike connecting trail along Cottonwood Lake Number Three toward Long Lake
Set up a base camp at Long Lake
Sleep here for night 1
Day 1 Totals: about 9 miles and 1,000 ft of elevation gain
If you’d like to take Old Army Pass instead, then skip the part about hiking to Long Lake and make base camp at the Cottonwood Lakes Four or Five.
Day 2 - Summit Mount Langley Via New Army Pass and Hike Out
Wake up early, leave backpacking gear at basecamp, and hike with a lighter backpack up New Army Pass
Summit Mount Langley
Hike back down New Army Pass
Pack up your camp at Long Lake
Hike back out to trailhead & drive home
Day 2 Totals: about 17 miles and 4,900 ft of elevation gain
Alternatively, you could extend this to 3 days by camping a second night at Long Lake after your Mt. Langley summit, and then making an easy hike out on day 3.
EXAMPLE MT. LANGLEY VIA COTTONWOOD PASS ITINERARY
Another option for a longer backpacking trip is to hike in via Cottonwood Pass and summit Mt. Langley from the backside. I did this last year, and here is a 5-day itinerary for that trip:
Day 1 - Cottonwood Pass to Chicken Spring Lake
Acclimation day of 4.5 miles with 1,472 ft elevation gain
Day 2 - Chicken Spring Lake to Soldier Lake
5.75 miles and 796 ft of gain to set up base camp for summit day
Day 3 - Summit Mount Langley
This is the big summit day with 7.25 miles with 3,367 ft of elevation gain, but you can just carry a lighter day pack
Day 4 - Soldier Lake to Chicken Spring Lake
Starting the hike out for 5.75 miles with 1,213 ft of gain
Day 5 - Chicken Spring Lake back to the Trailhead
Finish up your trip on an easy day of 4.5 miles with just 137 ft of gain
9. IMPORTANT MT. LANGLEY SAFETY TIPS
While the Mount Langley trail is one of the easier California 14ers, that does not mean it’s “easy.” There are a lot of factors that can make this trail dangerous, so you need to be aware and be prepared.
When planning your Mt. Langley hiking trip, pay particular attention to the following hazards and plan ahead accordingly.
ALTITUDE SICKNESS
One key thing to take into consideration when hiking Mt. Langley is the altitude. If you’re not used to hiking at altitude, it is super important to prepare for how it will affect you and learn how to properly acclimate before attempting the Mt. Langley hike.
Altitude sickness is extremely serious, and you should be prepared to turn around and descend if you or anyone in your hiking party starts showing symptoms of Acute Mountain Sickness (AMS). The main symptoms include persistent headache, difficulty sleeping, dizziness, fatigue, loss of appetite, and nausea or vomiting.
If you notice these symptoms, you should descend immediately (no matter how close you are to the summit), because continuing up will only make things worse. AMS can also affect your own thinking, so it’s important to look out for each member of your group and notice symptoms or other unusual behavior.
Backpacking the Mount Langley trail will certainly help give you more time to acclimate to the altitude of the summit.
SNOW ON MOUNT LANGLEY
Hiking Mount Langley when there is snow on the trail can be dangerous if you’re not properly prepared or know how to handle this kind of technical terrain. This is why I recommend you try to do this hike in July, August, or September.
TECHNICAL TERRAIN & NAVIGATION
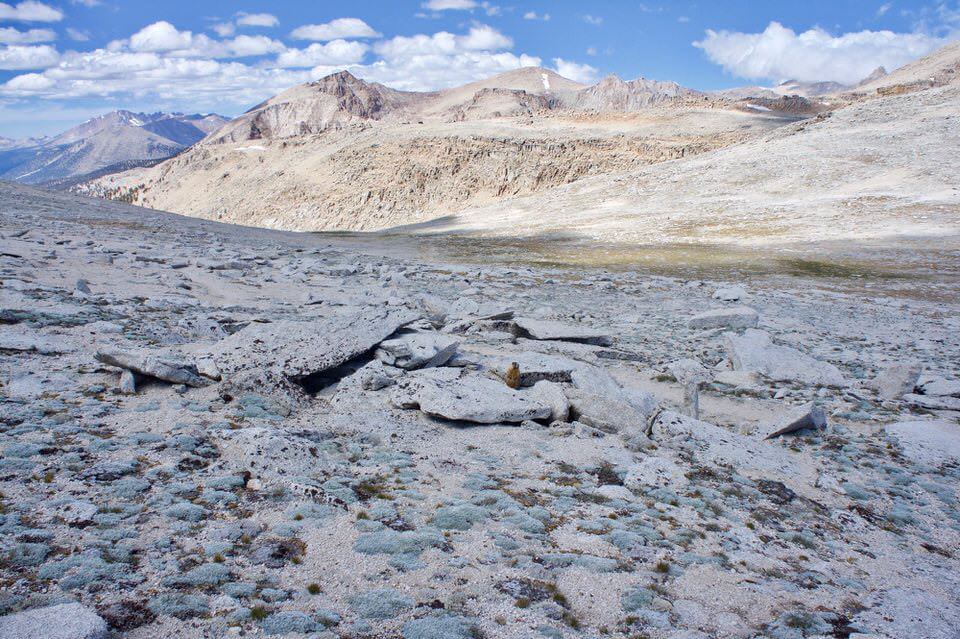
For the most part, Mt. Langley is not technical. However, there is one section I can recall where finding the right route is critical or else you could find yourself in tricky terrain. This spot is up near the summit.
When you get closer to the Langley summit, pay close attention and follow the giant cairn so that you don’t get lost. I also highly recommend downloading our GPX file above so you can make sure you’re on the right path.
If you feel at all nervous or unsure of yourself in this terrain, there’s never any shame in turning around. It’s always better to play it safe in the mountains.
Pro Tip: I also recommend marking a “waypoint” at the top of New Army or Old Army Pass (whichever way you come up) on your GPS so that it’s easy to find on your way back down. The terrain is all rocky when you get to the top of the pass, and it can be tricky to find the entrance back down the pass.
THUNDERSTORMS
It’s super important to be aware of the weather when hiking Mt. Langley. On any 14er, you really want to be off the summit and heading down by the afternoon because of the risks of being caught in a thunderstorm above treeline.
Although the thunderstorms on Mt. Langley are not as bad as the ones you’ll find on Colorado 14ers, summitting before noon is still a good rule of thumb to follow.
BEARS & OTHER WILDLIFE
Another thing to remember is that Mount Langley is in bear country. If you’re choosing to backpack Mt. Langley, you should know that you are required to use a bear canister to hold your food and anything else with a smell that might attract a bear.
While a bear canister is not required for day hikers, you must keep your pack with you at all times and make sure not to leave food out unattended. Also, definitely don’t leave food in your car at the trailhead – use a bear locker for anything you don’t bring with you on the trail.
Rangers ask that you DON’T bring bear spray with you. The black bears are pretty skittish, and bear spray is likely not needed here in this part of the US. This is what is stated by park rangers when you pick up your permit.
>> Check out more backpacking safety tips here
10. MOUNT LANGLEY PACKING LIST
The gear you carry will depend on whether you’re hiking or backpacking the Mt Langley trail. We have some EXCELLENT resources on both day hiking and backpacking gear, so I highly recommend you check them out.
Full day hiking packing list here
Full 3 to 5 day backpacking checklist here

*Please note that some of the below links and others in this post are affiliate links.
There are also a few absolutely essential items to make sure you bring when you’re hiking Mt. Langley:
2) Water Bottle and CamelBak: Camelbaks are awesome for hiking! They are the easiest way to stay hydrated, and I typically always bring one with me. Also consider bringing a Nalgene or water bottle for backup. That way, if a leak develops in your CamelBak, you can at least transfer water to the Nalgene and still be OK.
3) Water Filter: A water filter is an absolute MUST bring on your backpacking trip of Mt. Langley. Do not drink the water in the outdoors without filtering it first. My favorite filter is the Katadyn Hiker Pro Microfilter , but the Sawyer Squeeze is also another great affordable option.
4) Headlamp: You should always bring a headlamp + extra batteries on every day hike or backpacking trip, and my go-to is Petzl Actik Core .
5) GPS App or Device: It’s always smart to at least use the Gaia GPS App for peace of mind, even if you don’t have a dedicated handheld GPS device.
6) Rain Jacket or Poncho: Thunderstorms are common in the mountains, so you should be prepared with a rain layer, whether that be a rain jacket like the Patagonia Torrentshell or an emergency rain poncho .
7) Down Jacket: Another high-altitude essential. Be prepared and bring at least a nice lightweight down jacket with you like the Patagonia Down Sweater or the Patagonia Nano Puff .
8) Snacks: Bring plenty of snacks (a mix of salty and sweet gives you options when you’re not sure what you’ll be craving) to fuel your adventure! You’ll want to be constantly snacking on your hike to maintain energy. Altitude can make you feel “not hungry” so be sure to eat even if you aren’t feeling hunger. I like to pack Clif Bars, Complete Cookies, and Kate's Real Food Bars for quick snacks. Electrolytes are also great to bring along. I like Nuun tablets .
9) Socks: Bring at LEAST 2 pairs of socks. Dry feet are the key to preventing blisters. You’ll want to swap out your socks every so often during your hike – don’t wait till you get hot spots. Anytime you stop to rest, just swap those puppies for a fresh pair and let the other ones dry on the back of your pack. I recommend Darn Tough wool socks .
10) Bear Canister: These are required when backpacking in the Sierra Nevada’s. I recommend one that’s roughly 430 or so cubic inches, which I find fits 3-5 days of food perfectly for me. The BearVault BV450 Bear Resistant Food Canister is a great choice.
Also, don’t forget your permit! And maybe bring some microspikes if you’re hiking this trail in early or late season where you might encounter snow or ice on the trail.
GRAB MY [FREE] COMPLETE BACKPACKING PACKING CHECKLIST!
Want a full list of everything I recommend to take backpacking with you? Download our free backpacking packing checklist below! This PDF also includes my layering tip-sheet PLUS 25+ backpacking food ideas.

11. MT. LANGLEY VIA NEW ARMY PASS TRIP REPORT
If you’re itching for more Mount Langley details, then feel free to read my trip report here. Otherwise, skip to the end for more California hiking and backpacking resources!
Day 1: Easy Hike into Long Lake via the Cottonwood Lakes Trailhead
On this particular outing on the Cottonwood Lakes Trail, my best friend, Cara flew into California from Colorado to attempt Mount Langley with me. We drove up to Lone Pine the day of our entry and picked up our permits at the Eastern Sierra Interagency Visitor Center at around 9 am, and then drove to the Cottonwood Lakes Trailhead (which took about 40 minutes from Lone Pine, CA).
Since I have done the hike before, I knew the first day would be pretty easy, so we decided to add on some extra miles just for the fun of it and planned to visit the Cottonwood Lakes before ultimately heading to Long Lake for the night.
Pack weights were around 25 lbs each.


When we got to the fork on the main trail we took the right trail which takes you toward Cottonwood Lakes and Old Army Pass. The Cottonwood Lakes Trail is fairly flat up to the base of both New Army Pass and Old Army Pass with minimal elevation gain. It makes for a nice way to get acclimated.
The longer hike gave us plenty of time to catch up and make fun of each other.

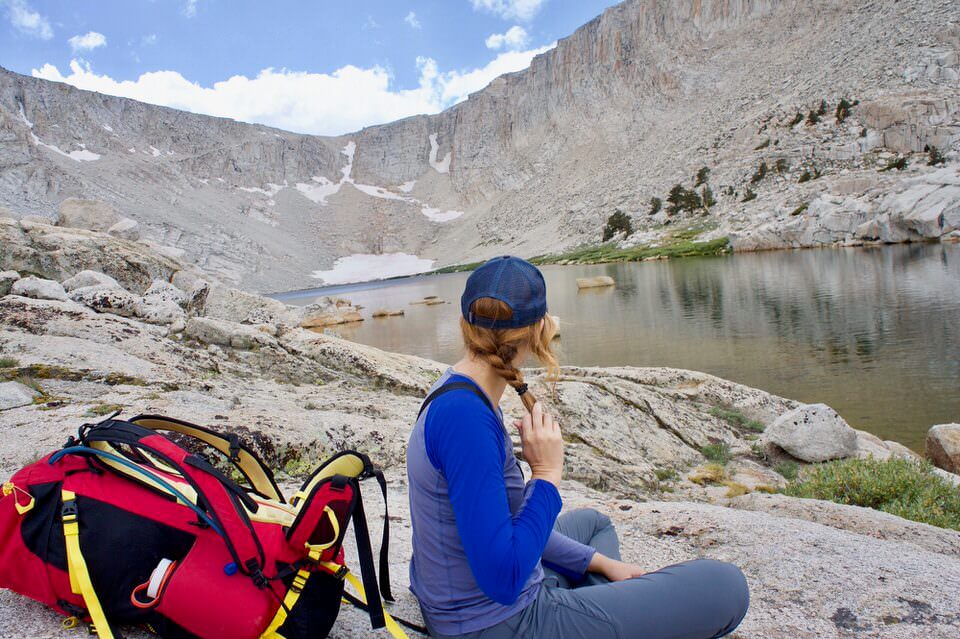
Besides the fact that we had plenty of time on the hike in, the main reason I wanted to hike up to Cottonwood Lakes at the base of Old Army Pass is that I remember from 2015 that it was such a beautiful area. It is just gorgeous lake after gorgeous lake. We saw a couple of fishermen out there too
The photo below shows the base of Old Army Pass (in the distance), this is where we decided to take a lunch break and enjoy the views, and we had the whole place to ourselves. In front of me in this photo is Cottonwood Lake Number 4.
Then if you look at the map (details in the Cottonwood Lakes Trail map section above), you can see that there is a trail that connects Cottonwood Lakes over to the trail that takes you to Long Lake (where we intended to camp that night).
The connector trail is very easy to follow and just skirts the edge of Cottonwood Lake Number 3.

Once you are past Cottonwood Lakes Number 3, you have to pass through a bit of marshy area. There wasn't a super defined path across the watery grasses, but you can see the trail on the other side that you want to connect with. So we just tried to follow the path that kept our feet the driest.
The trail to Long Lake then turns into this really insane, alien-planet looking boulder field. The picture below doesn't really do it justice. It was really cool to walk through.

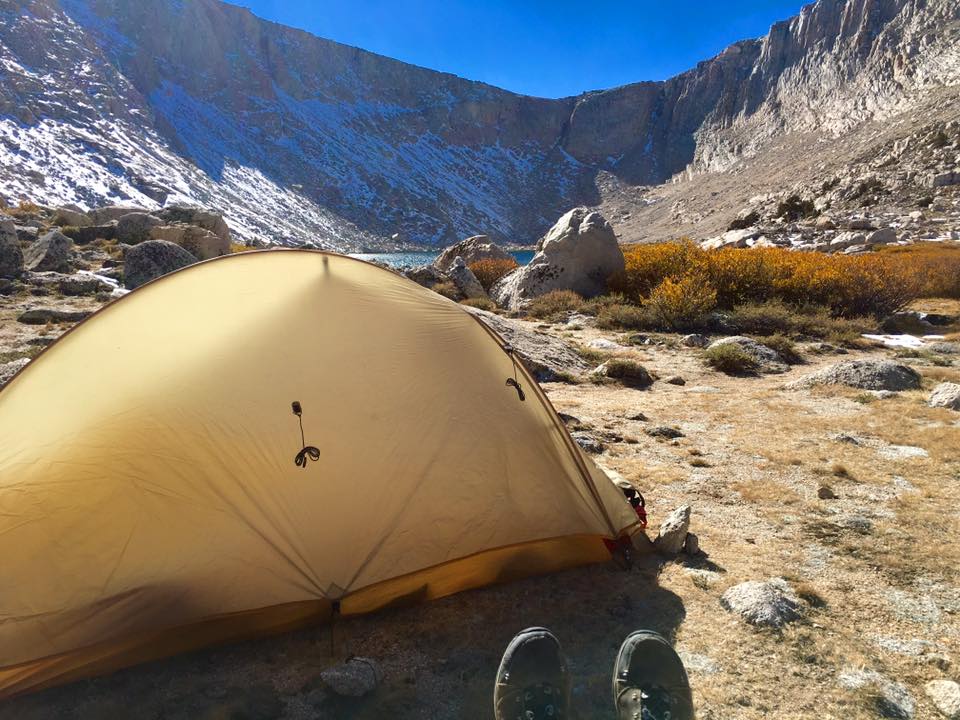
We reached camp at Long Lake a little before nightfall, set up our tent, pumped water for the next day and then made dinner.
It got very cold at night even though we were there in early September.
Day 2: Long Lake - up New Army Pass - Mount Langley Summit - back out to Cottonwood Lakes Trailhead
We woke up around 6 am the next day and left most of our stuff at camp and only took a few things up to the summit with us in our packs.
Once you start heading up New Army Pass, there isn't easy access to water sources, so make sure you have plenty of water to summit and make it back to at least High Lake.

I honestly think the switchbacks look like they will take longer than they actually do. It felt like we were up at the top of the pass in no time. And at the top, you are rewarded with great views of all the lakes you hiked around the previous day!
It's freaking beautiful! Lakes on lakes on lakes.

Make sure to pay close attention at the top of the pass to the cairns and entry to the pass. It's easy to get lost at the top because all of the rock looks the same. I marked the "top of the pass" on my GPS just in case we got lost amongst all the granite rocks and boulders.
At the top, you'll find a path that starts to take you down, but be careful not to follow it for too long or you'll find yourself hiking away from Mount Langley and deeper into the backcountry!
You'll see in my map above how Cara and I made this mistake and ended up backtracking. It's better to stick closer to the edge. You can pass by the Old Army Pass on your way hiking to Mount Langley and check out the views from the top of Old Army Pass.
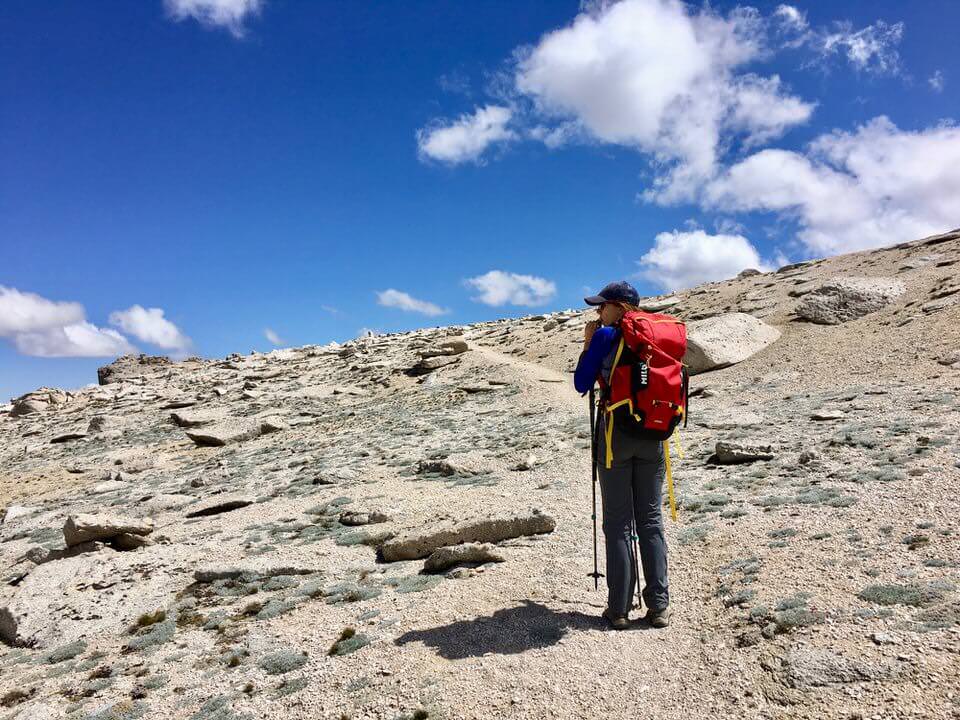
There is really only one tricky spot to the whole hike. As you make your way across, up and down, toward Mount Langley at the top of the pass, you will eventually reach some vertical rock and you'll think.. "Shoot.. now what?"
Well Cara and I opted to go right of the vertical rock, and found ourselves doing a bit of exposed scrambling. What we should have done is gone to the left. If you head left, you'll see a huge cairn which directs you the way to go.
If you are getting overly sketched out, you've gone the wrong way. The exposed and tricky move should only last a few minutes before you find the trail and cairns again. From that point on you will continue to follow these huge cairns to the summit (see one of the cairns below).

The trudge to the summit is quite steep. It took me a bit of time, especially as I was adapting to the altitude. Cara had mile-high lungs and seemed just fine.
Soon enough we reached the summit of Mount Langley! And just as has happened to me many times before, a huge cloud came and sat over us at the summit, so we weren't able to see many of the views from the top.
Still, it was awesome to finally be at the top of this bad boy, especially considering I failed first attempt due to snow.

Getting to the top is only half the battle though, and we knew we still had a long day ahead of us since we intended to hike all the way back to the Cottonwood Lakes Trailhead and drive home. So we began our hike back down the mountain.
The downhill was much faster (of course), and we made great speed back to camp. We took a longer break at camp to get more water and eat more food before heading back to the trailhead.
We made it back to the trailhead by around 5 pm, pounded some chips and salsa, grabbed some McDonald’s to go, and then drove 4 hours back home. That put us at a really long day - 17 miles hiking + 4 hours of driving!
To top it off, Cara hopped on a plane the next morning to fly back to Colorado.
I'm super stoked she was able to come, even though the weekend went by fast! We had a ton of fun, summited another 14er, and it was her very first hike in California!
I hope you get a chance to go on this trip, too. It's one of my favorites hikes in California! Going in October (like I did back in 2015), although colder and snowier, is also a really beautiful time to go on this trail. The fall colors are out and the snow and the lakes are just beautiful.
If you are looking for more California 14er inspiration, check out our other resources below!
Trail guides on popular California 14ers:
A Full List of All the California Fourteeners
Backpacking Mount Whitney Via the Onion Valley to Whitney Portal Route
Also, be sure to check out these essential hiking resources!
Essential Backpacking Hygiene Tips & Feminine Care in the Outdoors
10 Awesome Hiking Groups and Challenges to Encourage You on Your Hiking Adventures
Cheers,
Allison - She Dreams of Alpine


30 Spectacular Mammoth Hikes (in the Eastern Sierras) | With jaw-dropping mountain vistas, breathtaking alpine lakes, gorgeous waterfalls, and incredible views around every trail bend, the Sierra Nevada is such a special place to hike. You can experience the eastern Sierra magic on these 30 incredible Mammoth hikes, from short day hikes to epic backpacking trails. | shedreamsofalpine.com