The Ultimate 3-5 Day Backpacking Packing List for 2024 (PLUS Backpacking Checklist PDF)

Every single time I get ready for a backpacking trip I HAVE to look at my printed out backpacking packing list to make sure I didn’t leave anything behind! You’d think that after years of practice I’d be good at just packing from memory, but you’d be surprised how often my mind fails me (👋over-active mind here!).

Even though I’ve been backpacking for many years now, I never seem to fail to leave something out when I’m laying gear out to get ready. So now I just don’t risk forgetting something by using my backpacking checklist, and I recommend that you do the same.

Always get in the habit of reviewing your backpacking gear checklist before you head out on a trip! I personally like to do this at least a few days in advance, just in case I need to go to the store to grab some extra things (like batteries, snacks, wipes… you know…).

This post will give you two useful resources to help you pack for your next backpacking trip.

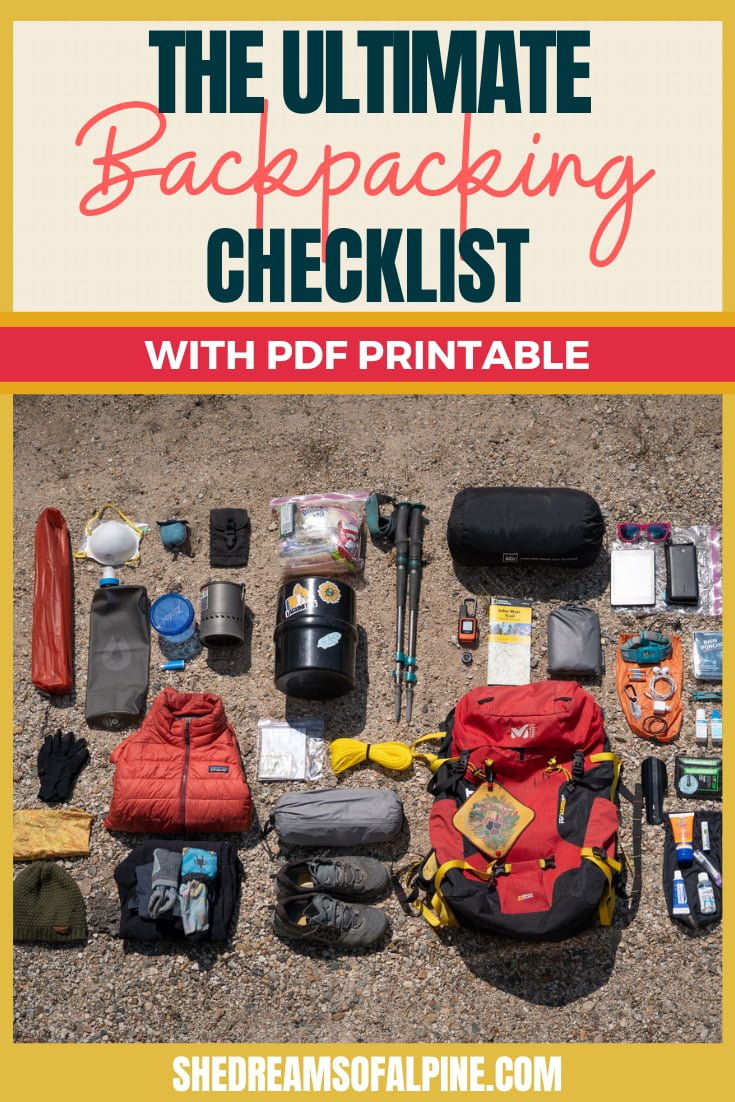
First, I’ve created a Backpacking Checklist PDF that you can download and print out for your reference. It includes everything I cover in this post but in a nice condensed checklist, and it’s the ultimate backpacking gear list…if I do say so myself! I used to have this gear list written on a back of some notebook paper, but thanks to this blog, I made it nice, pretty and organized. Because you’re worth it. 😉

Second, in this blog post, I will take each of my backpacking gear checklist items and give you my personal recommendations for the gear I love using myself. Basically, this post is a look at my backpacking gear closet… my backpacking must-haves, so to speak.

If you ever find yourself thinking, “What gear would Allison of She Dreams of Alpine bring backpacking?" (and I’m just going to pretend that you think that all the time), then this is the post for you, friend! It’s also totally OK if you are thinking, “I don’t know who this She Dreams of Alpine chick is, but I would like someone to give me overnight backpacking list gear recommendations!” I’ve got you covered, too.


DOWNLOAD THE BACKPACKING CHECKLIST PDF BELOW

Before you go through the post to get a glimpse at the gear I recommend for each category of backpacking items, you should download and print off my backpacking checklist for quick reference for your future backpacking trips.

Just keep it close to your gear, and then you’ll always have it handy to review when packing for a trip. My backpacking checklist is a full detailed list of what you should consider bringing with you on any backpacking trip (particularly trips in the 3-5 day range).

I also include a few extras for you - this download includes not only the backpacking packing list, but also a tip sheet on layering outdoors and 25+ backpacking food ideas!

backpacking-checklist-pdf

DON’T FORGET! Leave No Trace (LNT): I also want to make a quick reminder here to always Leave No Trace when backpacking. This is well-known knowledge to my backpacking enthusiast friends here, but many of you may be newer to backpacking and might not be aware of the best practices when backpacking outdoors.

The big thing to remember and practice with LNT is to always be sure that whatever you pack in with you also ALWAYS PACK OUT. If you bring toilet paper with you, you pack your dirty toilet paper out with you (yep, use a ziplock!).

There are also some other key rules about where to camp, and where to leave your human waste, so be sure to check out the LNT website for more details if you don’t know the 7 principles.

NEW TO BACKPACKING?

Also, if you ARE new to backpacking, and are feeling overwhelmed a bit by ALL THE THINGS, I highly recommend you check out my backpacking program.

Join me (and your peers) on a transformational adventure, where you will learn how to confidently go on your first ever (or perhaps your first solo) outdoor backpacking trip without the constant fear of getting lost, the debilitating worry of being unprepared, and the lurking feeling that you lack the "know-how" and skills required to stay safe on the trails. Click here to be the first to know when my one-of-a-kind backpacking program re-opens again for enrollment!,

Alright, let’s get on with the backpacking checklist, shall we?

My Complete Backpacking Packing List

Here’s my ultimate list of what to pack for backpacking. The list is broken down into the same categories as my backpacking checklist PDF. This gear list is most applicable for 3-day backpacking trips and up to 5-day backpacking trips (and obviously this list will work for 2-day trips as well).

This list isn’t fully optimized for really long thru-hiking trips though, since that takes a LOT more planning and coordinating, and your gear strategy will be a bit different. However, most of the gear items will still apply.

This backpacking gear list usually brings me in at around 25-30 lbs with the gear that I own.

Note: This list contains affiliate links.

The Backpacking Essentials

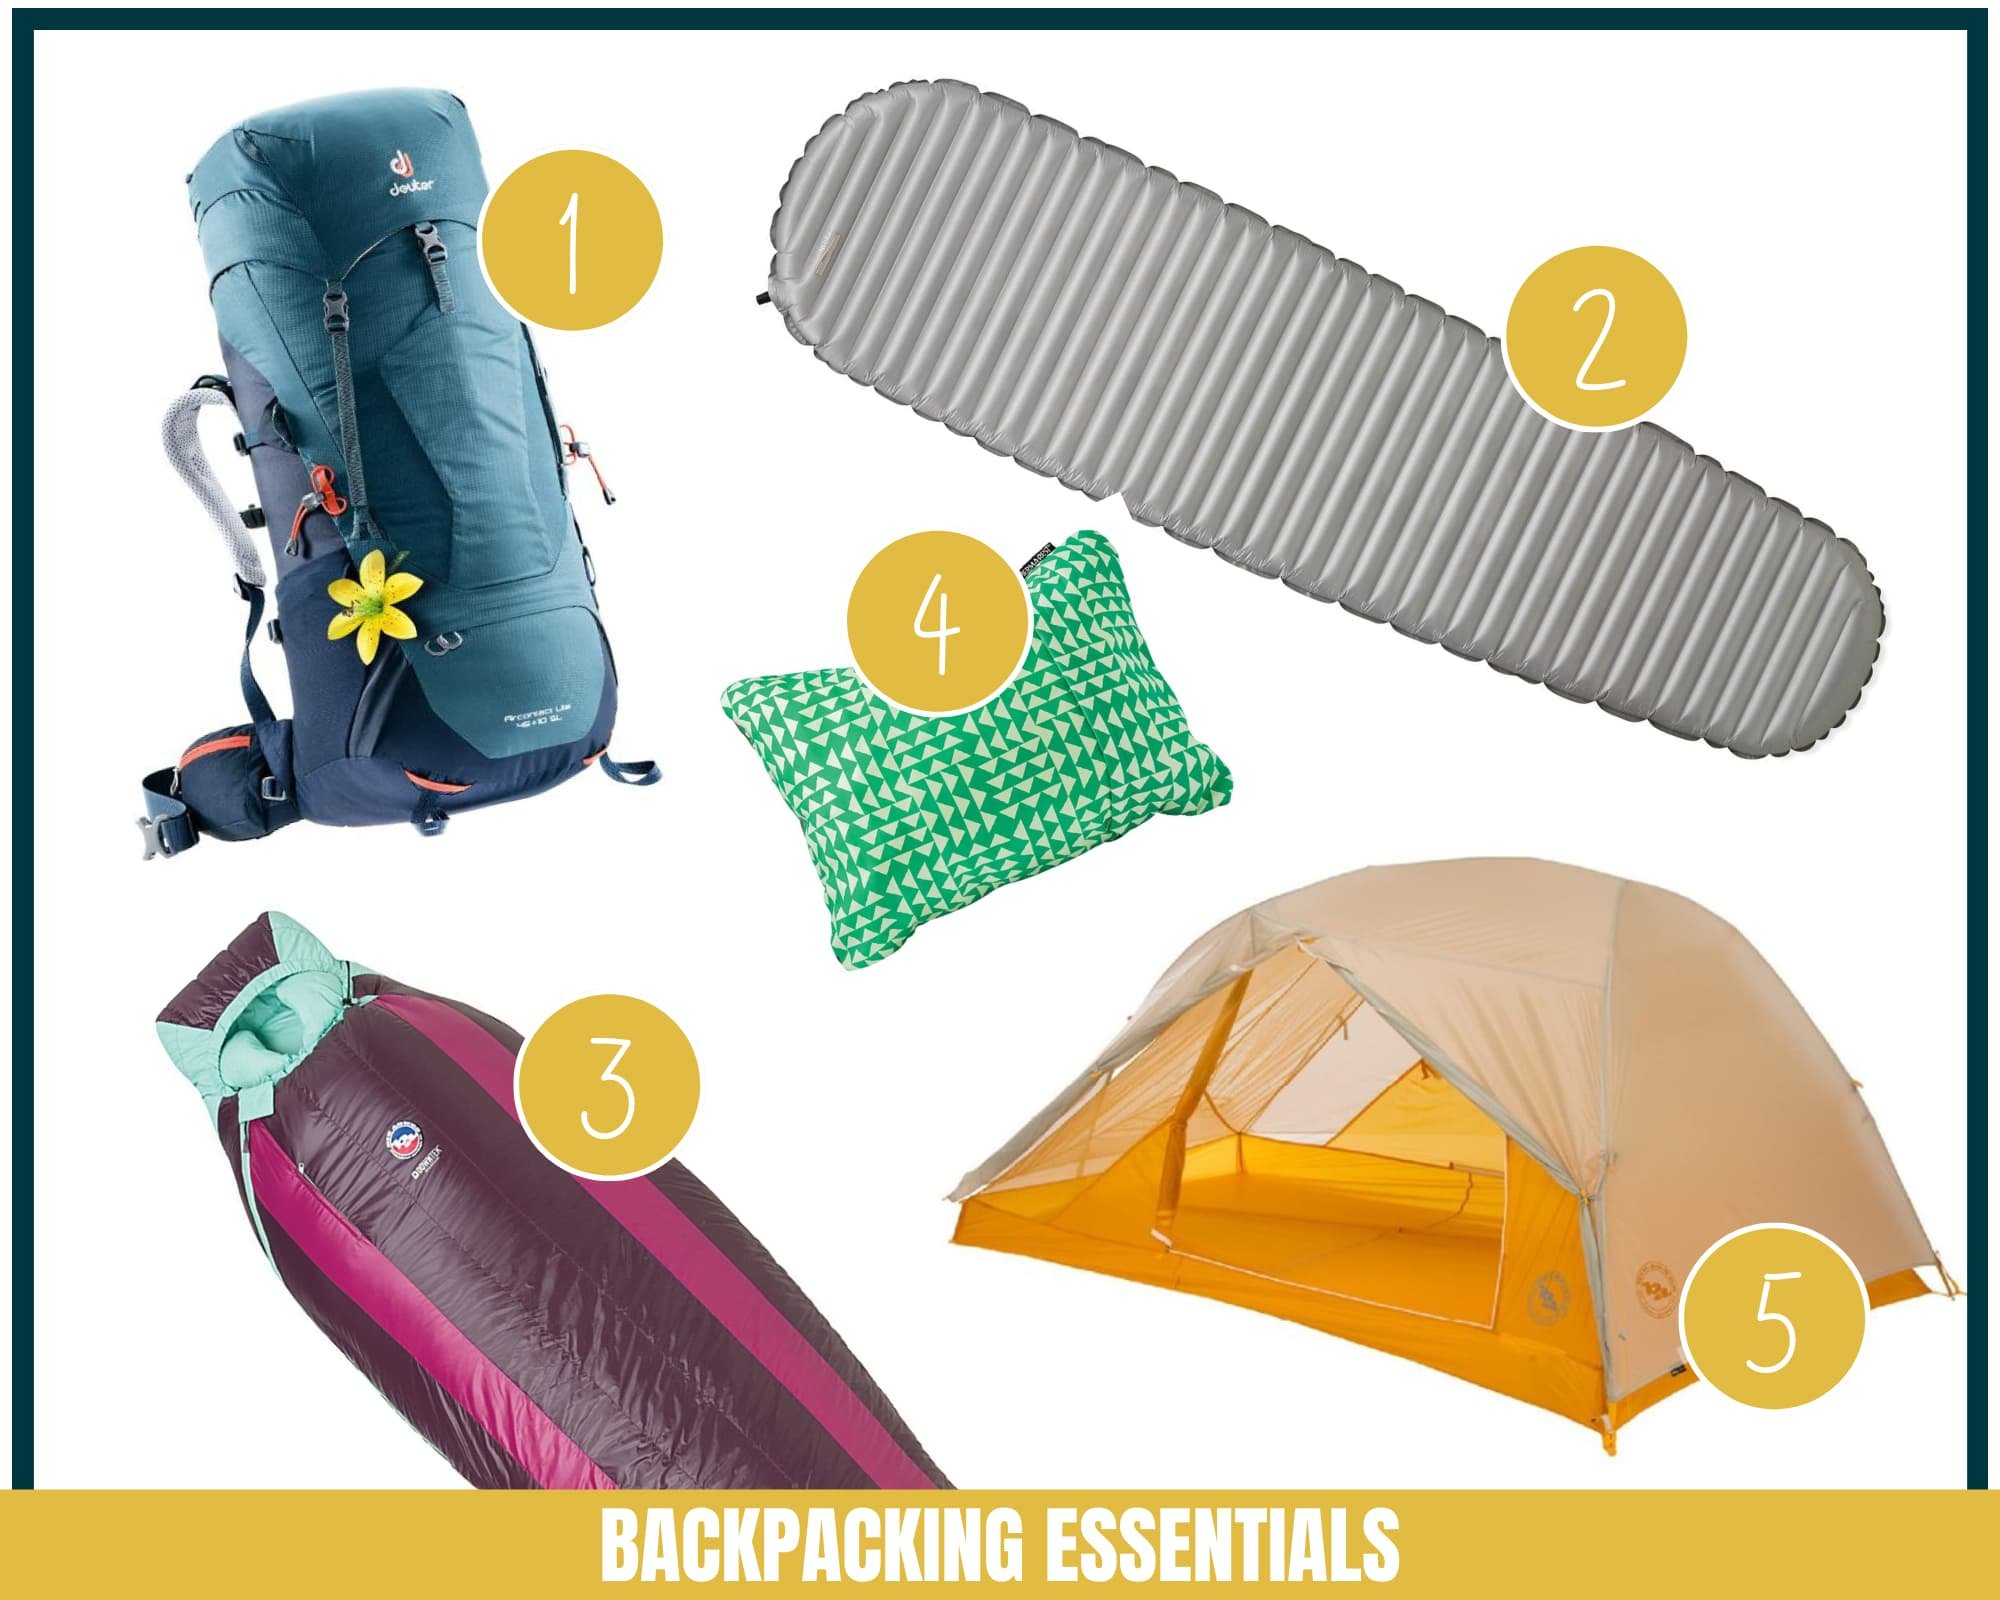
The backpacking essentials are some of the core items (and often the heaviest items) you’ll have in your backpack. When starting out you might feel like you can’t afford all of these big-ticket items, so I just want to say it’s totally ok to start with cheaper gear and work your way to a more optimized (and light-weight) kit as you grow as a backpacker.

Just keep in mind that splurging a bit for these pieces will make the biggest overall dent in your backpacking pack weight. It’s pretty incredible how lightweight gear has gotten these days! And friends, it really is worth the price tag.

PLUS, all the stuff I have spent more money on has lasted me 10x times longer than the cheaper items. (Definitely look into the benefits of REI membership to help save some money on your big purchases.)

But just start where you are, and don’t stress out too much. You can make it work with whatever gear you can get!

1) Backpacking Backpack [Recommended Brand: Deuter] (40-50L) - Deuter's 45+ Liter backpacks make great first time backpacking backpacks. This was the first backpack I used when I started backpacking, and I still use it often to this day. It's very comfortable, has plenty of pockets and makes packing really simple!

Another great backpack option is the Granite Gear Blaze 60L, which is a lightweight pack that is super adjustable. I got this pack for our JMT thru-hike, and it was fantastic during several weeks on the trail!

2) Sleeping Pad [Recommended Brand: Therm-a-Rest] (inflatable or foam) - The Therm-A-Rest NeoAir XTherm sleeping pad is my favorite sleeping pad. It's light weight and easy to pack. It's super comfortable (no body parts touch the ground), and it's warm! You could alternatively bring a foam pad as well.
3) Sleeping Bag [Recommended Brand: Big Agnes] (15-25 degree F) - I always recommend getting a down sleeping bag if you are going to be a "serious" backpacker. If that's you, I recommend getting a 0 to 15 degree rated bag. If you will be doing more high altitude hiking, just splurge on the zero degree bag, it will be worth it.

We love Big Agnes down bags, but don’t be afraid to shop around! The key here is to look for a down bag. They are warmer, weigh less, and compress down more. Check out Steep & Cheap or REI Outlet for good deals!

4) Backpacking Pillow (Optional) - Personally, I never bring one! I just like to stuff the jackets and extra clothing I’m not wearing into the hood of my sleeping bag and call it a day! This works for me and saves weight in my backpack. However, if you’d really like some extra support you can go for an inflatable pillow or a compressible pillow like the Therm-a-Rest compressible travel pillow, but I recommend trying to go without one and see how you like it!
5) Tent [Recommended Brand: Big Agnes] (1-2 person) - Tents can be expensive, but they are also one of the biggest items we carry as backpackers, so work your way up to affording a lighter weight tent if you can. I recommend not getting anything bigger than a 2-person tent. I have both a 2-person and a 1-person tent (I LOVE my 1-person tent!), and my favorite brand for backpacking tents is Big Agnes.

Looking for more information about the backpacking essentials? Check out these resources on my site:

Backpacking Navigational Gear

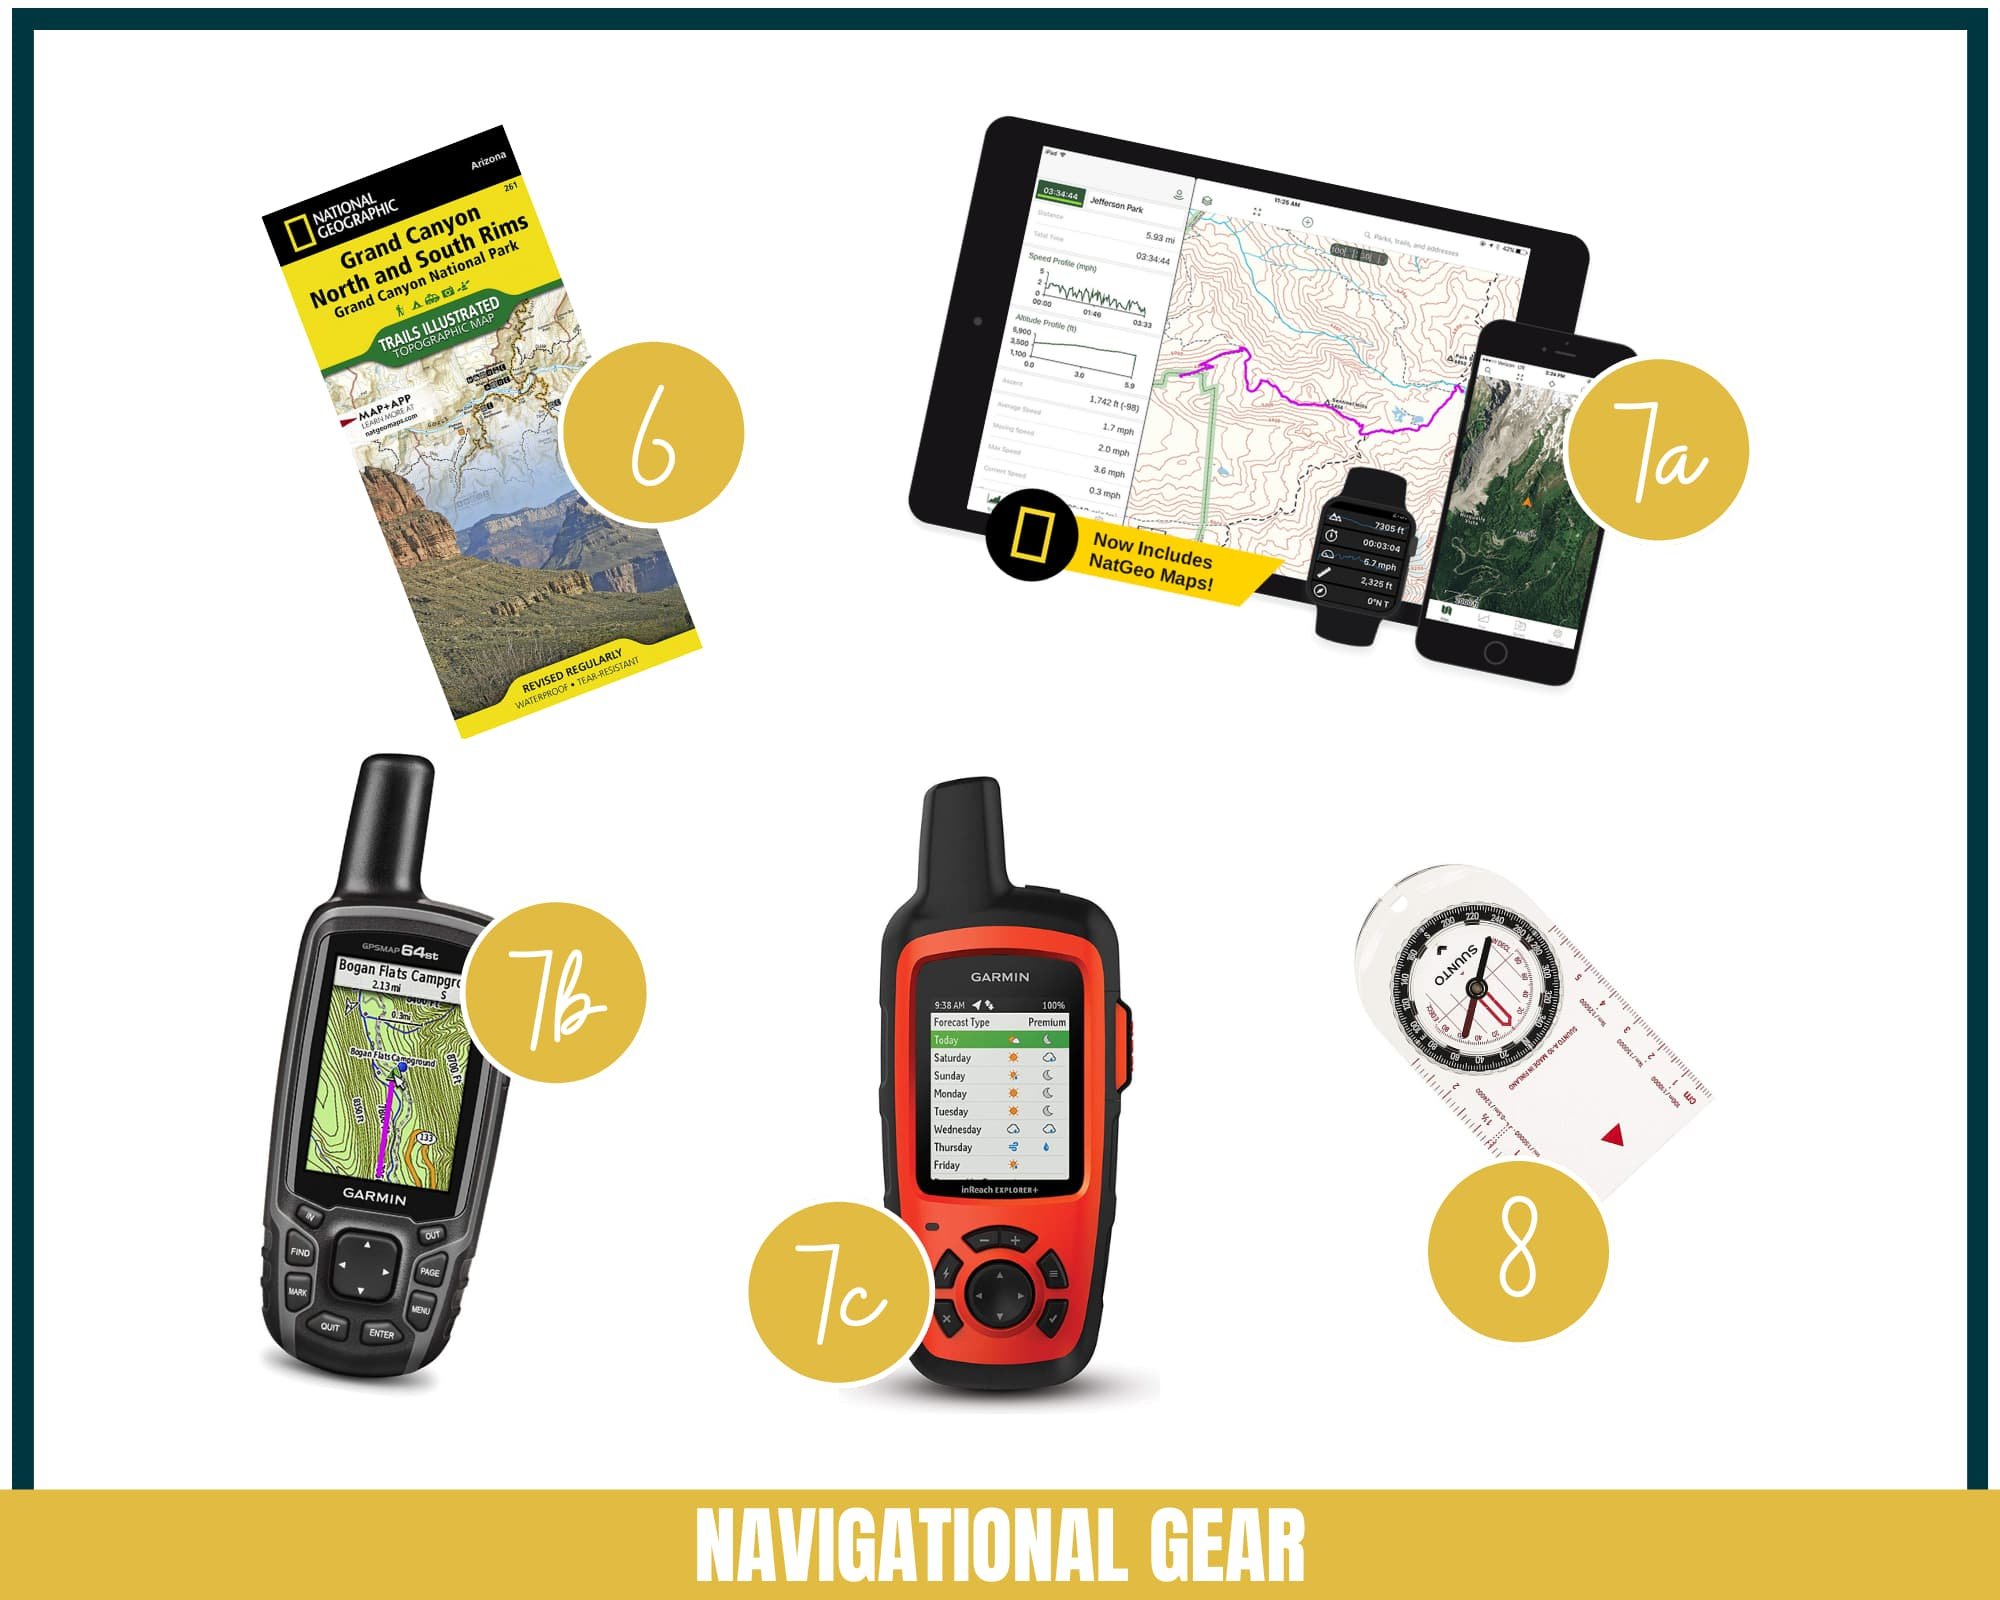
Navigational gear is one of the most important backpacking necessities, in my opinion. I believe every single person who hits the trails should be responsible for themselves and know how to navigate outdoors. Here’s a look at the backpacking navigational gear I personally love and recommend.

6) Map of the Trail/Area [Recommended: National Geographic Trail Maps ] - I always recommend bringing a map of some sort on your backpacking trip. Either you can find one online that describes the area you will be hiking in, or you can create one online with CalTOPO or GAIA GPS. For paper maps, I love National Geographic, and it can be nice to have a physical map along with your GPS.
7) My recommendations for GPS devices – I think a GPS is absolutely essential for every backpacking trip! Don’t forget to bring extra batteries or a charger for your device as well.
7a) GAIA GPS Phone App - At a bare minimum, consider getting a premium subscription to the GAIA GPS app. This app allows you to download maps in advance and take them offline into the backcountry. You can record your tracks, upload tracks to follow (like the one above), and so much more!

GAIA is offering a special 20% discount to anyone who subscribes through my link above. But even if you don’t use my link, please, get yourself a GPS phone app to help you navigate outdoors!

7b) Handheld GPS - If you hike often or go backpacking, then I highly recommend you investing in a handheld GPS. I own a Garmin 64st and LOVE this device. While this model has been discontinued, you can't go wrong with a Garmin – they are the gold standard when it comes to GPS devices.
7c) Handheld GPS with Satellite Communicator - If you have a little bit more money to spend (and if I were starting from scratch), I’d get a GPS device like the Garmin Montana 700i which provides both GPS tracking capabilities as well as SOS satellite communication.

I own the Garmin inReach Mini now and pair it with my Garmin 64st, but you can save weight by getting an all-in-one solution.

8) Compass [Recommended Brand: Suunto] - It’s always good to bring a compass with you on any hiking or backpacking trip. I’ve personally rarely had to use mine, but I consider it my “3rd” line of navigation defense. (it’s always good to have redundancy in your safety systems). If you don’t know how to use a compass, also consider doing some training to learn how to use it in the backcountry!

GRAB MY [FREE] OUTDOOR BACKPACKER STARTER KIT

I created the Ultimate Outdoor Backpacker Starter Kit for you (and it's FREE)! This starter kit is filled with 14 pages of my best hiking and backpacking tips to help you learn what it takes to become a safe, confident, and self-sufficient outdoor backpacker!


Water Necessities

I made water its own category because water equals life. So I would say it’s pretty important! That’s why you MUST make sure you have the right backpacking gear to meet your water needs (and water treatment needs) on the trail.

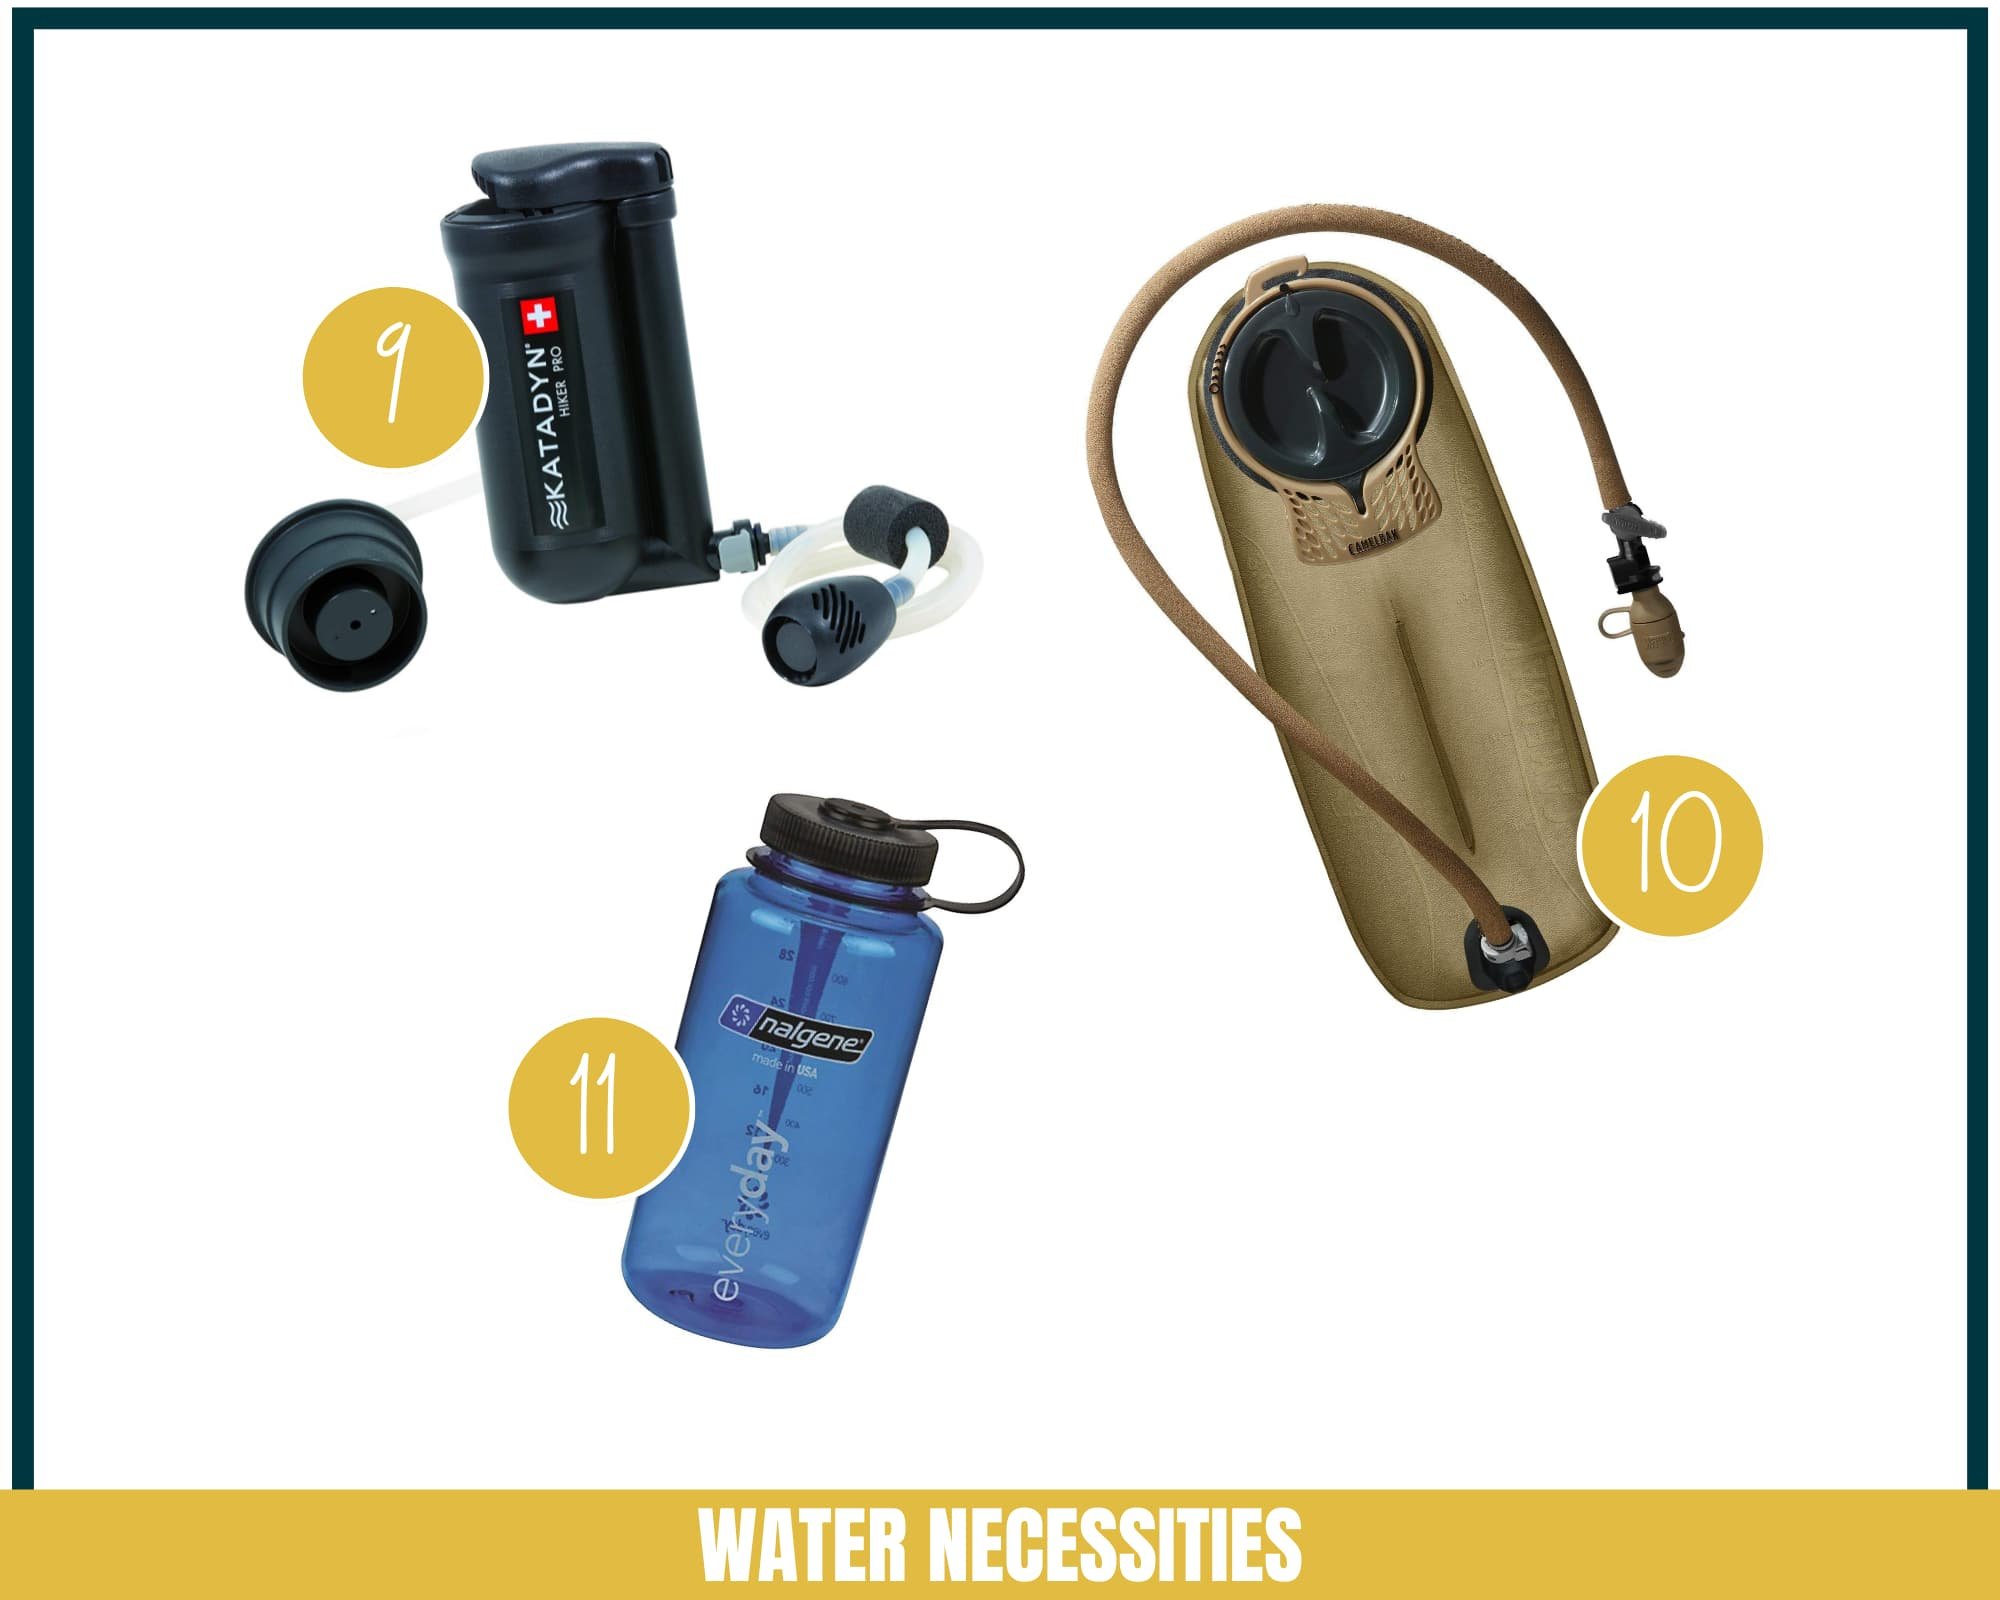
9) Water Filter [Recommended Brand: Katadyn] - There are a few water filters I recommend, and I own several. I like the Katadyn Hiker Pro Microfilter, and I also like the SteriPen. I use the Hiker Pro more often when I backpack, but when I want something small to bring with me on hikes I will throw the SteriPen in my pack.

You could also opt for a Sawyer Squeeze, which is more affordable! I also have become a huge fan of the  Katadyn Be Free,  and it is often my go-to. There are pros and cons for each of the different options.

10) Water Reservoir [Recommended Brand: Camelbak] (3 Liters) - Camelbaks are awesome for backpacking! They are the easiest way to stay hydrated, and I typically always bring one with me (unless I know its going to be too cold because your straw will freeze up in freezing temperatures). I recommend getting one that has at least a 3-liter reservoir.
11) Sturdy Water Bottle [Recommended Brand: Nalgene] - Also consider bringing a Nalgene or other water bottle for backup. I've had friends who had their Camelbaks start leaking part way into a backpacking trip (although it's never happened to me personally), so I will usually pack an empty Nalgene as backup. Then, if a leak develops in my Camelbak, I can at least transfer water to the Nalgene and still be OK. Sometimes I even like to keep plain water in my Camelbak and put electrolyte water in my Nalgene.

Backpacking Kitchen Essentials

Another key piece of your backpack camping checklist is kitchen essentials. You need to eat on the trail – a lot more than you normally do when you’re not hiking for miles a day – so you need the camp kitchen gear to make your food.

Note: if you decide to go stoveless on your backpacking trip (which is becoming more and more popular these days), you won’t need to bring some of the backpacking gear items below with you.

12) Camping Stove [Recommended Brand: MSR] - I love my MSR Reactor stove system. I bought this after my JetBoil broke down, and I like it a lot more. It works great at high altitude and takes only about 30 seconds to bring water to a boil. The MSR Pocket Rocket 2 is another (more affordable) backpacking stove option that I love.

You could also go stoveless depending on what foods you bring. If you bring a stove, make sure to bring a lighter or matches with you as well, even if your stove has an igniter button (since those buttons can be unreliable).

13) Small Lighter - You don't need anything fancy, just something that lights reliably, like a Bic.
14) Spork - I like these Light My Fire Sporks because you get a spoon and fork all in one. Your bases are covered.
15) Small Pocket Knife [Recommended Brand: Trango] - I love my little Trango Piranha knife. It’s super small, super light weight, and really sharp! Plus it also doubles as my bear can opener because the bottom of the knife is the perfect shape for opening up my bear canister.
16) Collapsible Bowl (Optional) - If you are sharing your cooking gear with another backpacker, then be sure to pack a bowl. I really like the collapsible bowl options out there. However, when I am not sharing my stove, I usually just eat straight out of my MSR Reactor stove pot.
17) Small Towel - It's often useful to have a small microfiber towel to wipe things down with after cooking, especially if you are sharing stoves with other people.
18) Meals & Snacks [Recommended Brand: Good To-Go] - This should be somewhat obvious, but make sure to pack enough food for the number of days you will be backpacking. I like to pack Clif Bars, Complete Cookies, and Larabars for quick snacks. Good To-Go dinners are some of my favorite dehydrated meals to bring on backpacking trips as well. The ingredients are great, and they are super delicious. My favorites are the Thai Curry and the Herbed Mushroom Risotto!

Backpacking Safety & Emergency Gear

When you are wondering what to pack for backpacking, safety and emergency gear should be at the top of your list. Here’s a look at what I always bring with me to help me feel safe in a variety of situations.

19) Headlamp [Recommended Brand: Petzl] (PLUS extra batteries!) - I pretty much don’t go anywhere without a headlamp. I have a Petzl headlamp, and it has been going strong for several years now. It's also always good to pack an extra set of batteries (or even an extra headlamp) whenever you hike or backpack.
20) Sunscreen & Lipbalm [Recommended Brand: Joshua Tree] - This should be a no-brainer, but always wear and bring sunscreen for a hike. I really like Neutrogena sunscreen. It's also important to bring lip balm that has sunscreen in it. My favorite lip balm is the Joshua Tree brand.
21) Sunglasses [Recommended Brand: Goodr] - My favorite pair for most outdoor activities is from Goodr. I originally bought these sunglasses when I got into trail running since I couldn't find a pair of glasses that were comfortable and would stay on my face when I was running. These finally did the trick, and now I love wearing them hiking, too! They come in a bunch of fun colors and patterns and the best part... they are only $25-$35! If you want something more classic, Native Eyewear is another good choice because they offer a great lifetime warranty.
22) SOS Satellite Communication Device [Recommended Brand: Garmin] (highly recommend!) - I mentioned the Garmin in Reach+ Explorer above in the navigation section (it’s both a GPS and Satellite SOS device), but another option is the inReach Mini. This is what I own because I already had the Garmin 64st GPS before I bought a satellite device.

I believe this is a super important piece of gear you should really invest in for yourself when you can. Having a satellite communicator could potentially save your life one day, and that is worth the money, my friend.

Also, it’s really nice to be able to shoot my family messages like “Hello I’m at camp now,” or “Starting my day” even when I’m deep in the backcountry. There are a lot of brands out there, but I really love my Garmin devices. But feel free to do your research - it’s a big purchase!

23) Emergency Rain Gear - This includes a multitude of things like a rain jacket, an emergency poncho, a pack cover (or some trash bags), etc. You definitely AT LEAST want to bring an emergency poncho and a few trash bags! If you are in an area that rains a lot, you may want to bring even more rain gear.
24) Backpacking First Aid Kit - Another backpacking essential is a small first aid kit to keep in your pack at all times. This should include bandages, painkillers, gauze, tape, etc. Make sure you know how to use everything in the kit before you hit the trail.
25) Emergency Fire Starter - I like the Light My Fire fire starter, but you could also get some storm proof matches instead.
26) Duct Tape - You never know what may need mending on the trail. You can wrap a small amount of duct tape around your trekking poles to keep handy for emergencies.
27) Bear Safety Equipment - If you plan to backpack in bear county, be sure to bring the proper bear food storage (like a bear can) and potentially bear spray (although this is not allowed in all areas). The important thing here is to understand the local rules and recommendations of the area you are going backpacking.

For instance, the parks that maintain a big portion of the Sierra Nevada in California require that you have a bear canister when staying overnight in the backcountry, but they do not allow bear spray. Know your area before you go.

Miscellaneous Gear

These are the items we often forget when packing for our backpacking trip, but they are still super important! You could definitely have a rough day if you forget any of these things.

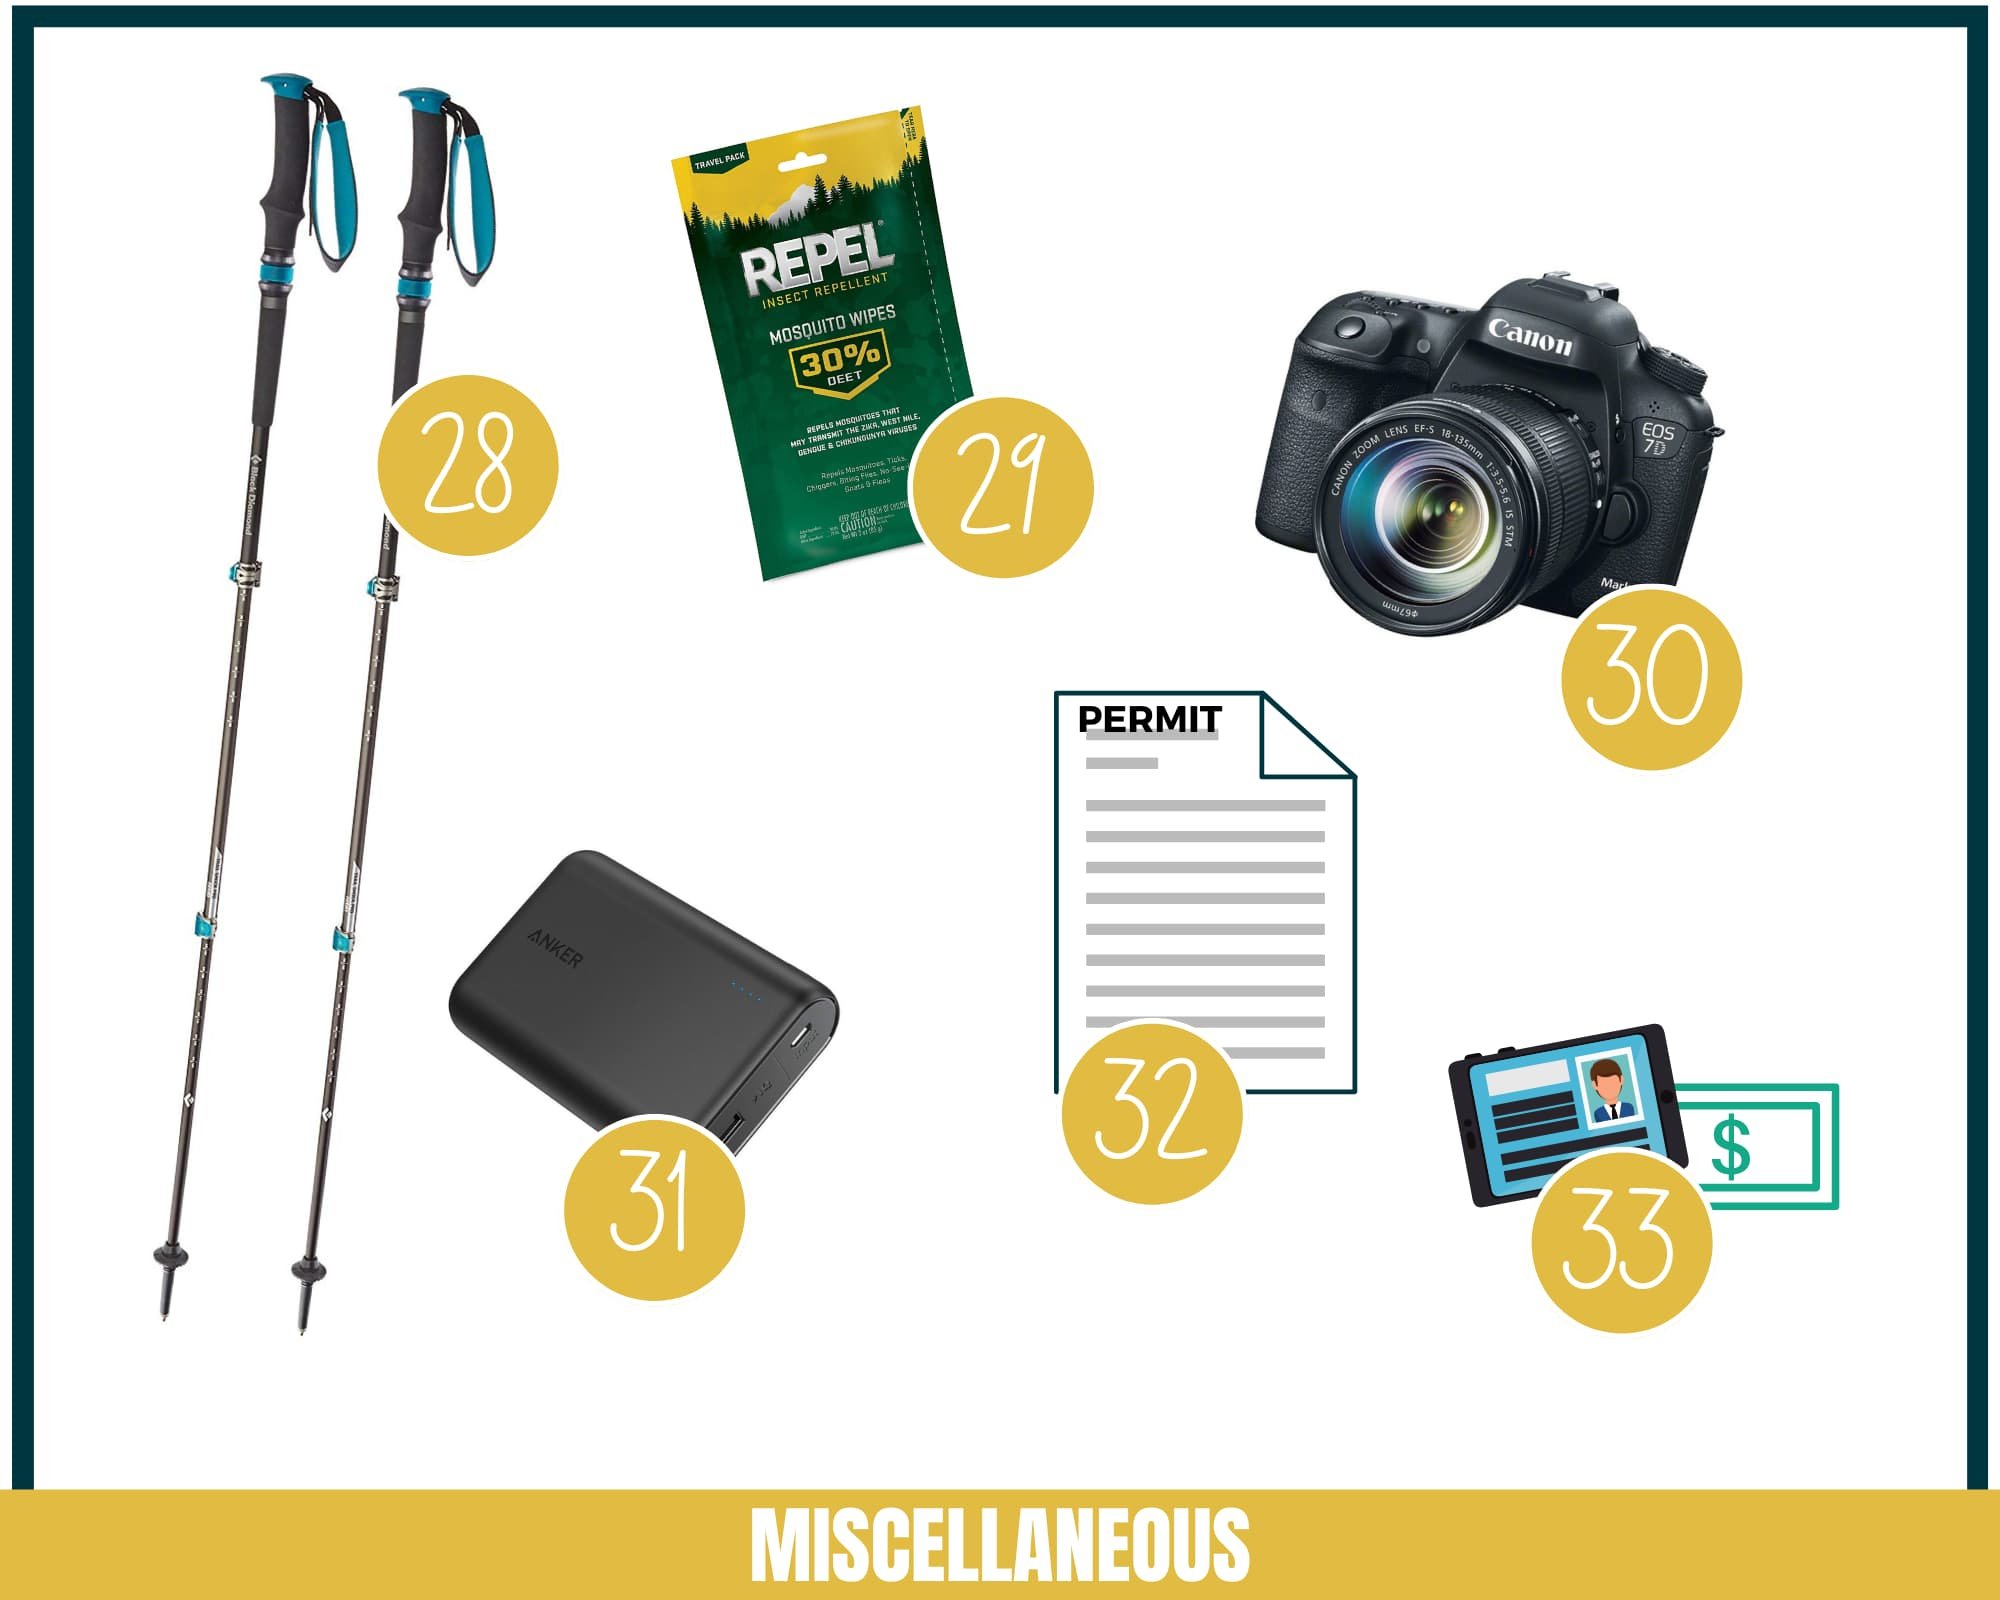
28) Trekking Poles [Recommended Brand: Black Diamond] - You really want poles with snap locks, not twist locks, and I love the Black Diamond Trail Pro Shock Trekking Poles. In fact, Michael and I both have these. I've owned a pair of cheaper trekking poles in the past, and they broke fairly easily, but these are almost indestructible. I've been using the same pair for many years now, and they are still going strong!
29) Bug Spray or Wipes - In warmer weather, it’s always safe to just bring some insect repellent, just in case. I prefer the wipes for hiking and backpacking because they are lighter and easier to pack, and you don't have to worry about spills!
30) Outdoor Camera Gear [Read About Our Favorite Outdoor Adventure Photography Gear Here] - Don't forget to pack a camera or a phone to capture your backpacking trip! You can read our post on Outdoor Adventure Photography Gear if you want details on the gear we use and recommend for outdoor photography. But also you can't go wrong these days with your phone camera – the best pictures come from the camera you have with you!
31) Small External Battery (and Cable!) - If you plan to use your phone a lot during your backpacking trip, it's probably worth packing a backup battery and charging cable. This is especially important if you are going to use your phone as a camera and GPS.
32) A Photo ID, A Bit of Cash, & a Credit Card -  I always bring a small zip lock bag with my photo ID, a credit card, and about $20 of cash with me on every backpacking trip. I’ve never needed it, but you never know if something unexpected might happen. Also, maybe consider writing a few emergency numbers down on a sticky note to bring with you... because if you're anything like me, you probably don’t have them memorized, and your phone could die on you in the backcountry.
33) Printed Permit:  Make sure to print out anything you need in advance, like your permit (if your backpacking trail requires one). You might also want to consider printing out weather forecasts or any special trail details you need to remember.

Backcountry Toiletries

Another crucial piece of your must-have backpacking gear is your backcountry toiletry kit! I usually like to put all of my toiletry backpacking items inside of a lightweight stuff sack for easy grab-and-go when needed.

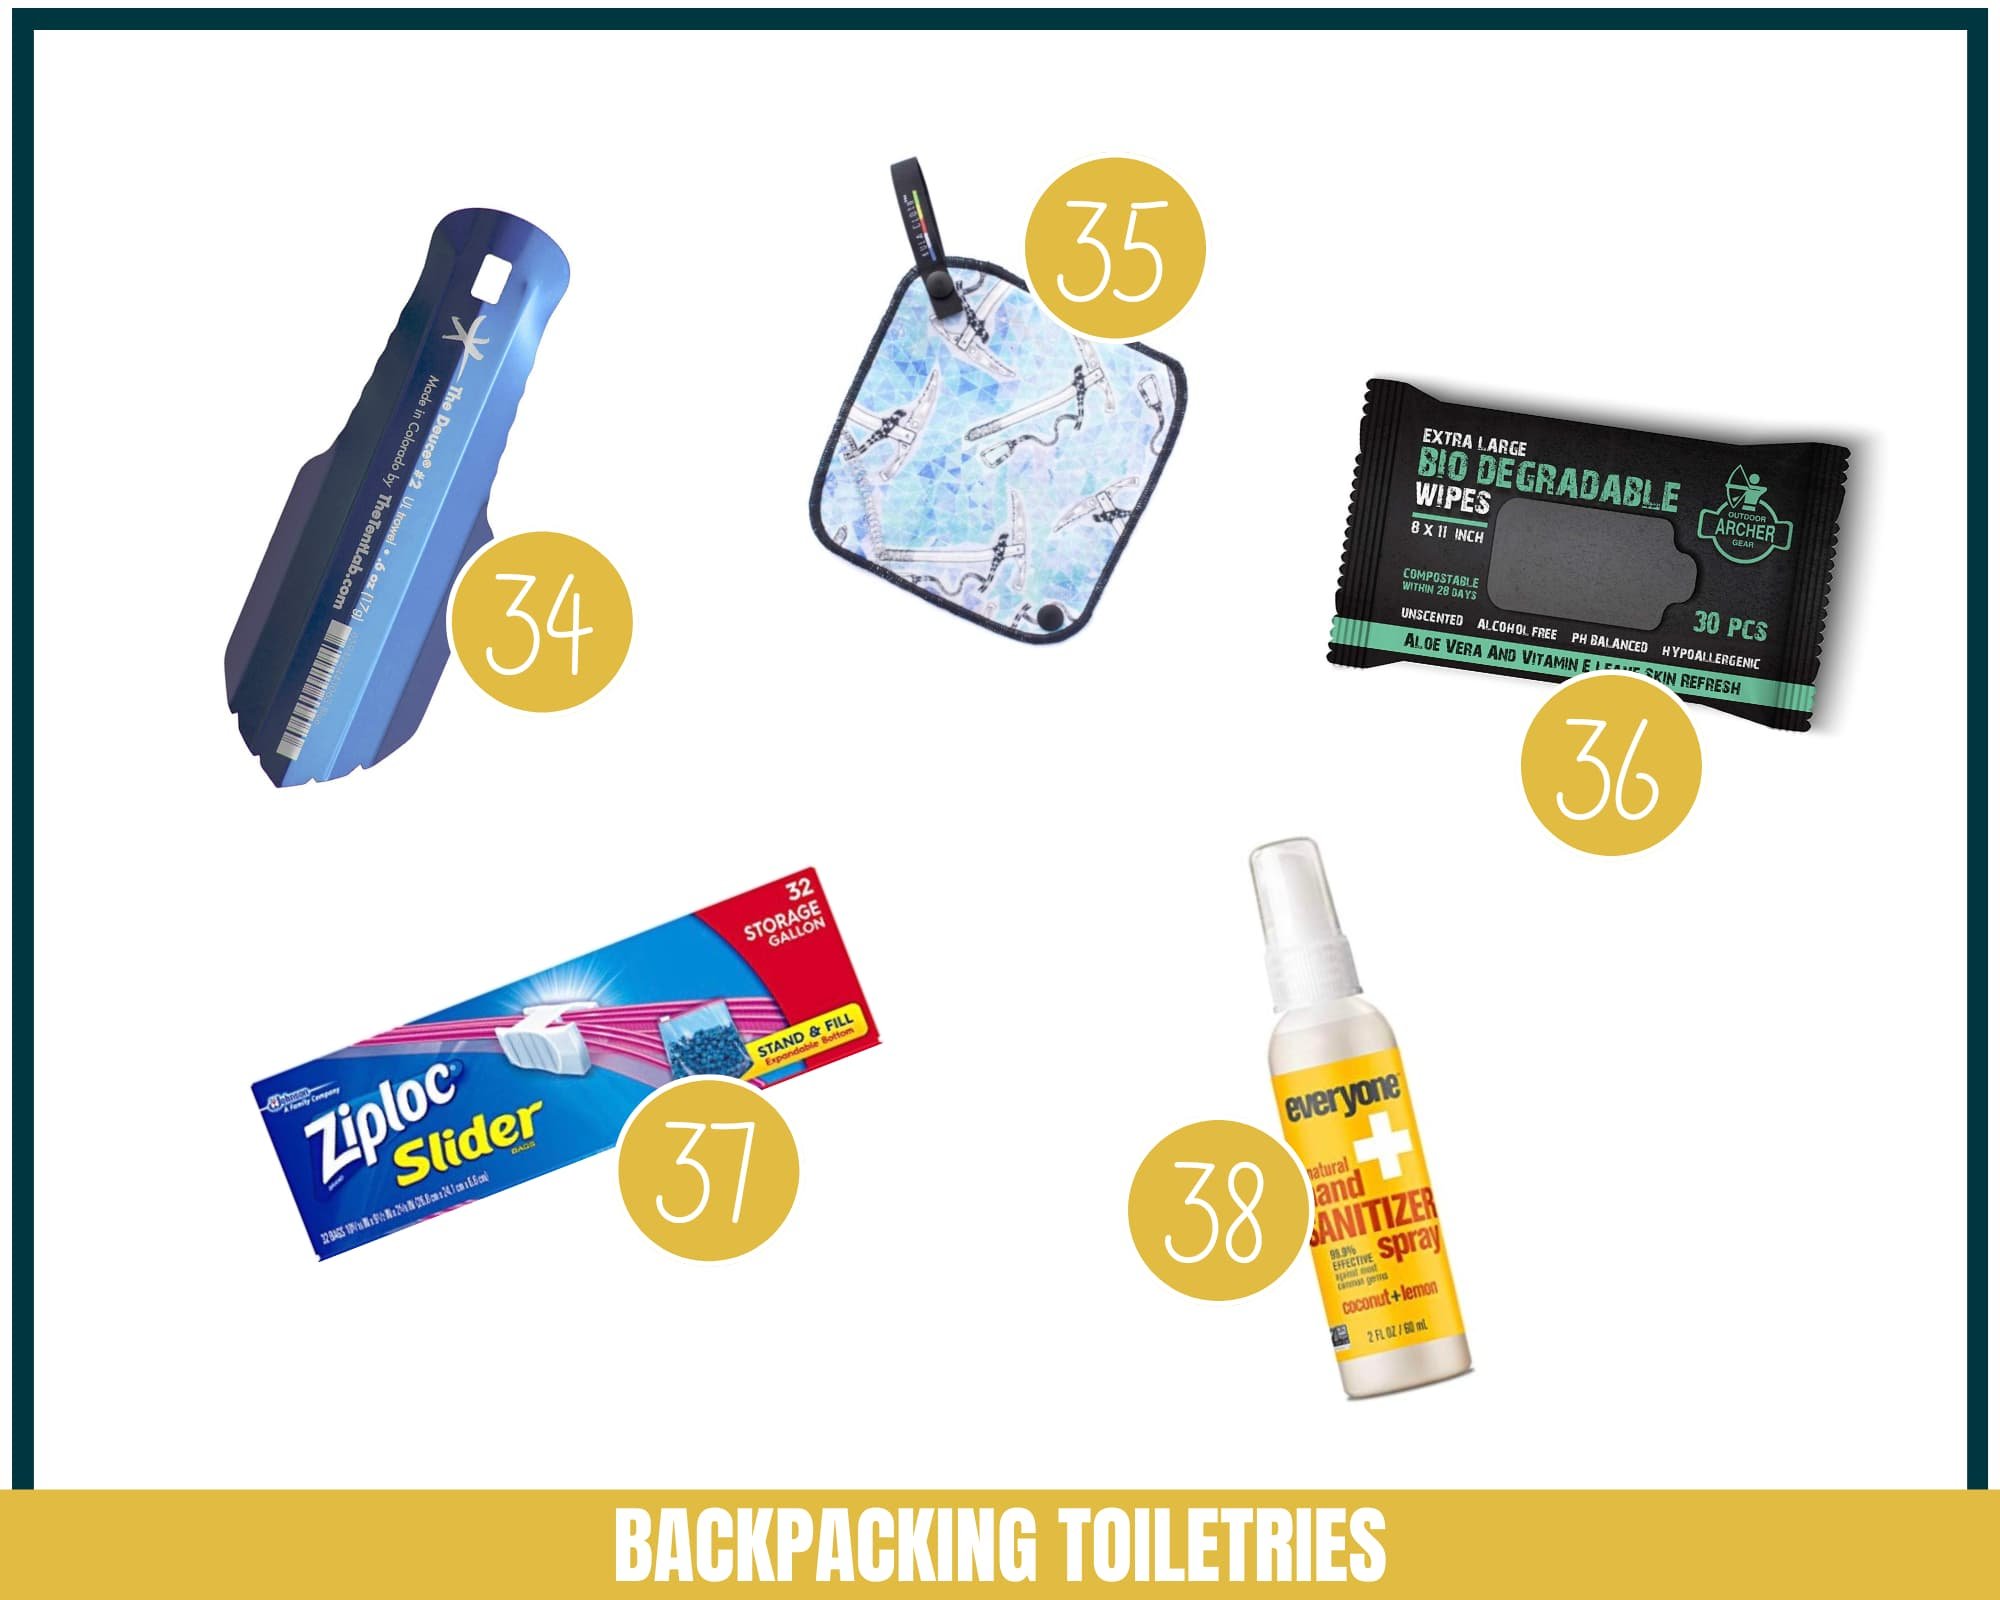
34) A Lightweight Backpacking Trowel -   Your human waste needs to be buried (at least 6-8 inches deep) and the easiest way to do this is with a backpacking trowel! I love the Deuce of Spades trowel, since its super lightweight and durable.
35) A Pee Rag [Recommended Brand: Kula Cloth] (optional) -   Since you can’t leave toilet paper behind, why even use it when you just have to pee? You can use rocks or leaves (although make sure you can identify poison ivy so you don't use that!) or use a pee rag instead. There are a few options out there but the Kula Cloth is my personal fave. Simply do your business then use the anti-microbial cloth like you would toilet paper. The Kula Cloth easily attaches to your bag or tent to dry in the sun, and it comes in super fun patterns!
36) Biodegradable Wipes or Toilet Paper -  My personal go-to combo is the Kula Cloth for number 1, and biodegradable wipes for the rest (but you can bring toilet paper instead). But whatever you use for number 2, don’t forget to pack it out! A bonus of bringing the wipes is that you can also use a clean wipe to clean your body in the morning to feel a bit more fresh.
37) Ziploc Bags -  A couple Ziploc bags take up virtually no space in your pack, but can come in super handy. Use them to pack out any waste.
38) Hand Sanitizer -   Your hands will probably get pretty dirty while backpacking, so it's a good idea to at least kill the germs on them to keep from getting sick.

Looking for more information about the backpacking hygiene? Check out these resources on my site:

Clothing

Inside of my Backpacking Checklist PDF, I included a Layering 101 cheatsheet that goes a little more in-depth on layering essentials. Learning to layer properly in the outdoors is an essential skill, and you’ll discover this as you go on more trips. Below are some of the basics though to consider bringing with you., and also check out my full What to Wear Hiking post for more info on choosing hiking clothes.

Also, as you go through my backpacking clothing list below, you might start to notice that many of my recommendations are from the Patagonia brand (which I know is expensive). But I truly love this brand, and think they make some of the very best backpacking clothing and gear.

The quality of Patagonia clothing is fantastic, the gear is built to last (and they will repair it!), the company has excellent values – not only with the product they are creating, but also with their customers – and their gear was built with the outdoorsperson in mind. So I’m a big fan! Most of my Patagonia gear is going on 7+ years strong still, so you also get a lot of value out of it.  

39) Wool Socks [Recommended Brand: Darn Tough] -  I highly recommend getting wool socks, and always bring at least 2 pairs of socks, Why are socks important? Having dry feet is one of the key ways to prevent getting blisters on a hike. If you are hiking and start noticing your feet are sweaty, take some time to swap your socks, then let the sweaty pair hang off of your pack to dry. I am a big fan of Darn Tough wool socks, and Smartwool socks are also great!
40) Hiking Boots -  You might be surprised to learn that I don’t actually feel passionate one way or another about a particular brand of boots or hiking shoes. I go back and forth between my Ahnu hiking boots (which I love, but are sadly discontinued), my 5.10 Guide Tennies (approach shoes which are better for technical, rocky trails), and trail running shoes. The important thing here is to find a solution that works best for you and that doesn’t give you a lot of hot spots. Also, if you have trouble with your ankles, you probably want to go for a boot with ankle support.
41) Upper Lightweight, Breathable Base Layer [Recommended Brand: Patagonia] -  The first layer on you wear on your upper body should usually be lighter, depending on the weather. You can totally wear a t-shirt or tank top, but I like wearing a lightweight long sleeve, like the Patagonia Lightweight Capilene shirts. They are super breathable and protect you from the sun.
42) Upper Mid Layer [Recommended Brand: Patagonia] (synthetic or fleece) -  Mid layers are usually a light, breathable jacket or fleece. My go-to mid layer is my old purple Patagonia Nano Puff. I've had it for about 8 year now, and even though it has a few rips in it now, it is still going strong!
43) Upper Heavier Layer [Recommended Brand: Patagonia] (down) -  If the weather looks like it will be extra cold, or if you know the summit temps or night time temps might turn quite chilly, consider packing a heavier down jacket. You don't need a mountaineering down jacket, but I usually pack my thicker Patagonia Down Sweater jacket for when it's frigid.
44) Upper Waterproof/Wind Layer [Recommended Brand: Patagonia] -  It's also smart to pack a rain coat or poncho for bad weather (even if you don’t expect bad weather, you should be prepared, since weather forecasts aren't always totally accurate). I usually pack my Patagonia Alpine Houdini Jacket because it is super light weight and wind & rain resistant. I don’t think Patagonia sells the Alpine Houdini anymore, but they do still offer the Houdini. And if you’re backpacking in a place that rain a lot, it's probably worth getting a more substantial rain jacket like the Patagonia Torrentshell.
45) Hiking Pants (breathable and quick drying) -  A good pair of hiking pants is essential on the trail! I usually only bring one pair of pants for 3-5 day backpacking trips, but I make sure they're quick-drying and breathable. Sometimes I also might bring a pair of super lightweight shorts to wear in my sleeping bag at night.
46) Long Underwear (wool) -  If you know your trip is going to be in colder conditions, make sure to bring a pair of wool long underwear to wear underneath your hiking pants or in your sleeping bag.
47) Beanie -  Pack a beanie to keep your head warm if it's cold out! I love the Carhartt beanies, which are functional and inexpensive.
48) Hat -  I also like to bring a trucker-style hat with me on hikes to keep the sun out of my face. Plus, my hair usually gets a bit ridiculous from camping, and a hat covers that right up!
49) Gloves - If it's going to be chilly, consider bringing some gloves with you! Cold hands can be really uncomfortable and inconvenient. (You can also bring some disposable hand warmers to sitck in the gloves to keep your fingers extra toasty!)
50) Extra Undies -  And last but not least my friends, fresh undies for each day backpacking for the win! That’s truly my number one hygiene tip! BRANWYN makes awesome hiking undies, so get a couple pairs!

>>> Check out all our recommendations for the best hiking underwear here!


DON’T FORGET! DOWNLOAD A PRINTABLE VERSION OF THE ABOVE BACKPACKING PACKING LIST BELOW:

backpacking-gear-list

Have any other favorite essential backpacking gear items you recommend and want to share with others? Let me know what you LOVE in the comments below, and why gear you consider a must-have!

more backpacking resources

Looking for even more backpacking tips? Check out these articles on the site!

Cheers,

Allison - She Dreams of Alpine

 
pin-it-button

Related Posts: