18 Adventure-Worthy Backpacking Trips for Beginners
You may have heard me say this before, but it’s worth repeating: I believe that outdoor backpacking is the gateway into epic outdoor adventure. That’s why I’m really excited to share these 18 adventure-worthy backpacking trips for beginners with you!
What do I mean when I say that backpacking is the gateway? I mean that, if you can learn the skills you need and gain confidence in using them outdoors on the trails via backpacking, your outdoor adventure options will open wide up!
For instance, my first backpacking trip was backpacking Half Dome in Yosemite, and that trip was one of the biggest catalysts in me eventually saying yes to bigger and epic adventures such as rock climbing, mountaineering, and even canyoneering.
Backpacking gave me the confidence I needed to push myself even further and see what else I was made of. I found I had a love for the outdoors that extended well beyond 3-4 day backpacking trips.
Now I don’t want beginner backpacking trips to be exclusively “easy” backpacking trips, because I believe that many of you (newbies) are probably capable of quite a bit more than you can imagine. So in this post, you’ll find a variety of mileage and difficulty options, but I did purposefully choose trails that are not technical or overly exhausting.
As you go through this post, read a bit about each of the trails and choose what fits you (and where you are starting out physically) the best. Each and everyone of us are starting from different points when we pick up backpacking, and that is 100% OK, my friend! I knew absolute zero about backpacking when I started!
This post is also split up into 2 main sections – a list of United States backpacking trails for beginners and then some international backpacking trails for beginners as well. I also reached out to a few fellow bloggers in order to include a geographic variety of backpacking trails, so you’ll see that a few of the suggestions below come from other outdoor adventure bloggers.
Let’s get after it, shall we?
STOKED ON BACKPACKING, BUT LOOKING FOR SOME EXTRA SUPPORT?
Join me (and your peers) on a transformational adventure, where you will learn how to confidently go on your first ever (or perhaps your first solo) outdoor backpacking trip without the constant fear of getting lost, the debilitating worry of being unprepared, and the lurking feeling that you lack the "know-how" and skills required to stay safe on the trails. Click below to be the first to know when my one-of-a-kind backpacking program re-opens again for enrollment!
Best Backpacking Trails in the US for Beginners
First up on this list are some excellent backpacking destinations for beginners in the United States. You’ll notice many of these are in California, and well, that’s because I know California the best and have backpacked in California the most! I promise you these backpacking trails are SO worth doing!
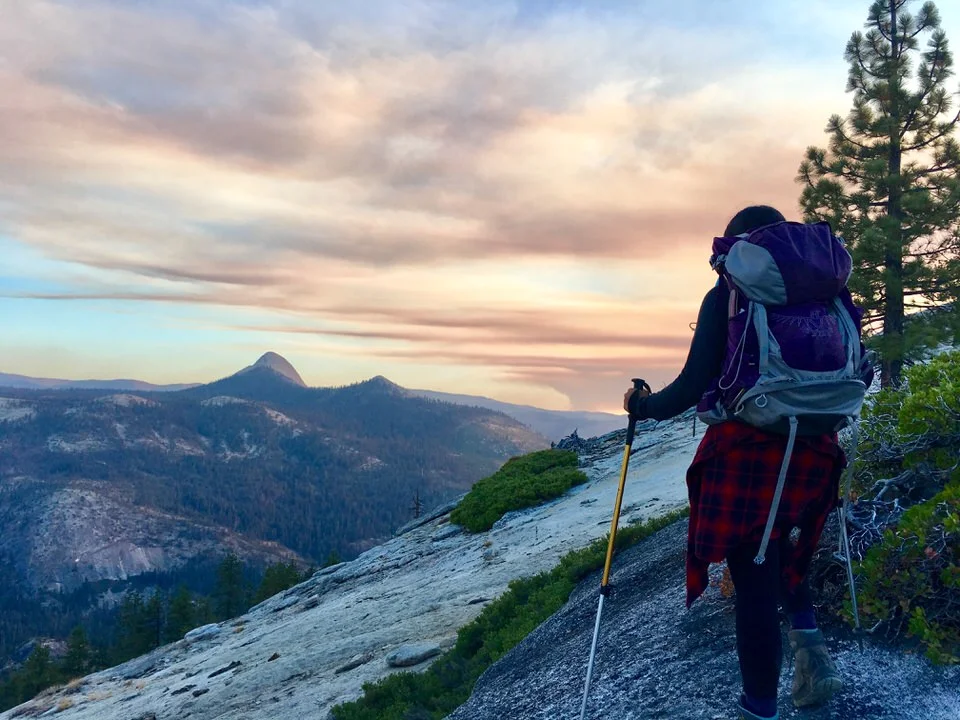
1. Half Dome - California
Backpacking Half Dome Quick Facts:
Location: Yosemite National Park, California
Type of Trail: Out and back
Total Mileage: ~ 14.5 miles via the Mist Trail, ~16.5 miles round trip via the John Muir Trail, or you can choose to go up the Mist Trail (7.25 miles) and down the John Muir Trail (8.25 miles) for a round trip of around 15.5 miles. Its easier on your knees to go down the John Muir Trail, because the Mist Trail is stair steps the practically the whole way.
Total Elevation Gain: ~5000 feet of elevation gain (though, when I took my GPS, It said more like 5,600 feet of gain)
Time Needed to Backpack: As a beginner, plan to spend 3 days and 2 nights backpacking this trail.
Permit Needed? Yes! You must have a backpacking permit and a Half Dome permit to hike this trail. Read more about California permits here.
Want to read the full trail guide? Check Out the Half Dome Hike Guide here
About the Trail:
Many people attempt the Half Dome hike as a day trip, but I also think it makes an absolutely fantastic backpacking trail! Half Dome is hands down one of the most unique hiking experiences you can get in the United States, so spending more time on this trail feels like a no-brainer to me.
You’ll start your first day by hiking up the Mist Trail. Its a brutal uphill stair-stepping workout, but it is the quicker and more efficient option. Make sure to bring plenty of water, particularly if you are hiking in the summer. You will get very thirsty!
Your first night, you’ll want to camp at Little Yosemite Valley Campground after your long uphill trudge up the Mist Trail. This is a really nice campground, and it even has pit toilets (which is not common on most backpacking trails). Enjoy your evening here and rest up for day two when you will tackle the Half Dome cables.
On day two, once again, make sure you have plenty of water as you head up to conquer Half Dome. You’ll want to leave the bulk of your backpacking gear at your campsite so you can tackle Half Dome with a smaller and lighter pack, but bring a small daypack so you can go hands-free at the cables.
There’s not much downhill on this hike as you make your way up the sub-dome. It’s an uphill battle until you make it to the top! At the bottom of Half Dome, you’ll probably hesitate, since the hike up the cables is nearly vertical, and your only protection is your grip on the cables and your footing against the planked “stairway” to the top.
DO NOT attempt the cables without proper gloves or shoes with good traction. DO NOT attempt the cables if you are very terrified of heights. I also advise against using a “harness” system to go up the cables. In my opinion, harnesses are just a false sense of protection here, because you would need a very specific set up in order for this to actually be “safe”, and most people are not going to have that setup. Having to fuss with carabiners and your harness system is going to do you more harm than good in getting up the cables.
Just take your time, and focus on going plank to plank and hanging on with a strong grip. There will be a LOT of people on this hike, and really the only way to avoid crowds would be to get there around sunset or very early in the morning.
The views are worth it though, and I think it is a super exciting backpacking trip – making it to the top of Half Dome is extremely gratifying! Then you can rest easy because the rest of your backpacking trip will be downhill. Make it back down to Little Yosemite Valley Campground on night two and rest up for your hike out on day three.
On day three, enjoy your final morning in Little Yosemite Valley and then make your way with all your gear back down to your car! On your way down, consider taking the John Muir Trail instead of the Mist Trail (they intersect). Even though the John Muir Trail will add on about an extra mile, it is much easier on your knees to go down this trail than the stair-stepping Mist Trail.
Why Half Dome is a great backpacking trip for beginners: Backpacking up to Half Dome instead of tackling it as a day hike helps make this monster of a hike more manageable, and frankly more enjoyable, especially if you are brand new to hiking and backpacking. While this trip won’t necessarily be the easiest backpacking trip you could go do, it certainly will be very, VERY memorable!
In fact, Half Dome was my very first backpacking trip, too! It’s where my whole outdoor adventure life got kick-started, so you could say I’m a little biased. :) If you’re up for the elevation gain and tackling the Half Dome cables, you certainly won’t regret doing the Half Dome Hike as a beginner backpacking trip!
Side Trip Option: If you want to extend your backpacking trip, consider spending an extra night at Little Yosemite Valley and hiking to the top of Clouds Rest before hiking back out.
Read more about the Half Dome Hike and other Yosemite hikes:
Hiking Half Dome << The FULL trail guide
How to get a Half Dome hiking permit
2. Havasu Falls - Arizona
Backpacking Havasu Falls Quick Facts:
Location: Grand Canyon, Arizona
Type of Trail: Out and back
Total Mileage: Roughly 25 miles roundtrip (from parking lot to Beaver Falls and back)
Total Elevation Gain: The beginning of the trip is all downhill, you descend about 2,500 feet into the Grand Canyon, but that means the total elevation gain for the trip is about 2,500 feet when you hike back out.
Time Needed to Backpack: 3 nights/4 days
Permit Needed? Yes! Very strict on permitting for this trail.
About the Trail:
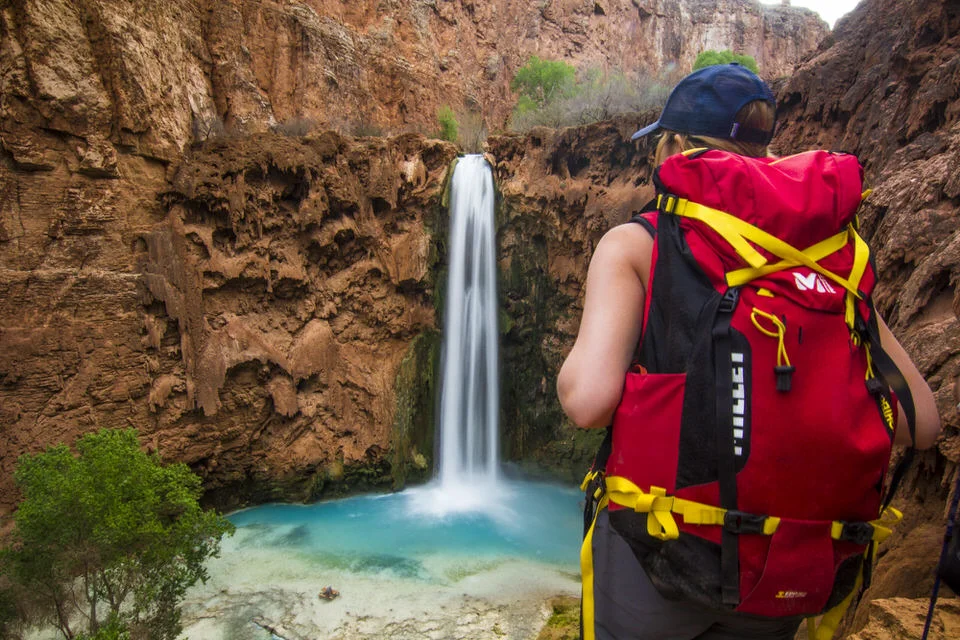
I’m not exaggerating, the Havasu Falls trail is one of the most beautiful backpacking trails I’ve ever gone on. Definitely in the top five, if not in the top three. Over the course of 3 nights and 4 days, you’ll get to spend your time backpacking in one of the most surreal and beautiful places in the United States.
People come from all over the world in order to see the beautiful, crystal blue waters and the five amazing waterfalls along this iconic trail. The hike is roughly 25 miles long as a round trip if you hike all the way down to Beaver Falls which is the final waterfall of the hike. The hiking is relatively easy, but there are some tricky sections to the trail that you’ll want to take extra caution on.
The effort is worth it though! All five of the waterfalls along the trail are absolutely breathtaking and like nothing else you can see in the United States.
I have a complete guide (linked below) to backpacking Havasu Falls, and it’s definitely one of the top go-to sources on this trail.
Read my full Havasu Falls Trail Guide
Also, getting backpacking permits for this trail is super competitive, and the process can be confusing, so I have a whole post just to walk you step-by-step through the Havasu Falls permit process. Check it out here:
Complete Guide to Getting a Havasu Falls Permit
Why Havasu Falls is a great backpacking trip for beginners: I think Havasu falls is one of the best backpacking trips for beginners for so many reasons! First, it’s not too difficult, especially if you break it up into 4 days of backpacking. Second, the views and waterfalls are simply insane! It’s one of the most beautiful places I’ve ever been to. Third, there are quite a few amenities here, like established campgrounds and toilets, so if you are still new to backpacking this can help ease you into it all. Honestly, the hardest part about this trail is getting the permits!
GRAB MY [FREE] BACKPACKING STARTER KIT
I created the Ultimate Outdoor Backpacker Starter Kit for you (and it's FREE)! This starter kit is filled with 14 pages of my best hiking and backpacking tips to help you learn what it takes to become a safe, confident, and self-sufficient outdoor backpacker!
3. AMC HUT TO HUT - NEW HAMPSHIRE
Backpacking AMC Hut-to-Hut Quick Facts:
Location: White Mountains, New Hampshire
Type of Trail: Point to point or out & back
Total Mileage: Varies, based on chosen huts
Total Elevation Gain: Varies, based on chosen huts
Time Needed to Backpack: 2-7 days
Permit Needed: Hut reservations required
About the Trail:
The Appalachian Mountain Club operates a network of huts in the White Mountains of New Hampshire. You can hike in and sleep in a hut, instead of a tent, which makes a great beginner backpacking trip. In fact, hiking to the Zealand Falls hut was my very first backpacking trip, and it was beginner-friendly enough that at the time, I didn’t even realize it was a backpacking trip!
You can get an easy intro to backpacking by hiking into a hut for a night then back out the next day, make it a challenge by hiking to all the huts, or enjoy somewhere in between by visiting a few huts. The easiest huts to hike into are Lonesome Lake or Zealand Falls.
The AMC huts are super popular, so make sure to make a reservation ahead of time to reserve your bed. And while you won’t have to pack a tent, you should carry in a sleeping bag (and perhaps a pillow), since the huts don’t provide linens.
Why backpacking to the AMC Huts is a great backpacking trip for beginners: Hiking to a hut is a wonderful intro to the White Mountains, and you don’t need to bring a tent or camp kitchen gear. You can choose your own adventure for the challenge that’s right for you. And the scenery is simply stunning!
This backpacking trail was submitted by Kate, Content Manager for She Dreams of Alpine.
4. SANDBEACH LAKE - COLORADO
Backpacking Sandbeach Lake Quick Facts:
Location: Rocky Mountain National Park, Colorado
Type of Trail: Out & back
Total Mileage: 9 miles
Total Elevation Gain: 2,086 feet
Time Needed to Backpack: 2 days/1 night
Permit Needed: Campsite reservation required. RMNP has a $30-35 entry fee (or National Parks pass) and also requires timed entry permits from the end of May to mid-October.
About the Trail:
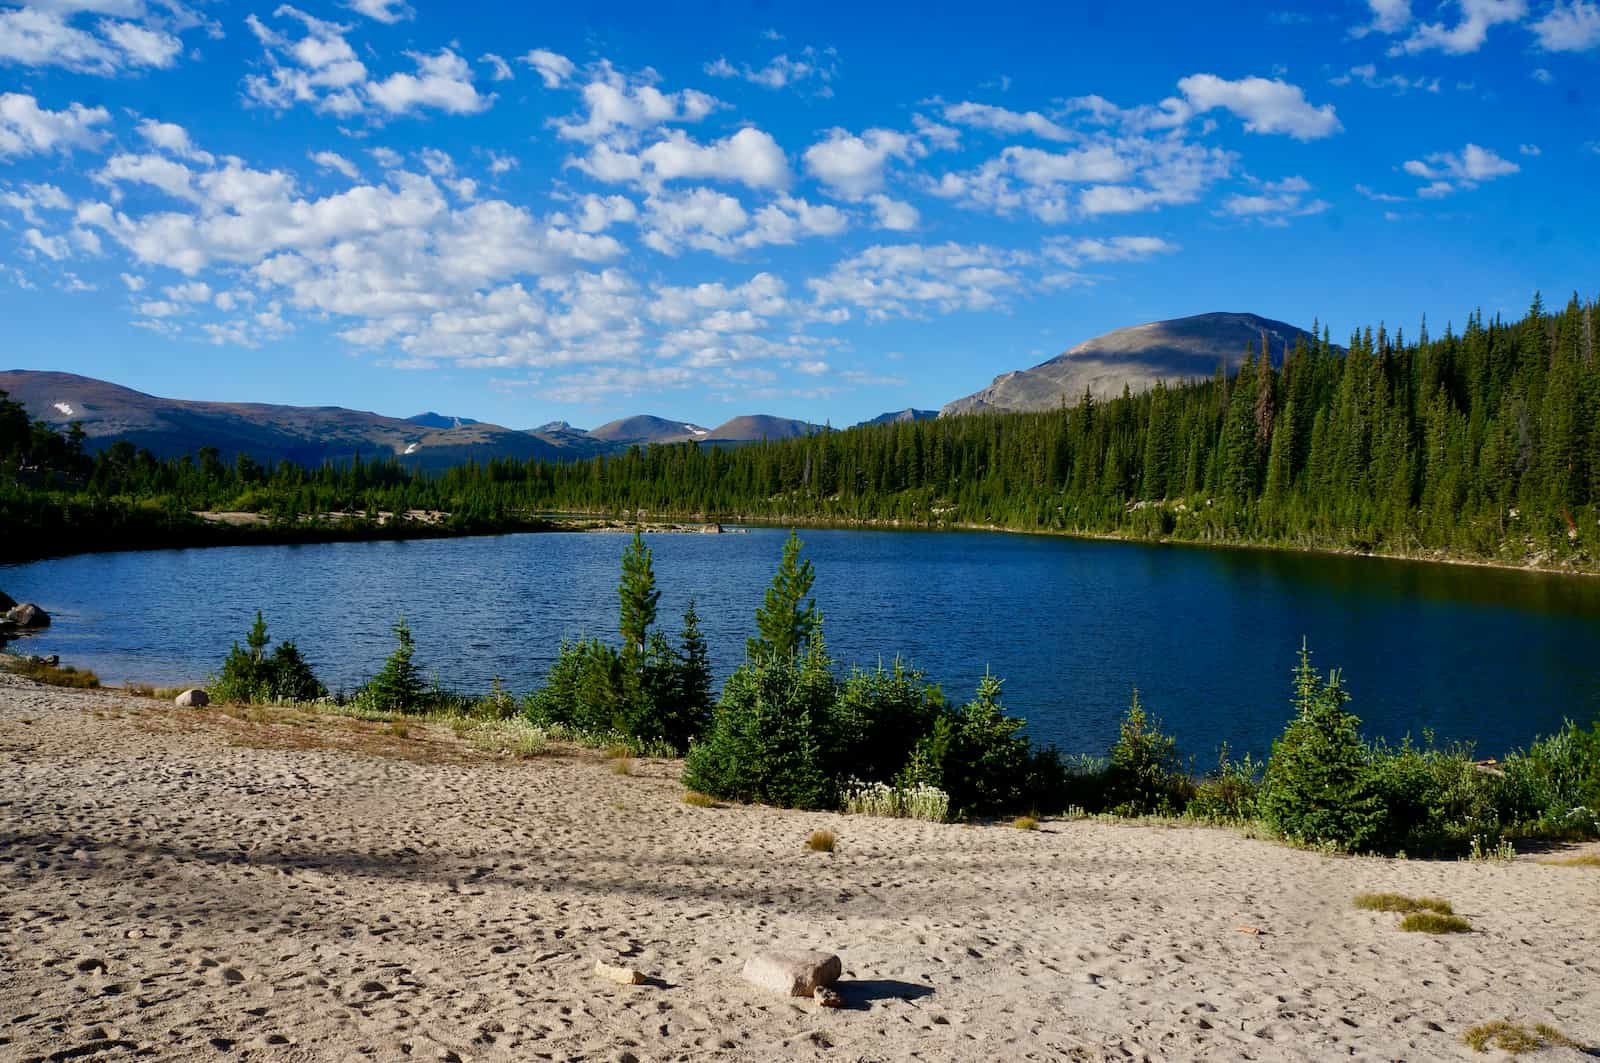
The trail to Sandbeach Lake is short enough that it can be done as a day hike, but that’s just one of the many reasons it makes an awesome beginner backpacking trip. It’s also a seriously gorgeous alpine lake where you can lounge on the beach and soak in the views. And if you’re brave, you can even take a dip in the icy cold water!
The hike in to Sandbeach Lake is only about 4.5 miles but does have around 2,000 feet of elevation gain. The trail is very well-maintained and easy to follow, so it still should be doable for beginners.
If you’re lucky, you can snag the coveted campsite right on the shores of Sandbeach Lake – although that does mean you’ll have to carry your gear the whole way. There are also campsites available earlier along the trail, and you could set up camp there, then just take what you need to play at the lake.
Why backpacking Sandbeach Lake is a great backpacking trip for beginners: It’s a short hike one-way to camp, and it’s a great way to learn about camping in bear country, since a bear can is required. Plus, it’s an alpine lake, which is cool for anyone!
This backpacking trail was submitted by Kate, Content Manager for She Dreams of Alpine.
5. The Lost Coast Trail - California
Backpacking the Lost Coast Trail Quick Facts:
Location: Northern California
Type of Trail: Most people hike this trail point to point (which requires a shuttle), though you could hike it out and back for a longer trip.
Total Mileage: Roughly 25 miles long if hiking point to point
Total Elevation Gain: Negligible!
Time Needed to Backpack: 2-3 days
Permit Needed? Yes!
About the Trail:
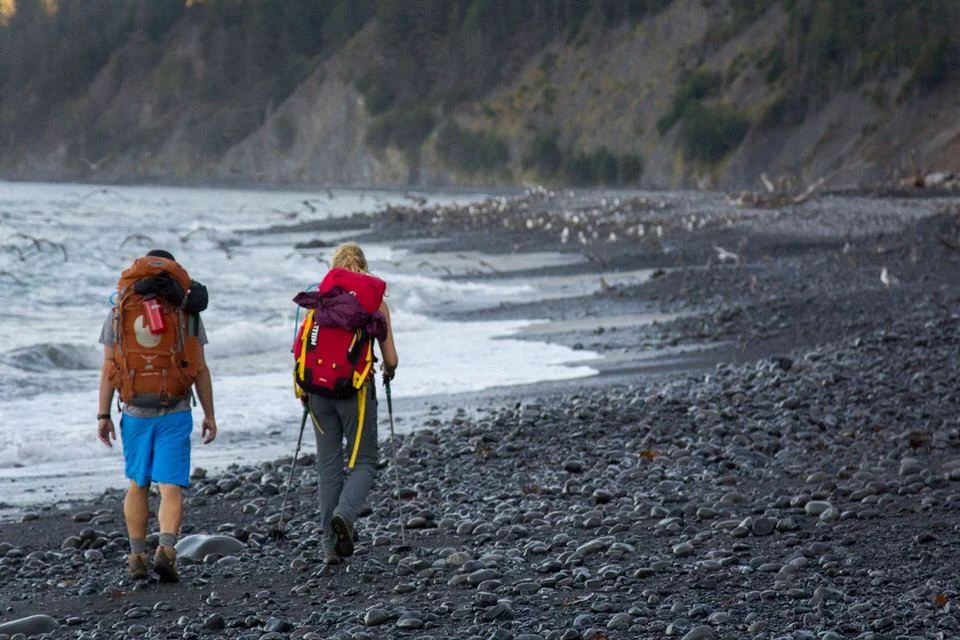
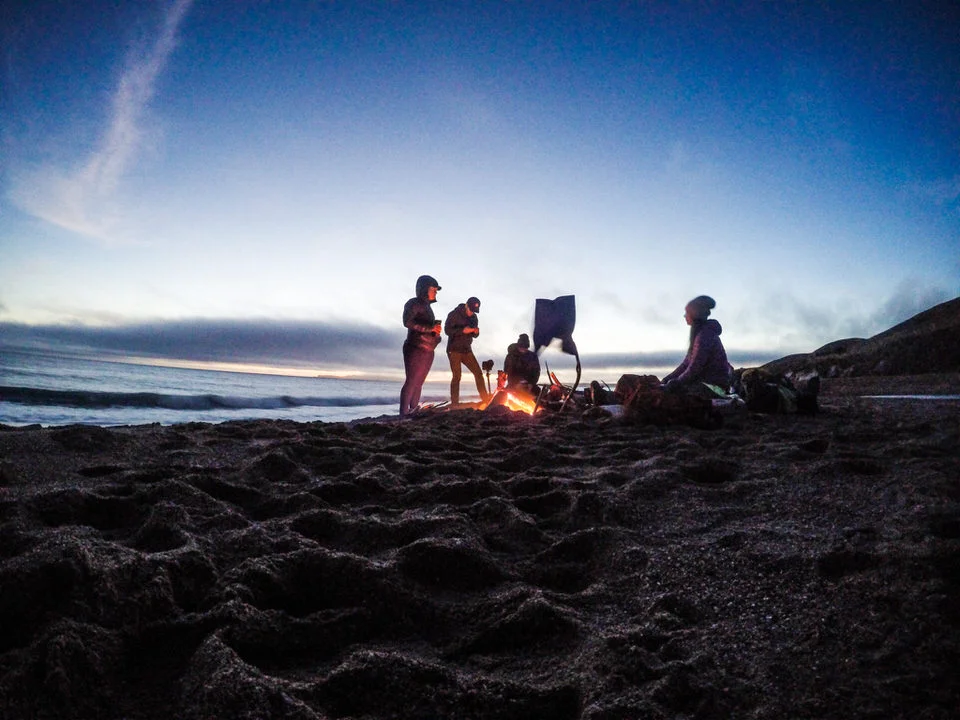
The Lost Coast Trail is a totally unique backpacking trip. It is just so completely different from the backpacking trips I’ve gone on in the Sierras. The Lost Coast Trail lies along one of California’s most beautiful rugged coastlines and follows some of its most isolated and breathtaking beaches. It’s stunning, to put it mildly!
There are two primary sections to the Lost Coast Trail, but most people are more familiar with the Northern section which runs from Mattole Beach to Black Sands Beach (near Shelter Cove).
The beauty of the Lost Coast Trail hike is that it can be practically hiked year-round thanks to the fabulous nature of California coastal weather. Your entire backpacking trip will be hiking the coastline, and it doesn’t get more epic than that!
I have a complete guide to backpacking the Lost Coast Trail, so if you’re interested in backpacking the Lost Coast Trail, be sure to read my full Lost Coast Trail Backpacking Guide.
Why the Lost Coast Trail is a great backpacking trip for beginners: This trail is great for beginners because there is practically no elevation gain involved. However, beginners do need to be sure to do plenty of research on this trail because there are some tricky sections to the hike where you have to watch the tide schedule. Again, you can read all about that in my backpacking trail guide above.
6. The Cottonwood Lakes Trail - California
Backpacking The Cottonwood Lakes Trail Quick Facts:
Location: Sierra Nevadas, California
Type of Trail: Out and back
Total Mileage: This varies depending on how many lakes you decide to go see, but it is in the 18 miles round trip range, or roughly 26 miles round trip if you decide to tack on Mount Langley (which would be considered a more difficult backpacking trip).
Total Elevation Gain: Roughly 1,000’ to the lakes or 5,900 to Mount Langley.
Time Needed to Backpack: 2-3 days if only backpacking the lakes
Permit Needed? Yes!
About the Trail:
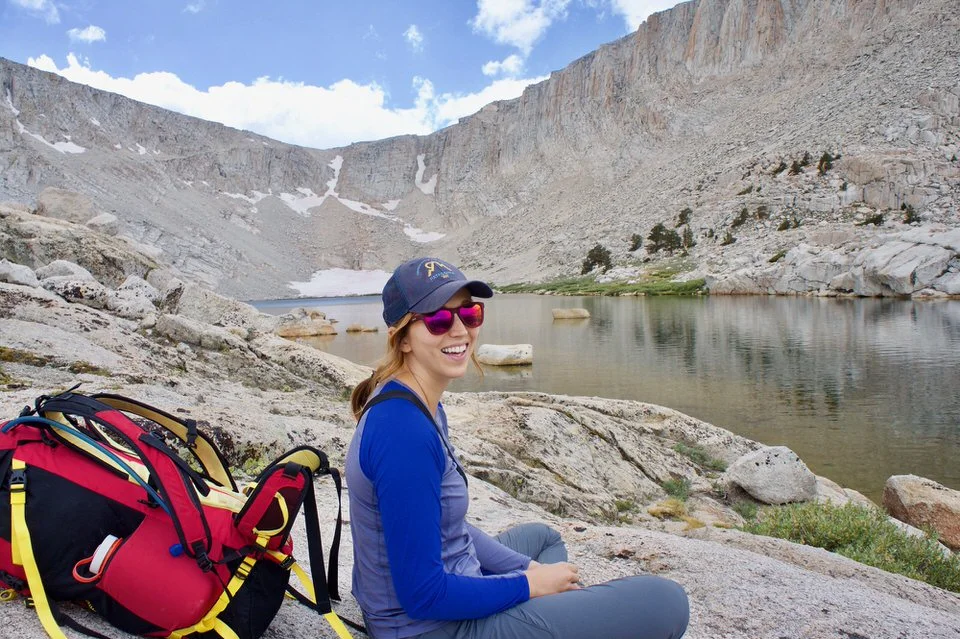
The Cottonwood Lakes Trail is one of the best backpacking trails for beginners because it is an absolutely stunning (and relatively easy) trail in the Sierra Nevada Mountains. The trail to the main Cottonwood Lakes area is easy to follow and fairly flat with minimal elevation gain. It makes for a nice way to get acclimated to the altitude of the mountains.
Once you make it to the main lakes you can do some excellent wilderness camping around the area. There are five main lakes known as the Cottonwood Lakes, and the best camping options are around the eastern portions of Cottonwood Lake Four and Five. There aren't really any good camping options near Cottonwood Lakes One and Two.
Make camp here and do some short day hikes exploring the area, or alternatively, plan to go visit one of the higher alpine lakes known as Long Lake. Long Lake is where most backpackers will camp if they are planning to summit Mount Langley (a California 14er) via New Army Pass. There are a ton of great options for dispersed camping here.
I have a complete guide to backpacking the Cottonwood Lakes Trail (plus a summit of Mount Langley), and it’s a great resource on this trail, so if you’re interested in backpacking the Cottonwood Lakes Trail, be sure to read my full trail guide on the Cottonwood Lakes Trail and hiking Mount Langley.
Why the Cottonwood Lakes Trail is a great backpacking trip for beginners: This trail is so lovely and beautiful, and it’s one of my favorite places to go in the Sierras. You could bring a group with varying levels of backpacking experience here, and it would offer something for every skill level. Take it easy and explore the lakes, go fishing perhaps, or take it to the next level and summit Mount Langley (a California 14,000 foot peak).
7. The Trans-Catalina Trail - California
Backpacking The Trans Catalina Trail Quick Facts:
Location: Catalina Island, California
Type of Trail: Point to point (typically)
Total Mileage: ~38.5 Miles Round Trip (Avalon to Parsons Landing to Two Harbors) is the official mileage from Catalina Island. My GPS logged just over 39 miles though.
Total Elevation Gain: 8,329 feet total elevation gain for trip, 8,475 feet total descent
Time Needed to Backpack: 4-7 days if a beginner
Permit Needed? Campground reservations are required!
About the Trail:
Catalina Island, located off the coast of California, offers some amazing hiking and backpacking opportunities all across the island, but the Trans-Catalina Trail is it’s crown jewel.
Most people start their backpacking trip in the town of Avalon and continue to hike across the length of the entire island, camping along the way in the designated campsites that need to be reserved ahead of time. The terrain is rugged, and sometimes tough, but the biggest obstacle of this trail is coordinating your ferry rides to and from the island, so be sure to do your research in advance!
Basically this trip is perfect for you if you're looking for a trail that is challenging but beautiful, "mountainous" but near the ocean, secluded but still very close to civilization! It is one of a kind, and one you aren't likely to forget, from the boat ride over to the island to the hilly seaside views. In fact, this would be a great trail to do solo, particularly if you are looking to take your first solo backpacking trip.
I have a complete guide to backpacking The Trans-Catalina Trail, with all the info you need to plan your trip, so be sure to check out my Trans-Catalina Trail Backpacking Guide if you want to do this trail.
Why The Trans Catalina Trail is a great backpacking trip for beginners: This trail has so many itinerary options, it’s fantastic! While you can certainly make this a very difficult backpacking trail (by doing this trail in fewer days), you can also spread your trip over multiple days and make it a much more easy-going and enjoyable backpacking trip. You’re also never too far from civilization in case something goes wrong!
8. Tuolumne to Devils Postpile - California
Backpacking Tuolumne to Devil’s Postpile Trail Quick Facts:
Location: Mammoth Lakes, California
Type of Trail: Point to point
Total Mileage: ~37.6 Miles
Total Elevation Gain: ~5,000 total elevation gain for trip
Time Needed to Backpack: 4-5 days for beginners
Permit Needed? Yes!
About the Trail:
If you’ve ever had your sights set on backpacking the John Muir Trail, but don’t have the vacation time to allocate to tackling the full trail (which can take 4 or more weeks for newer backpackers), then doing sections of the JMT is another fantastic option.
One of my favorite (and relatively easier) sections of the JMT it the portion from Lyell Canyon in Tuolumne to Devil’s Postpile (near Mammoth Lakes, California). You’ll spend your first 2 days making your way uphill towards Donahue Pass (11,031 feet), and then the remainder of your trip will be a beautiful downhill hike towards Devil’s Postpile (worth making the extra short sidetrip to see this unique geological feature).
I have a complete guide to backpacking from Lyell Canyon to Devils Postpile, so if you’re interested in backpacking this section of the JMT, be sure to read my full Lyell Canyon to Devils Postpile Trail Guide.
Why the Tuolumne to Devils Postpile Trail is a great backpacking trip for beginners: It’s a beautiful section of the John Muir Trail, which gives you a nice taste of what to expect if you ever decide to do the full JMT thru-hike one day!
Note: If you’re spending some extra time in the Eastern Sierras, be sure to visit Mammoth Lakes. There are a bunch of fun outdoorsy things to do in Mammoth Lakes in the summer.
9. Isle Royale National Park - Michigan
Backpacking Isle Royale National Park Quick Facts:
Location: Isle Royale National Park, Michigan
Total Mileage: Varies depending on trails you decide to connect
Total Elevation Gain: Varies depending on trails you decide to connect
Time Needed to Backpack: Can string trails together in this area for anywhere from 1 to 10 nights.
About the Trail:
Isle Royale National Park in Michigan is the perfect backpacking destination for those new to backpacking or for a first-time solo backpacking trip. There are two main trails that traverse the length of the island: the Minong Ridge trail and the Greenstone Ridge trail. Using these two trails, backpackers can string together an itinerary for anywhere from one to ten or more nights.
In 2014, I spent 8 days and 7 nights backpacking on the island. Although I was with a group of friends, it occurred to me at the time that it would be the perfect place to try solo backpacking. You can plan your itinerary to fit the mileage and elevation that best suits your skill level.
>>>Check out our full trail guide to Backpacking Isle Royale to see how Kellie, She Dream’s of Alpine’s Social Media Manager, planned her route on Isle Royale.
There are even three-sided shelters at some of the campgrounds, which is a fun option to have, although they fill quickly in the day. There is also a lodge on Isle Royale, and backpacker showers for a small fee. Even if you don’t stay at the lodge, it’s a great place to grab a burger before hopping the ferry back to the mainland.
Being on an island, there is plenty of water to filter every day. Many of the campgrounds are located on scenic coves, with boat docks perfect for swimming and relaxing. The park is closed in the winter, and can be pretty buggy mid-summer, making autumn the best time to visit.
The most difficult part of planning a backpacking trip to Isle Royale is coordinating your arrival and departure. Most visitors arrive by ferry, however the ferries don’t run every day, so it can be tricky to line up your backpacking itinerary with the ferry schedule.
Why backpacking on Isle Royale National Park in Michigan is a great backpacking trip for beginners: The trails are really well marked, with very few trail intersections. There are no real predators to worry about on the islands. Wolves and moose are here, but no bears or cougars to keep you up at night.
This backpacking trail was submitted by Leigh of Campfires and Concierges – to read more about this trail, check out her post here.
10. BIG PINE CREEK NORTH FORK TRAIL - CALIFORNIA
Backpacking The Big Pine Creek North Fork Trail Quick Facts:
Location: California
Type of Trail: Out and Back
Total Mileage: This really depends on how far you decide to go on this trail, but most itineraries will be around 5.5-6.5 miles out to the lakes (and then the same back to the trailhead).
Total Elevation Gain: Around 2,250ft to Second Lake or 3,000ft if you go to Fifth Lake.
Time Needed to Backpack: 2-3 nights depending on if you do some side trips.
Permit Needed? Yes!
About the Trail:
This backpacking trip in the Sierra Nevada provides epic views of aquamarine alpine lakes with stunning 14er mountain peaks in the background, and it’s absolutely perfect for beginners because you can basically choose your own adventure on the Big Pine Creek North Fork Trail.
There are so many camping options available around these gorgeous alpine lakes that you can break this trail up however you want. This means it’s a really great trail to build your skills as a backpacker.
You can hike out to First Lake on your first day then move camp to Fifth Lake the next day, or you can just set up your basecamp at Second Lake and do side trips for a couple days. No matter how you spend your time on this trail, you’ll absolutely love it!
>>>Check out my complete guide to backpacking the Big Pine Creek North Fork Trail to get all the details about this trail!
Why the Big Pine Creek North Fork Trail is a great backpacking trip for beginners: First of all, the alpine lakes on this trail are seriously jaw-dropping, so, believe me, you’ll understand the magic of backpacking when you see these views. But what makes the Big Pine Creek North Fork Trail especially great for beginners is that there are so many places to camp along the trail, so you don’t need to force yourself to make it to a certain destination each day. You can learn what you’re capable of on the trail and pivot if you don’t want to hike as far – or want to hike farther!
11. Ancient Lakes - Washington
Backpacking Ancient Lakes Quick Facts:
Location: Central Washington
Type of Trail: Out and back
Total Mileage: 4 miles round trip (or more if you decide to explore side trails)
Time Needed to Backpack: 2 days/1 night minimum
Permit Needed? You will need a Discover Pass to park at the trailhead
About the Trail:
Ancient Lakes is a perfect trail for those wanting to test out backpacking for the first time. It’s a flat two-mile trip to camp near these beautiful lakes in central Washington. The short distance to camp makes it easy to pack up and hike out if you decide backpacking isn’t your thing. It also offers 12 miles of trails to explore in the basin, so you don’t get bored while you are there. Just be sure to bring along a map or a GPS to get you back to camp or your car.
You will need a Washington Discover Pass to park at the trailhead. Also, be sure to pack in all the water you need as it’s not advised to drink the water from the lakes—even if you filter it. The accessibility of this trail and the remaining snowpack in the mountains make it a little crowded on weekends in early spring, so arrive early in the morning if you want one of the prime campsites!
Why Ancient Lakes is a great backpacking trip for beginners: The short distance to camp makes it less of a commitment. You could easily hike in and have plenty of time to set up camp and decide if you want to spend the night, while still having enough time to pack up and hike back to your car if you decide that you don’t.
This backpacking trail was submitted by Kaelee from Seattle Bred – to read more about Kaelee and her adventures, check out her blog here.
12. Coast Camp in Point Reyes - California
Backpacking Coast Camp in Point Reyes Quick Facts:
Location: Point Reyes National Seashore, California
Type of Trail: Out and Back
Total Mileage: ~4 miles round trip
Time Needed to Backpack: 2 days/1 night minimum
Permit Needed? Yes!
About the Trail:
Located an hour north of San Francisco, Point Reyes National Seashore is the Bay Area's off the beaten path national park. Despite being relatively unknown, most of the backpacking permits here are booked out months in advance. Coast Camp is one of those popular spots.
It's the closest you'll get to camping on the beach. It's an easy 2 miles on a fire road to get to camp. Coast Camp has water spigots and vault toilets. This makes it the perfect weekend trip for beginner backpackers.
Why Coast Camp in Point Reyes is a great backpacking trip for beginners: There's no cell service, so it feels remote, but should things go awry, you're only a short hike from civilization.
This backpacking trail was submitted by Paulina from Little Grunts – to read more about this trail, check out her post here.
DOWNLOAD My Complete BACKPACKING CHECKLIST PDF BELOW
Before you go on any outdoor backpacking trip, I recommend that you download and print off my backpacking checklist for quick reference. Just keep it close to your gear, and then you’ll always have it handy to review when packing for a trip.
My backpacking checklist below is a full detailed list of what you should consider bringing with you on any backpacking trip (particularly trips in the 3-5 day range). Plus, I also gave you a few extras! The download includes not only a backpacking packing list, but also a tip-sheet on layering outdoors, and 25+ backpacking food ideas!
International Beginner Backpacking Trails
Of course, backpacking isnot be limited to the United States! The trails in this section are some great beginner backpacking trails located outside of the US.
13. Cape Pillar Track - Tasmania
Backpacking the Cape Pillar Track Quick Facts:
Location: Tasmania
Type of Trail: Out and Back
Total Mileage: ~17 miles
Total Elevation Gain: Minimal
Time Needed to Backpack: 2 days/1 night minimum
Permit Needed? You’ll need the Tasmania Parks Pass to park your car at the Cape Pillar trail. If you’re visiting Tasmania, you can purchase a Holiday Parks Pass which gets you access to every national park in Tasmania for 60 days for just $90 per car.
About the Trail:
Many people taking a road trip around Tasmania will want to try one of its amazing hiking trails. However, some of these aren’t for the faint of heart; many involve summiting mountains with no clear pathway or hiking with gear for six days straight!
Luckily, there are plenty of beginner hiking trails in Tasmania as well. Lots of these are short walks, but the Cape Pillar track is ideal for the backpacker wanting to go on an overnight hike and see some beautiful scenery without too much exertion.
The 30km route spans Cape Pillar, traveling through a variety of different terrain – grassland, dense forest, a coastal path – before finally arriving at the cape’s rocky outcrop, where the you can enjoy two views, one out to sea and another back to land.
Although there are a few ups and downs, this isn’t a hike with much elevation due to its proximity to the sea. The cape sits at 300 meters above the water and that’s about the maximum altitude you’ll experience.
The Cape Pillar track is best done as a 2 day hike; free camping is available in Wughalee Falls and it is recommended that hikers head here first to leave overnight packs before hiking the rest of the trail as a day hike. This means that the first day is a 22 km hike and the subsequent day is an easy 8km. There are chalets en-route – these are for private tour groups, but they are happy for backpackers to fill up with water there.
Tasmania doesn’t feel the same heat as the rest of Australia, so the best time to do this trail is the summer (December to February). Spring and autumn are also plausible times – although do be aware that camping can be very cold in these months, and even colder in winter!
Why the Cape Pillar Track is a great backpacking trip for beginners: Experience the beauty of backpacking in Tasmania without too much physical exertion required!
This backpacking trail was submitted by Claire from Claire’s Footsteps – to read more about this backpacking trail, check out her post here.
14. The Wicklow Way - Ireland
Backpacking the Wicklow Way Quick Facts:
Location: Ireland
Type of Trail: Long distance hike
Total Mileage: 79 miles
Total Elevation Gain: ~10,500ft total gain
Time Needed to Backpack: ~1 week
Permit Needed? Yes!
About the Trail:
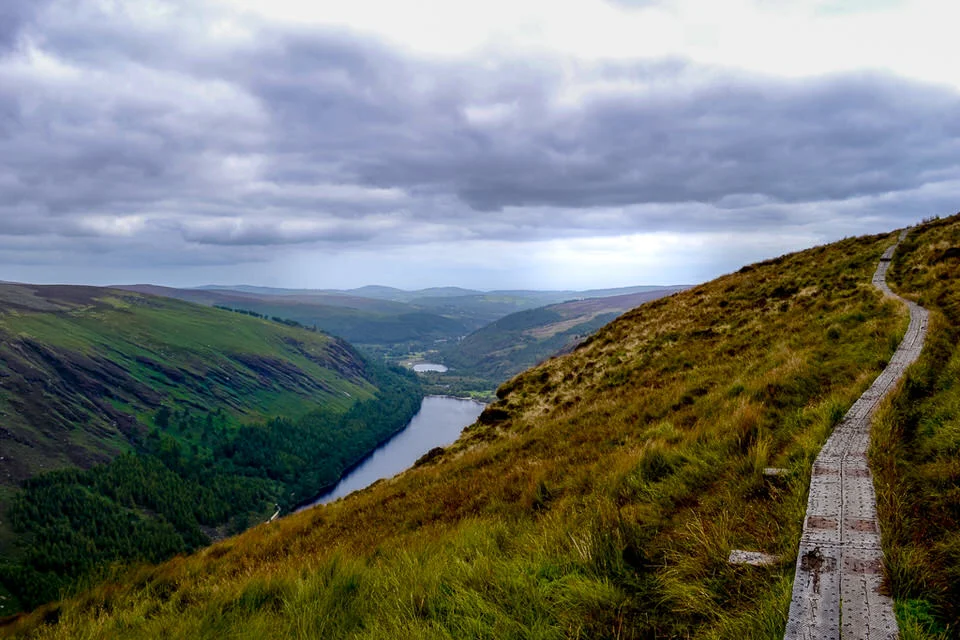
The Wicklow Way is one of Ireland’s best long distance backpacking trails. It is 79 miles (or 127 kilometers) of stunning green countryside. The landscape is pleasantly varied, though it all maintains that quintessential Irish charm! While there is some elevation gain in the more mountainous sections, you don’t need to be in tip-top shape.
The Wicklow Way stretches from Dublin’s suburbs in the north, to the village of Clonegal in the south. You can choose northbound or southbound—I recommend the latter because the elevation gain isn’t as difficult in the southern foothills of the Wicklow Mountains. As you head north, you hike into the mountains and encounter steeper daily climbs. The highest point is about 1900ft/600m, with a 3200m total aggregate elevation gain across the entire hike.
For average backpackers, the Wicklow Way shouldn’t take more than a week. There are plenty of villages along the way with accommodations to fit any budget, as well as a few wooden shelters along the trail. I think it’d be inconvenient to camp every night on the Wicklow Way, as there are long stretches of private land where camping is forbidden. It’s also sometimes difficult to tell if you’re on private land or not. Plus, a warm meal and hot shower in a B&B is literally heavenly after days of walking in the Irish rain!
Besides plenty of rain gear for the aforementioned inclement weather, you don’t need to worry about carrying a ton of stuff. You can stock up on snacks and such in the villages along the way. One particularly special stop is in Glendalough, where you walk through lakes and ruins, and Park Rangers educate the public on the area’s fascinating history. Take your time here, and everywhere along the Wicklow Way for that matter, and you’ll have a backpacking trip out of an Irish fairytale!
Why Wicklow Way is a great backpacking trip for beginners: Its proximity to Dublin and main roads and the option to mix camping and hosteling/B&B-ing combine to make the Wicklow Way a great choice for beginner backpackers.
This backpacking trail was submitted by Kaisa from Glam Granola Travel –to read more about her and her adventures check out her blog here.
15. The Highlands Backpacking Trail - Canada
Backpacking The Highlands Trail Quick Facts:
Location: Algonquin Provincial Park, Ontario, Canada
Type of Trail: Loop
Total Mileage: 12-22 miles (depending on which loop you choose)
Total Elevation Gain: ~5,000 feet
Time Needed to Backpack: 2-3 days
Permit Needed? Yes!
About the Trail:
The Highlands Backpacking Trail in Algonquin Provincial Park provides one of the best routes for beginner backpackers in central Ontario. The trail can be completed as a 19 km or 35 km loop (11.8 mi or 21.7 mi) in either direction, and is easily accessed year-round.
Strong hikers can do one of the loops in a single day, though most take two days to do so, staying at one of the many beautiful lakeside campsites available on the trail. Beginner hikers and backpackers would be comfortable completing the trip in 3 days, spending a night on either side of Provoking Lake (19 km loop), or spending a night on either Head Lake or Harness Lake (35 km loop).
The trail has some rolling sections of elevation gain and loss, following contours carved out by glaciers. Over the entire 35 km loop, elevation gain totals just under 1550 meters (5085 feet). The steep sections of the trail are easy to manage, though can become quite slippery after a rain or in the fall mud season.
Water is easily found along the trail, as the majority of it follows lakes that are clean and clear. Bring along purifying tabs and dip your water bottle straight into the lake to fill up!
Because of the popularity of Algonquin Provincial Park, permits should be booked well in advance through the Ontario Parks website. Pick up your permits at the West Gate or Mew Lake Campground and drive straight to the trailhead that offers ample parking. If you’re looking for something scenic, pick early October to go - it’s peak colour season, and the mix of maples, aspens, and birch trees will awe you as they change.
Why The Highlands Trail is a great backpacking trip for beginners: Low mileage mixed with an easy to follow loop trail and fantastic views!
This backpacking trail was submitted by Emma Harris from Trailheads and Trail Mix.
16. West Highland Way - Scotland
Backpacking West Highland Way Quick Facts:
Location: Scotland
Type of Trail: Long distance hike
Total Mileage: ~96 miles
Total Elevation Gain: ~10,200 feet
Time Needed to Backpack: 7-10 days
About the Trail:
West Highland Way is probably the most famous trail in Scotland. It takes you from Milngavie on the outskirts of Glasgow all the way to Fort William, 154 km (or 96 miles) to the North covering about 3100 m of elevation gain. It was opened in 1980 and became the first officially designated long distance footpath in Scotland.
Thousands of people walk the WHW each year, and for a good reason – it takes you through an excellent variety of terrain and breathtaking views. There is really no surprise why WHW is such a popular trail. It can be done very fast in four days or leisurely over nine or ten days. You can adapt it to your own physical strengths or length of vacation time.
What is great about the West Highland Way’s popularity is that for most of its length it has an outstanding accommodation base – B&Bs, hotels, and campsites – every tourist can find something that matches their budget or preferences.
When you add to it the Scottish approval for wild camping (except for a stretch along the Loch Lomond), you are free to spread your daily hikes as long or short as you want. This is of particular importance when you are a beginner, and you are not really sure if 10 km a day is a lot or not.
Additional help can be found with luggage transfer services. If you are not up to carrying a heavy backpack over the many miles, you can just grab a daypack and send your big bag to the next destination. On the way, you pass many streams (burns), so it's easy to refill your water bottles as long as you carry a water filter with you.
Why West Highland Way is a great backpacking trip for beginners: The West Highland Way is a fantastic introduction to the variety of landscapes in the Scottish Highlands. It does not require extreme climbing, yet provides beautiful views. It's safe, never far from civilization, and an excellent destination for beginner and solo hikers.
This backpacking trail was submitted by Owca from A Woman Afoot.
17. The Salkantay Trek - Peru
Backpacking the Salkantay Trek Quick Facts:
Location: Peru
Type of Trail: Point to point
Total Mileage: ~46 miles
Total Elevation Gain: ~11,600 feet
Time Needed to Backpack: 5 days
About the Trail:
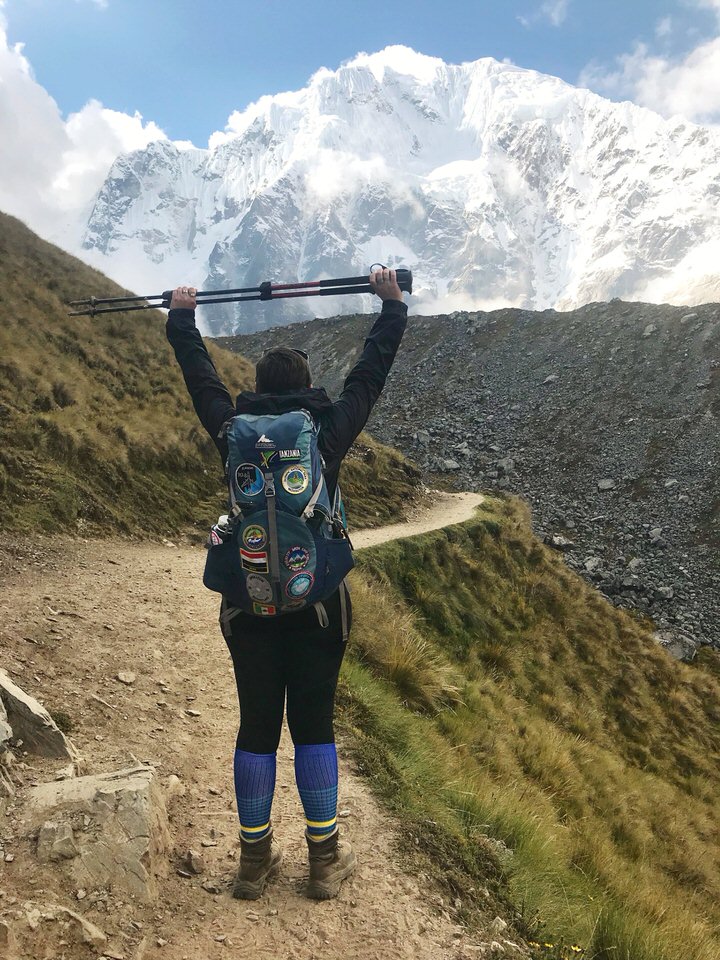
The Salkantay Trek, located a few hours outside of Cusco, Peru is a perfect introduction to high altitude hiking. This 5 day hike takes you past glaciers, jungle, over the Salkantay Pass - the highest point on the trail at 15,090 feet, with your final destination being Aguas Calientes and Machu Picchu.
The trail can be hiked solo or with a guide. If you are a first time hiker at altitude I would recommend hiring a guide in case you have an adverse effect to the altitude. If you're looking for a guide check out Mountain Gods Peru, a company owned and operated by an amazing woman named Elizabeth.
The trip breakdown is as follows, but can be changed based on accommodation and timing:
· Day 1: Mollepata to Salkantaypampa: 8.08 miles
· Day 2: Salkantaypampa to Collpapampa: 13.67 miles
· Day 3: Collpapampa to La Playa: 9.94 miles
· Day 4: La Playa to Aguas Calientes: 11.81 miles
· Day 5: to Machu Picchu: 2.49 miles
The Salkantay Trek is one of my favorite hikes in the world. I've done it twice and will be heading back to Cusco in May to do it again. The view of Salkantay glacier always takes my breath away. On the last day, if the sky is clear, you get a sneak peek of Machu Picchu across the valley.
Why the Salkantay Trek is a great backpacking trip for beginners: While at points this trail can be challenging - especially on day 2, the longest hiking day and reaching the highest point - I feel it is a great trail for beginners wanting to push themselves to do more hiking at altitude. With diverse terrain of steep uphills, rocky trails, and a combination of hot and cold environments, it provides a push for a beginner hiker to go to the next level.
This backpacking trail was submitted by Retha from Roaming Nanny – to read more about this trail, check out her post here.
18. Abel Tasman - New Zealand
Backpacking Abel Tasman Quick Facts:
Location: New Zealand
Type of Trail: Point to point
Total Mileage: ~ 37 miles (60km)
Total Elevation Gain: ~3,000 feet of gain
Time Needed to Backpack: 2-4 days
Water: Each campground provides water from a spigot though there are signs that recommend that you boil the water before drinking.
About the Trail:
Abel Tasman isn’t what you typically picture when you think of backpacking. The Abel Tasman coast looks like a lush, tropical island except with a mild climate. The track runs along the coastline from cove to cove, each of which is filled with crystal clear blue water and granite cliffs jutting out into the sea. These coves are absolutely beautiful to go for a swim in and secluded shores are perfect to relax on between your long hikes.
This is a great trip for beginners because the overall elevation gain isn’t too much, and you can cut it shorter at anytime if you aren’t having fun by hopping on one of the many charter boats that drive into the cove. Also, there is water, a pit toilet and even shelters to prepare your food at most campsites along the 60km Abel Tasman Coast Track.
This isn’t just a walk in the park though. Abel Tasman does have a few occasional steep parts but they’re very brief and don’t last long. This is also a great intro backpacking trip because among the 18 different campsites, 4 of them have huts that you can choose to stay in if you’d rather not camp in a tent.
While you can choose to make this just a one night trip, I recommend doing 32km of the trail and going for 3 nights so that you can take your time and enjoy the scenery. There are many campsites along the way but if you only have time for a one night excursion, I recommend camping at the secluded beach, Onetehuti.
Abel Tasman is best experienced as a one-way hike which can be done by taking a water taxi out to your chosen starting point and hiking back to the town of Marahau. The taxi ride in itself was one of our favorite parts of the whole experience of backpacking here.
Why Abel Tasman is a great backpacking trip for beginners: Little elevation gain, amenities all along the trail!
This backpacking trail was submitted by Robyn from Nomads with a Purpose – to read more about this trail, check out her post here.
Beginner Backpacking Trip Packing List
Here are several of the most important items to bring on your beginner backpacking trip, but this is definitely not a comprehensive list. Plus, some of the gear will vary based on the terrain and climate of the beginner backpacking trip you choose.
Be sure to check out my in-depth backpacking packing list guide for a full rundown of all the gear that I recommend for backpacking.
*Please note that this list contains affiliate links.
The Therm-A-Rest NeoAir XTherm sleeping pad is my favorite sleeping pad. It's lightweight and easy to pack. It's super comfortable (no body parts touch the ground), and it's warm!
Good To-Go Dinners are usually my dehydrated meal choice to bring on backpacking trips. The ingredients are great, and they are super delicious. My favorites are the Thai Curry and the Herbed Mushroom Risotto!
Remember that this is not a full gear list for backpacking, just some of the most important things. For a complete checklist of gear to pack, check out my printable backpacking packing list here.
DOWNLOAD My Complete BACKPACKING CHECKLIST PDF BELOW
Before you go on any outdoor backpacking trip, I recommend that you download and print off my backpacking checklist for quick reference. Just keep it close to your gear, and then you’ll always have it handy to review when packing for a trip.
My backpacking checklist below is a full detailed list of what you should think about bringing with you on any backpacking trip (particularly trips in the 3-5 day range). Plus, I also gave you a few extras! My download includes not only a backpacking packing list, but also a tip-sheet on layering outdoors, and 25+ backpacking food ideas!
I hope you enjoyed this post and that it gave you some fun new backpacking trip ideas for your next adventure outdoors!
Looking for even more backpacking goodness?
Check out these other useful posts for beginner backpackers:
Essential Backpacking Hygiene Tips & Feminine Care in the Outdoors
The Ultimate 3-5 Day Backpacking Packing List (PLUS Backpacking Checklist PDF)
7 Tips to Hiking and Summiting Your First Fourteener Mountain
10 Awesome Hiking Groups and Challenges to Encourage You on Your Hiking Adventures
Have a backpacking trip that you think would be a great idea for beginner backpackers? Let me know in the comments below!
Cheers,
Allison - She Dreams of Alpine














Important Permit & Reservation Deadlines for Popular California Hiking Trails & Campsites | Don't miss out on hiking or camping at some of Californias most popular sites because you missed the reservation deadlines. In this post I've outlined key deadlines to mark your calendars with for some of Californias most iconic locations such as Yosemite Wilderness Permits, Inyo National Forest Permits, Mount Whitney Permits, Half Dome Permits, JMT Permits, Joshua Tree camping reservations, Lost Coast backpacking permits and much, much more!. | shedreamsofalpine.com