The Ultimate 2025 Havasu Falls Hike Trail Guide - Backpacking Trail Details, Camping, Permits, Weather, Photography, and More
I’m not going to lie to you, the Havasu Falls hike is one of the most beautiful backpacking trails I’ve ever gone on. Definitely in the top five, if not in the top three! By this point, with social media being what it is today, most of you have probably seen photos from other outdoor enthusiasts and backpackers hiking into Havasupai Falls, and it’s probably something you immediately thought either, “That looks fake,” or “I HAVE to do this!”.
Don’t worry, you’re in good company. I thought both of those exact things. But the photos and colors are real my friend!
The beautiful bright blue waterfalls that you see while hiking into Havasupai Falls look like something out of a dream or from a different dimension. They almost seem fake or like they are oversaturated photos, but that is not the case at all here. Havasu Falls is truly a unique gem here in the United States and the waters are ACTUALLY that blue! But don’t just look at photos, get your butt out there and see them for yourself!
There are a lot of resources out there for this hike and a lot of good trip reports, but I always do my best to give you everything you need and I kind of think this post as an awesome one-stop-shop for planning your Havasupai Falls hiking trip.
I’ll help to make the process simple for you and cover everything you need to know about hiking Havasu Falls from getting a permit, trail details and GPX files, to what you should pack on your visit. Plus if you’re planning to stick around Arizona for a while, I’ve got a few great posts on other great hikes in Arizona that you can check out at the bottom of this post under resources!
However you plan to go see this trail and these beautiful waterfalls, whether backpacking with your own gear, going on a guided tour, or even helicoptering into Supai and day hiking to the waterfalls from your hotel (yes, theres a hotel there go figure), this should definitely be on your traveling bucket list. I have yet to explore another place quite like it. Let's dig in.
What We Will Cover in this Guide to the Havasu falls hike
There is a lot of information in this post, if you are looking for something in particular, feel free to skip ahead to one of the below categories. This Havasu Falls hike guide will cover the following:
A Brief History About Havasu Falls - A little information and history about Havasu Falls and the Havasupai people, in case you’re one of those people who likes to learn a bit more about a place before you go there!
Havasupai Hiking Details - Stats, baby! All the data for the trail, including how many miles, elevation gain, & more.
Havasupai Reservations and Permits - Everything you need to know about getting a Havasu Falls hike permit. You CAN’T do this hike without a permit in advance, so it is crucial information.
Havasu Falls Hike Map, Itinerary, & GPX File - I've created an interactive Google map detailing the whole trail and the waterfalls that you can explore. You can also download this map as a GPX file to upload into your own personal GPS device.
Best Time to Visit Havasu Falls (When to Go) - Details about the best time to hike Havasupai Falls and typical weather to expect on your trip.
How to Get to Havasu Falls - Where is Havasu Falls located and how do you get there?
Havasu Falls Camping - What to expect at the Havasupai Falls campground.
Additional Ways to Enjoy Havasu Falls - From mules to helicopters, to staying at the lodge in Supai, there are lots of different ways to experience Havasu Falls. This trail is surprisingly accessible for those who don’t want to go backpacking.
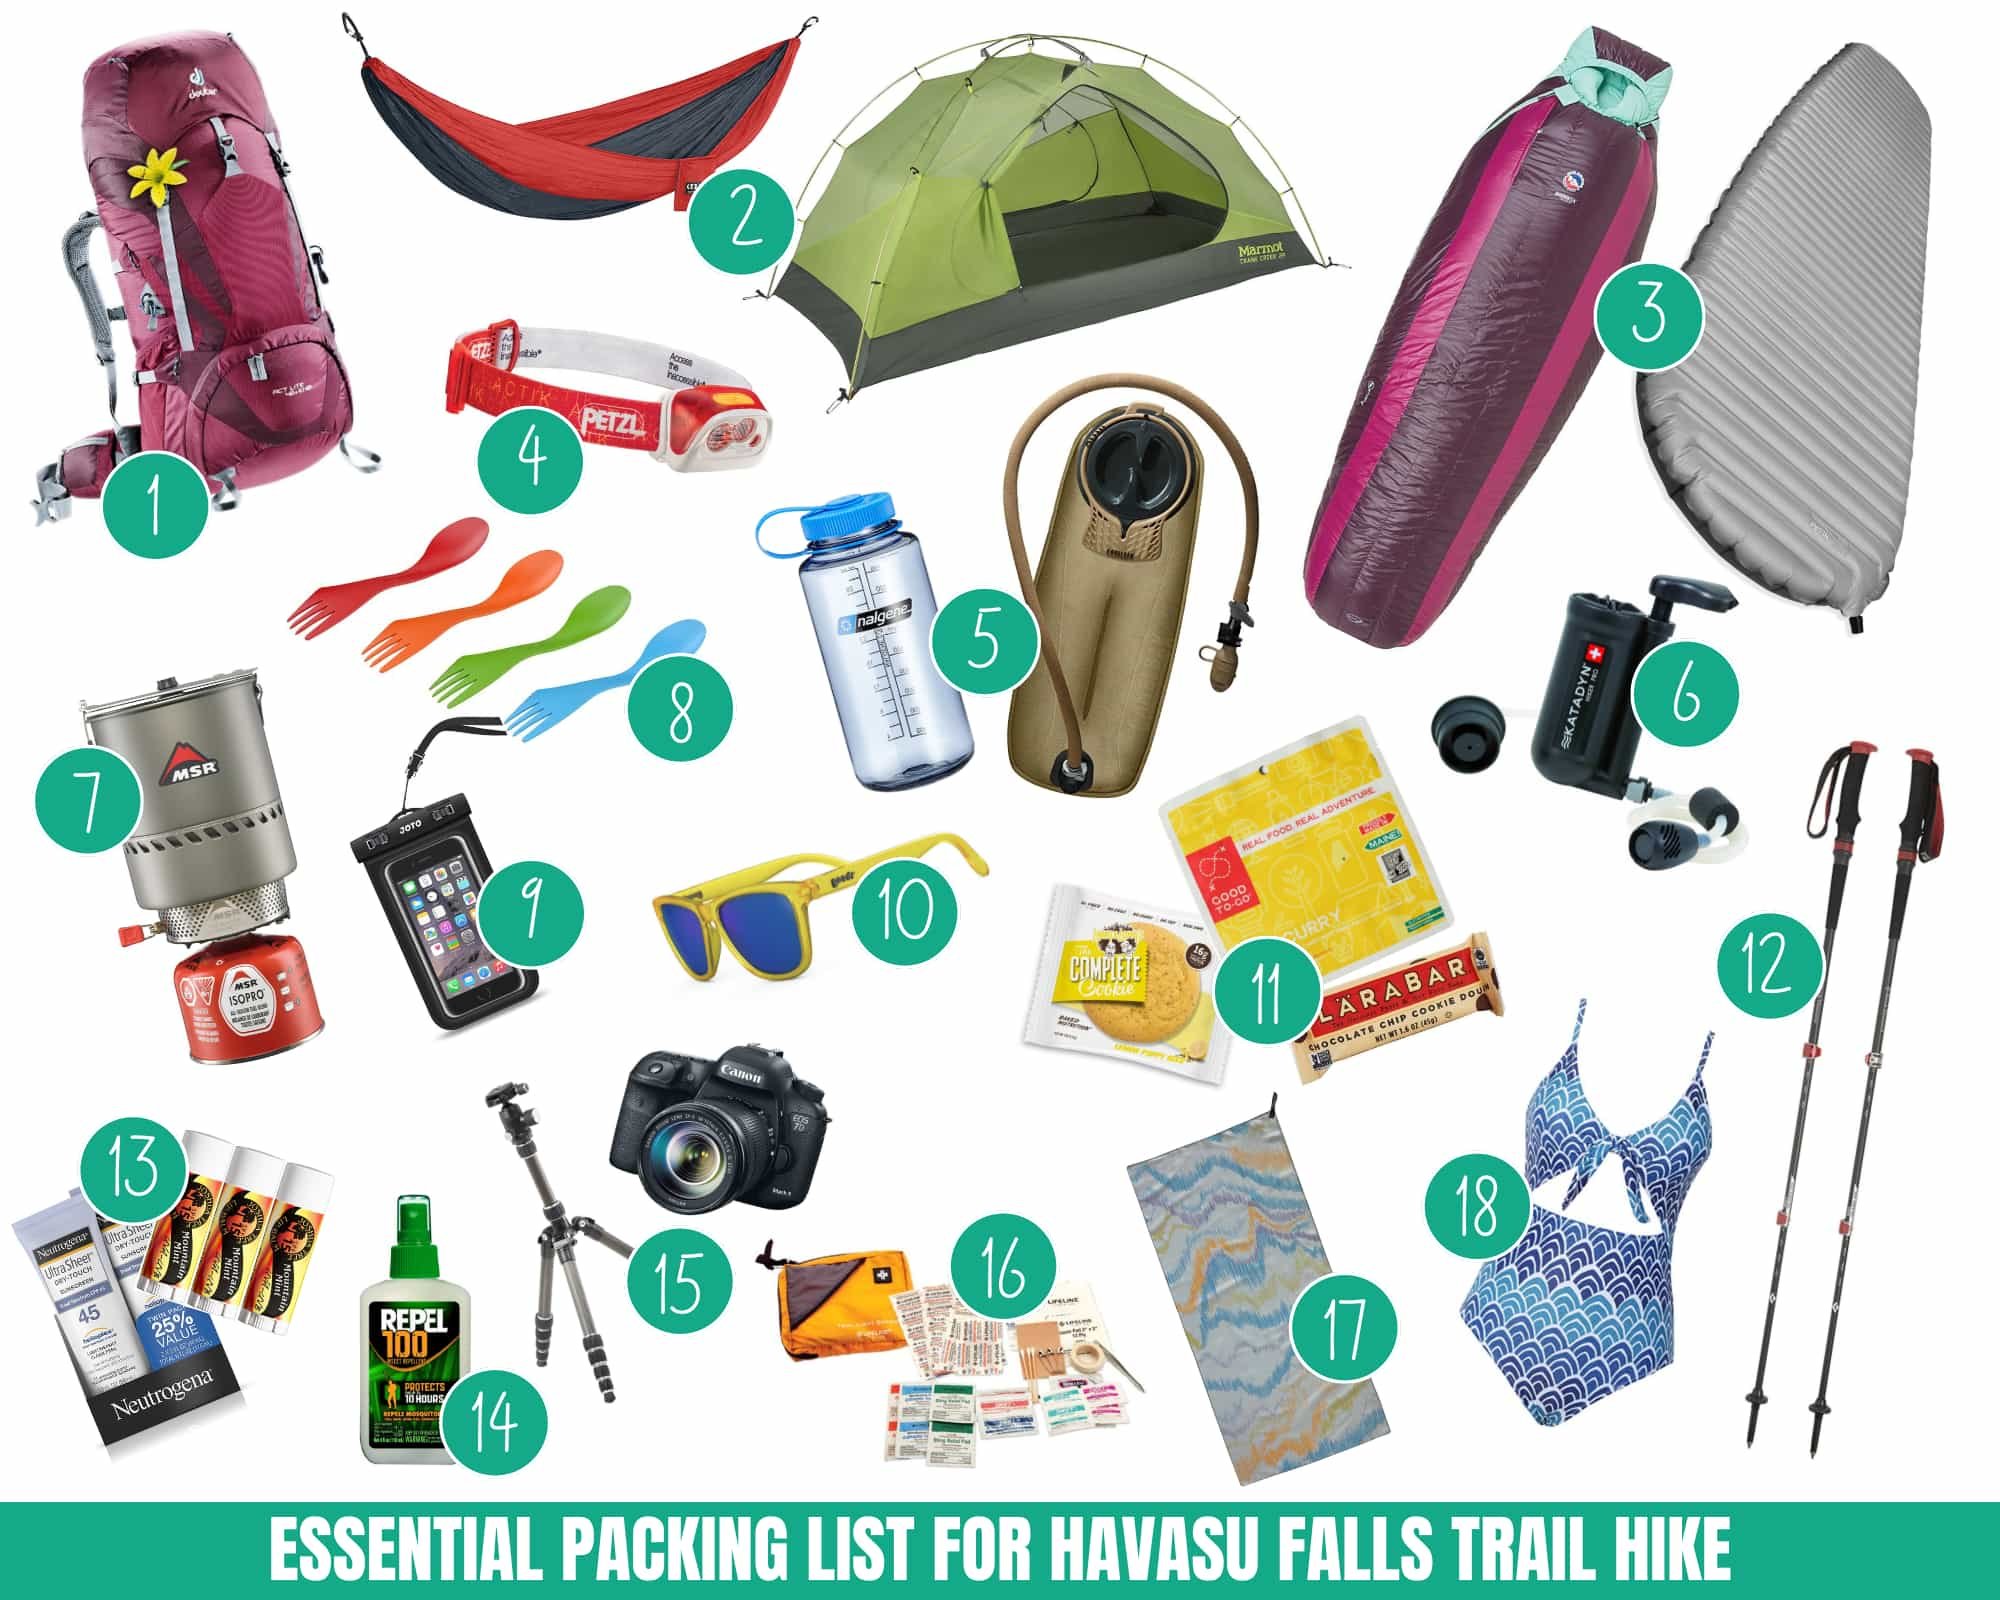
What to Bring - What are the essential items you should bring on your Havasu Falls trip? This Havasu Falls packing list will be mostly geared toward backpackers (since the majority of people who do this trail will backpack it, plus, backpacking is the best!).
Photography Tips - How to Take Awesome Havasupai Falls Photos - Michael's tips for taking the best photos of all the waterfalls along the Havasu Falls hike.
Turn-by-Turn Description of the Havasupai Hike - I’ll walk you through my experience on the Havasu Falls hike, including details on each of the 5 main Havasu Trail waterfalls.
Q&A - Common FAQs about the Havasu Falls Hike - Questions I frequently get from hikers wanting to do this trail, and my responses.
Plus, be sure to check out the bottom of this post to find more hiking trail guides in Arizona and other additional hiking, camping and backpacking resources!
Wait! Make Sure You Have a Permit First!
Permits are required in order to hike Havasu Falls. If you don’t yet have a permit, be sure to check out our Havasu Falls Permit Guide, which includes everything you need to know about the competitive permit process and how to improve your chances of getting a permit.
1) A Brief History Lesson about Havasu Falls & the Havasupai Tribe
This hiking area gets its name, "Havasu Falls Trail" from one (out of five) of the main waterfalls in the area called "Havasu Falls". This Havasu Falls Area is located on the Havasupai Indian Reservation. The native tribe to this area was first known as the Havasu Baaja, “people of the blue-green waters,” but today the tribe is more commonly known as the Havasupai Tribe. The Supai Village, located on the Havasupai Indian Reservation, is currently the most remote village in the United States. All of their supplies and mail are brought in via pack animals and helicopter.
A very brief history:
The Havasu Baaja people thrived for centuries in this area thanks to the aquifer that supplies water to this area we now know has Havasu Falls.
1776: The first white man, Padre Garces, discovered the Havasupai area and tribe.
1882: The Havasupai tribal lands were reduced to 518 acres by the federal government, which forced hard times on the tribe.
1919: The creation of Grand Canyon National Park - Havasupai is now surrounded by National Park land.
1975: 185,000 acres were re-distributed back to the tribe and this region is now very prosperous again due to tourism.
2) Havasupai Hiking Details
Whenever I’m gearing up for a hike and doing research on a trail, I like to know the quick information right off the bat, like how many miles is my hiking objective, what is the trailhead name, how many days should I set aside for it? So here’s a high-level overview of what to expect on your Havasu Falls hike.
Trail Name: Havasu Falls Trail
Trailhead Name: Havasupai Trailhead (located at the Hualapai Hilltop Parking Lot Area)
Havasupai Trailhead Elevation: 5,174 feet starting at Hualapai Hilltop Parking Lot
Type of Trail: Out-and-Back
How long is the hike to Havasu Falls? Roughly 25 miles roundtrip (from parking lot to Beaver Falls and back). Check out Section 4 ‘Havasu Falls Hike Map, Itinerary, & GPX File’ for more details.
Total elevation gain? The beginning of the trip is all downhill, you descend about 2,500 feet into the Grand Canyon, but that means the total elevation gain for the trip is about 2,500 feet when you hike back out.
How many days to spend at Havasu Falls? Plan on 3 nights and 4 days to do this hike. All campground reservations are required to be 3 nights. Check out Section 4 ‘Havasu Falls Hike Map, Itinerary, & GPX File’ for more details.
Havasu Falls Crowds: Very crowded. The permits for this hike sell out pretty much instantly. So if you are only looking for solitude… pick a different hike.
Havasupai Falls hike difficulty: This is hard to quantify. Since this trail is very popular, many people of all different experience levels do this hike. If you are very new to backpacking, you might find this hike very difficult. However, if you are an experienced backpacker, 3 days of hiking with only 25 miles roundtrip and 2,500 feet of elevation gain may feel very easy for you. For me, the hike felt easy. So let’s go with a moderate ranking here. The point is, as long as you are fairly physically fit and able, this hike should be doable for you!
Is a permit required to hike Havasu Falls? Yes. Absolutely yes. See my permit section below.
Is there drinking water available along the Havasu Falls hike? Bring enough water for hiking down to the campground (about 10 miles). Near the front of the campground, there is a water spigot flowing with creek water. However, it is highly suggested that you still treat the water! I personally, always treat my water when backpacking. Check out my packing list below for my recommended water filters.
Is this hike dog-friendly? Unfortunately, it's best to leave your dogs at home on this hike.
Is hiking into Havasupai Falls kid-friendly? As long as your kid is a good hiker/backpacker (or you are willing to carry them and their stuff), the hike to the first 3 waterfalls are definitely kid friendly. However, getting down to Mooney and Beaver Falls involves going down a slippery chain, stair and ladder section, so you will need to use your best judgement for your family if you decide to go further. As always, you should always consider you and your family’s hiking abilities before taking on any hiking or backpacking trip.
GRAB MY [FREE] OUTDOOR BACKPACKER STARTER KIT
I created the Ultimate Outdoor Backpacker Starter Kit for you (and it's FREE)! This starter kit is filled with 14 pages of my best hiking and backpacking tips to help you learn what it takes to become a safe, confident, and self-sufficient outdoor backpacker!
3) Havasupai Reservations & Permits
Getting Havasu Falls hike permits is probably the most complicated part about hiking the Havasu Falls Trail. Havasupai Falls Reservations are highly competitive to get and you are not guaranteed to get one. In fact, according to the Havasupai Reservations website, most permits sell out the first day reservations open.
You are REQUIRED to have a permit PRIOR to your visit, so no walk-ins, and sorry, no “day hiking” allowed. I won’t be surprised if in the future this system moves to a “lottery” system like popular California hikes such as Mount Whitney and Half Dome. Until then, here’s what you need to know.
I also have a separate blog post dedicated to the Havasu Fall Permit Process if you want even more details on how to prepare and improve your chances of getting a permit. It covers:
What’s New in 2025 for the Havasu Fall Permit Process
When to Apply
Where to Apply
How to Apply Step-by-Step (i.e. what does the process look like)
Cost: How Much Do Havasu Falls Hike Permits Cost in 2025
The Fine Print Behind your Permit for Havasu Falls (Things to Consider!)
Tips for Increasing Your Chances of Grabbing a Havasu Permit in 2025
What to Do if You Don’t Grab a Permit on Opening Day
When to Apply
Havasupai Campground reservations (for February to November) usually open up on February 1st each year at 8AM Arizona Time. This has been typical year to year, but the rules could change in the future.
Note: Arizona does not observe Daylight Savings Time, so make sure you adjust for your specific timezone appropriately.
In 2025, the Havasupai Tribe is continuing the presale reservation system first instituted last year. The presale registration period opens at 8 am Arizona time on December 16, 2024 and runs through 5 pm Arizona time on January 3, 2025. During this period, tourists will have an opportunity to purchase a limited number of reservations before the public on-sale opening day of February 1, 2025.
During the presale, tourists can register to purchase a 2025 reservation for the campground and/or lodge on 3 desired start dates. The presale requires a non-refundable fee of $20 per person per permit, and reservations are not guaranteed.
For more details about the new 2025 presale process, visit the official Havasupai Reservations site.
How to Apply
YOU MUST APPLY FOR YOUR HAVASUPAI FALLS CAMPING RESERVATION ONLINE! This is the only method for applying for permits for the Havasu Fall hike.
Where specifically? Go to the Havasupai Reservations Website and first set up an account. You MUST make an account on the Havasupai Website in order to get a campsite reservation, and it’s best to do this in advance!
Then on February 1st be ready to make your reservations!
There are no phone reservations.
To get a step-by-step overview of the Havasupai reservation process read this article: How to Get Havasu Fall Permits in 2025
How Much Does a Permit Cost?
This hike has gotten extremely popular, and the prices seem to rise every year. When I first did this hike back in 2016, I think we only paid about $80 a person, but it is much more expensive now.
For 2025, the pricing is $455 per person for a 3-night campground permit.
You must pay for your reservation in full at the time the reservation is made. So if you have a big group going on the hike, be sure to let your group members know to pay you up front.
Be prepared to throw down some cash for this hike, but trust me, it is totally worth the cost! If there is ever a hike that you spend a bit of money to experience, this is definitely one of them!
Other THINGS to Consider
There are a bunch of little rules and fine print around the Havasu Falls permit process. Here are a few things you should keep in mind as you prepare for grabbing 2025 Havasupai Falls backpacking permits.
How many people can be on one reservation? A campground reservation can include up to 12 people max. However, keep in mind that the larger your group is the harder it might be to get a Havasu Falls backpacking permit for a specific weekend. I recommend between 4-8 in a group.
Minimum & maximum night stay: All campground reservations must be for 3 nights / 4 days.
No day hiking is allowed! Also, please take note of some of the other rules on the Havasu Falls Trail. There are no drones allowed. There is no cliff jumping allowed, and there is no alcohol and drugs allowed. Plus, no littering, which I shouldn't have to even say here because you shouldn't go hiking if you intend to litter. That's just not cool.
There is only one name on the reservation, and that person on the reservation MUST be present on the hike or else the Havasupai hiking permit isn’t valid. YOU MUST BRING YOUR PHOTO ID ON THE HIKE TO CONFIRM.
Can I get a refund if I decide to cancel my trip? You can transfer reservations online for a 10% fee. To do so, simply view the details of an existing campground reservation from your account on the Havasupai Reservations website, click the "Transfer Reservation" button, and then choose how many spots (one, some, or all) to transfer away.
Don’t forget proof of your permit! Make sure to bring a printed copy of the email confirmation of your campground reservation or at least a screenshot of your reservation on your phone. Also make sure that you know your license plate number (or have a photo of it) of your vehicle that is parked at the trailhead. These things are all required at check in!
No one is permitted to proceed past the Supai Village without a wristband, so make sure that everyone in your group has a wristband before heading to the Campground.
Is there a fee/permit for parking? There is no fee or permit needed for parking and generally there is plenty of parking for everyone. Do not park in areas that says “no parking” and do not park in the parking area by the helipad. Please note that RV parking is tight, and might be trickier.
Your reservations are only for the hike and campground. If you want to book a spot at the lodge, you will need to do this separately, and they can be even harder to get.
What the Online Reservation Process Looks Like:
I can’t guarantee that the process will look exactly the same in 2025 as it did before, because the reservation system for 2025 is not currently open. (I’ll update the visuals accordingly once reservations reopen if anything has changed). Here is a step-by-step visual guide of what the online reservation process looked like the last time it was open.
1) When you go to the reservation website, you will click "Make A Campground Reservation". Again, you’ll want to do this on February 1st.
2) Then you will see a page (like photo below) where you select the number of people and days you want the reservation for. Remember there is a group limit of 20 people max and 3 nights max per reservation.
3) You will then be directed to another page (as seen below) which shows you the start dates available. This screenshot was taken after the February 1 deadline, so you will notice that there are not that many options left. However, there appears to be a "day of" reservation available. It appears that if your schedule is more flexible, you may be able to get reservations "day of" for your hike if that option is open to you.
4) You will have a timed limit to make up your mind, select your dates, and press continue. The final page is still "timed", and you will need to enter your details and payment info before that time is up in order to secure your permits. You can set up your account details and payment info AHEAD of time before February 1st, and I highly recommend doing this.
4) Havasu Falls Hike Map & Itinerary
Hiking the Havasu Falls Trail is pretty straight forward. The trail is well defined and well-signed.
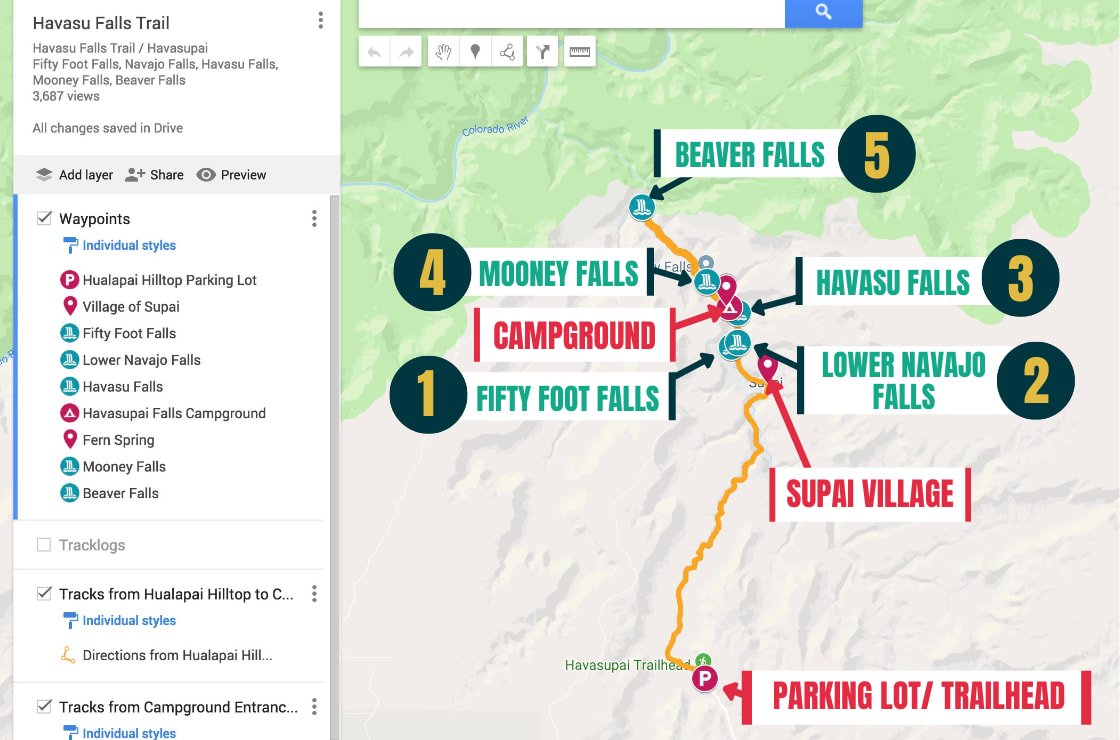
Below is my Havasu Falls Trail map. It details all the key milestones of your hike from the trail from the Hualapai Hilltop Parking Lot to Beaver Falls, as well as all 5 major waterfalls. If you click on the image below (or click here) you will be taken to an interactive map that you can further explore.
DOWNLOAD THE GPX FILE FOR THIS TRAIL!
Knowledge is power my friend, and I'm a girl who loves data. Get access to this trails GPX file PLUS my library of GPX files with tracks and waypoints for all the trails loaded onto the She Dreams of Alpine blog.
Load this puppy into your trusted GPS and rest easy knowing you have tracks to follow on your next hike or backpacking trip.
DON’T HAVE A GPS? YOU SHOULD.
I believe every hiker and backpacker should strive to be self-sufficient, and that includes knowing how to practice smart navigational skills in the outdoors.
This is an important safety skill set that I teach in-depth inside of my backpacking program. There’s no reason to risk getting lost in the outdoors.
Here’s what I recommend to get started:
(Note: This list contains affiliate links)
Gaia is offering a special 10% discount on a premium account to those who subscribe online through my link.
Don’t know where to start? If you need help with some Gaia GPS basics, download my quick Gaia GPS navigation 101 guide.
2) Get an SOS Device: Once you are able to, I recommend investing in some sort of SOS communication device like the Garmin inReach Mini or the Garmin inReach Explorer+ . These devices provide not only GPS tracking capabilities, but also an SOS satellite search and rescue communicator and text communication abilities in the backcountry.
My Go-To Trail Setup: The Gaia GPS app (premium subscription) + the Garmin inReach Mini.
Alternative to Garmin: Pair your Gaia GPS App with the Zoleo SOS device . With this set up, the Gaia GPS App serves as your GPS navigation device, and the Zoleo serves as an SOS/communication device.
Learn more about the best GPS devices for hiking here.
A Typical Havasu Falls Hike Itinerary
As I mentioned above, all reservations are for 3 nights and 4 days to do this hike. Most people typically hike all the way down to Beaver Falls, so the distances below reflect that as the turnaround point:
The Havasupai Hike is roughly 25 miles round trip (from the parking lot to Beaver Falls and back).
Day 1 - Hike to the Havasupai Falls Campground - 10 miles total
8 Miles from Hualapai Hilltop Parking Lot (Havasupai Falls Trailhead) to Supai Lodge. You will officially check in for your permits here at the Tourist Check-in Office in the Village of Supai. The Tourist Check-In Office is usually open from 6am to 6pm from May through October and 9am to 5pm the rest of the year.
2 Miles from Supai Lodge to Havasupai Falls Campground. On your way to the campground you will pass your first 3 waterfalls!
Pick a campsite for the night.
Highlights of Day 1: Explore 3 waterfalls Fifty Foot Falls, Navajo Falls, and Havasu Falls.
Day 2 & 3 - Havasupai Falls Campground to Mooney and Beaver Falls (and back) - 5 miles total
Wake up and hike 0.5 Miles from Havasupai Falls Campground to Mooney Falls.
When You’re done exploring Mooney Falls, hike 2 Miles from Mooney Falls to Beaver Falls
Spend time exploring the waterfalls on day 2, then make your way back to camp before sunset.
Highlights of Day 2 & 3: Explore 2 waterfalls Mooney Falls and Beaver Falls. Depending on how tired you feel, you can take it easy on day 2 and do more hiking on Day 3, or vice versa. Go at your own pace, there is plenty to do and see on the trail!
Day 3 - Havasupai Falls Campground back to the parking lot - 10 miles total
It will take you longer to hike out than it did to hike in because you will be going uphill and out of the canyon this time. Plan accordingly.
Note: If you are an EXTRA ambitious backpacker and hiker, you could extend your hike all the way to the Colorado River! However, I have not done that, and looking at the map you would need to be prepared to add extensive mileage to your Day 2 itinerary. You’d probably want to have 4 days at minimum if you were going to do this.
Day 2 to hike all the way to Colorado River (and back to the campground), and Day 3 to explore Mooney and Beaver Falls, and Day 4 to hike out. Again, I don’t recommend this for most hikers going on this trail… but could be a fun option if you have more time and are in good physical hiking shape.
Havasu Falls Hiking Video
To give you a taste of what to expect on your hike, check out this awesome video of the Havasu Falls Trail from YouTuber, Blue Zither. It is an absolutely stunning representation of the hike!
5) Best Time to Visit Havasu Falls
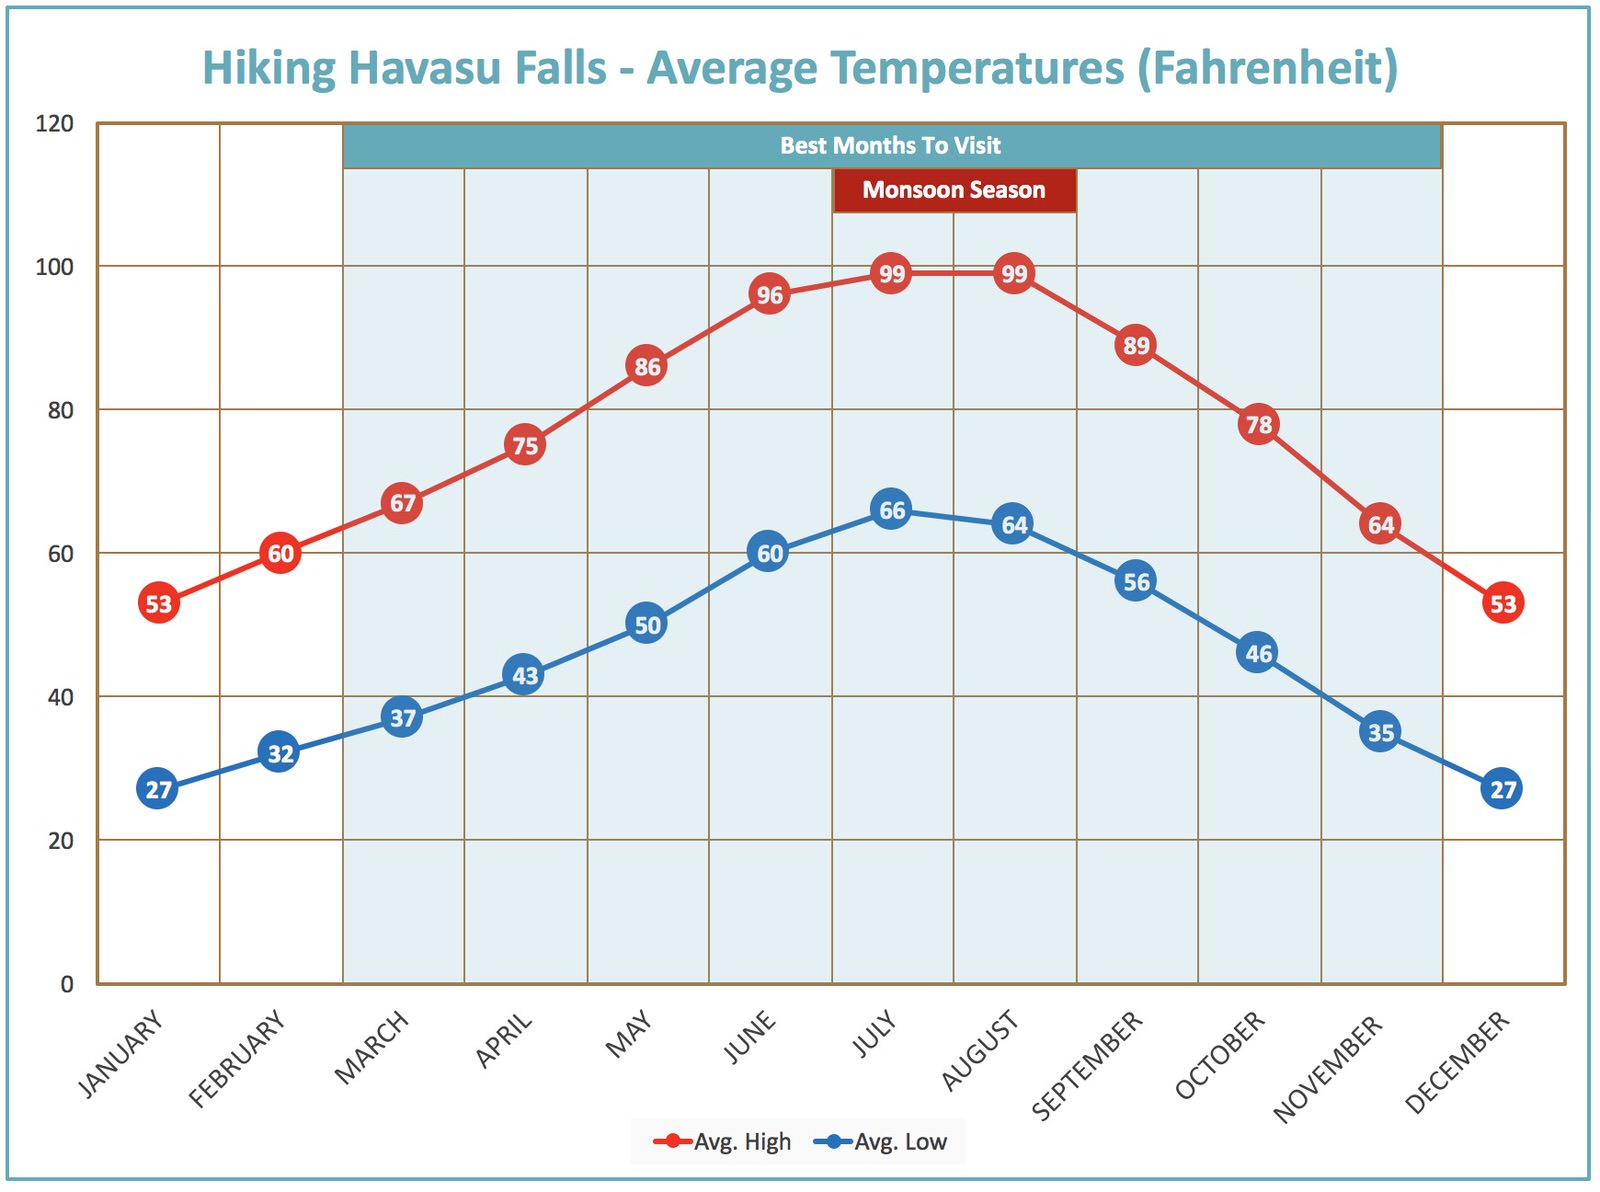
In my opinion, the best time to go to Havasu Falls would be in the spring or fall. However, you can technically visit from February to November, and to be honest, the permitting system is SO COMPETITIVE that literally anytime you can grab a permit is the best time to go!
Be flexible with your date range, and plant to have a few alternatives in your back pocket. If you are doing some pre-planning though and trying to be strategic with your permit grabbing plan, then see the chart below for details on Havasupai Falls weather information.
The summer can get very hot, up to 115 degrees F. The trails into Supai are closed if the temperatures reach 115 degrees F or above, so please note this risk to your reservation in the summer months. And again, they don’t make any guarantees that they will reschedule your permit or refund it. This is why on their website they recommend getting travel insurance. I didn’t do this, but it’s totally an option if you want to be prepared.
There is risk for heavy afternoon rains in July and August at Havasu Falls with the potential for flash floods. There have been several flash floods over the years (there was one in 2024), so definitely check the weather closer to the day of your hike to be on the safe side. Flash floods have changed the landscape even at Havasu Falls – the original Navajo Falls was removed by a big flash flood back in 2008.
As you can imagine, choosing the best time to hike Havasupai Falls really depends on what you prefer. The cooler months of the year (early spring and late fall) are better for exploring the trail, but can feel cold to get in the water. Plan to bring layers!
The summer months will make it quite hot hiking in, so plan to do your big hiking early in the morning before it gets too hot. However the summer months will be awesome for getting in the water!
Note: Tourism season for Havasu Falls runs from February through November. Permits are not available to visit in December and January.
6) How to Get to Havasu Falls
The Havasu hike is located just outside the boundaries of Grand Canyon National Park in Arizona. It can really vary on how long it takes you to drive there, but I've listed some estimates on the map below.
To get to the trailhead you will be traveling to Hualapai Hilltop Parking Lot which is located at the end of Indian Road 18. Whether you are coming from the east or the west, you will turn onto U.S. 66 highway in Arizona. Keep an eye out for for Indian Highway 18, and turn onto this road. You will then travel 63 miles (about 1.5 to 2 hours) north to Hualapai Hilltop Parking Lot.
Make sure you have enough fuel in your car to cover about 200 miles of driving before you get onto the Indian Road 18. The closest stations around about 70 miles away from the trailhead at Peach Springs and the Grand Canyon Caverns area. The next closest gas stations are in Kingman and Seligman and Ash Fork.
Parking: There is plenty of parking space for all visitors and there are currently no fees to park here. Pay attention to the parking signs in the area though, because violating the parking regulations could result in your car getting towed. RV parking is very tight.
7) Havasu Falls Camping Information
Where to Camp: The Havasupai Falls campgrounds, while requiring permits, are first-come/first-serve as far as picking a place to pitch your tent goes. The entire campground area is about a mile long and is sandwiched between Havasu Falls and Mooney Falls in the Grand Canyon. Most of the campsites are located along Havasu Creek, and you can look for clearings and benches to pick out your site.
Most of the sites are excellent for camping with flat campground areas. There are also a ton of trees which allow aunique hammock camping options!
You are not allowed to camp anywhere else besides the Havasupai Campground during your hike.
Where to Get Water: The water spigot that you can use to fill up your water is located at the entrance of the campground, so it could be advantageous to camp there. However, it is also nice to walk a bit further down the way to get away from the crowds for a bit. We just filled up our water + an extra water drum and hiked further down Havasu Creek as we walked into the campground. Then we didn't have to hike back in the morning to fill up our water on Day 2.
Bathrooms: There are 4 maintained bathrooms dispersed along the campground area.
Cooking and Campfires: Backpacking stoves are OK, but there are no campfires allowed.
Respect Camp Rules: No loud music, and quiet hours are from 8pm to 5am. There is no alcohol and drugs allowed. Also, pool floaties are no longer allowed. And I repeat, no littering, which means everything!
Don’t leave your trash behind for someone else to pick up, and be respectful of this area so that many more people can come to enjoy this place! This is not your all-inclusive resort, this is a respected tribal land and we must take care of it.
Animals at the Campground: There are definitely some small critters like mice and squirrels that run around, so always keep your food zipped up and locked away at all times. Never leave your food out and unattended. These animals will go to all lengths to get to your food, including chewing through backpacks and tents. There are special rodent-proof containers at the campground where you can store your food.
Above is a picture of what our campsite area looked like at the Havasupai Falls Campground. We set up camp on the opposite side of Havasu Creek and further down from the entrance of the campground (there are plenty of little foot bridges that cross over the creek), and although not right by the water, we were still very close to it, and we were pretty close to a bathroom as well.
8) Additional Ways to Enjoy HavasuPAi Falls
If backpacking and camping aren’t your style, there are additional ways to enjoy the Havasu Falls Trail that take out a bit of the hiking and “roughing it” aspects.
Havasu Falls Helicopter – There is a fancy helicopter transportation option during certain times of the year that will fly you in and out of the canyon and from The Hilltop to a landing area at Supai Village if that is more your style. This will knock out 20 miles of the overall hiking required to see the falls. You will still have to hike a bit to get to the falls, but it definitely cuts down on the mileage. You can find more information on the helicopter rides into the canyon here.
Havasupai Lodge at Supai Village – If camping isn’t your style, there is a lodge at Supai Village that you can stay at. The lodge isn’t necessarily 5-star quality, but it does have showers and toilets and comfy beds to sleep on. You can find more information on the lodge here.
Havasupai Mules – There are also options to ride pack mules or have pack mules carry your gear in and out of the canyon. You must make this reservation at least 1 week in advance of when your camping permits or lodge reservations are. There are many different options for using the pack mules and pricing is constantly changing, so to get update prices and more details, check here.
Havasu Falls Tours & Guided Trips – There are also some guided trips to Havasu Falls. If you were unable to get a permit yourself but really want to go on this hike, this could be an option for you. Companies like Arizona Outback Adventures provide some 3 day and 4 day trip options to visit the falls.
9) What to Bring - Havasu Falls Packing List
*Please note that some of the links here and in this post are affiliate links.
If you plan on backpacking the Havasu Falls Trail Hike there are some essential items that you should bring with you on your hike. Check out our Essential Havasu Falls Backpacking Packing List for a full list of the gear I recommend bringing on your Havasu Falls backpacking and camping trip. Below is a general list of what we recommend, but check out our full post for more details on why we love all the gear!
Alternatively, you can check out my full detailed 3-5 Day Backpacking Packing List.
NOTE: POOL FLOATIES ARE NO LONGER ALLOWED! PLEASE DON'T BRING THESE.
IMPORTANT! BE SURE TO BRING:
Your photo ID (especially if your name is the one holding the reservation), a printed copy of the email confirmation of your campground reservation or at least a screenshot of your reservation on your phone. Also make sure that you know your license plate number (or have a photo of it) of your vehicle that is parked at the trailhead. These things are all required at check in!
DOWNLOAD OUR BACKPACKING PACKING CHECKLIST
Never leave any crucial items behind when you head out on a backpacking trip! I’ve compiled all the essentials here for you so that you’ll never forget anything vital. PLUS, as a bonus, I’ve included a list of 20+ of my favorite backpacking food snacks and meals inside of this list for inspiration.
10) Photography Tips - How to Take Awesome Havasupai Falls Photos
Probably one of the coolest parts about hiking the Havasu Falls Trail is the opportunity for amazing photography. Similar to White Sands National Monument, the Havasu Falls Trail is a photographers dream! Here are a few tips from Michael, the primary photographer for She Dreams of Alpine, for getting the best Havasu Falls pictures:
Learn how take long exposure shots. Be familiar with your camera. Depending on what type of camera you have, you might have access to superior features such as long exposure shots. Long exposure shots will give you the effect of something moving in the image, such as water flow, and give you the opportunity for night photography which allows you to capture images in low light.
Bring a tripod. Bringing a tripod will help you keep your camera steady for long exposure shots and will help keep your camera out of the water. We sometimes took photos while standing in the water, which helped frame the waterfalls better. Our favorite tripod is the Carbon Fiber Travel Tripod.
If taking night photography, bring a bright light. If this is something you are interested in, bring a light that is brighter than your headlamp, such as a bright bike light or some sort of LED flashlight. You can use these extra lights to help expose the night shot or bring out a particular subject within the photo.
Consider bringing a wide angle lens. It can be nice to have a wide angle lens with you on this hike to capture the magnitude of the different waterfalls.
Bring an easy to carry protective case for your camera equipment. It is a wet environment and a steep hike at times, so it is good to bring an easily portable camera bag that you can go hands-free with.
Consider bringing a waterproof camera such as a GoPro. If you want to get more in the water with your camera without worrying about getting wet, a GoPro HERO4 Silver with water housing is a great option.
Wear bright colored clothing or swimsuits for photos. The main colors at Havasu Falls are bright blue and red from the rocks, so consider wearing other colors, such as yellow, that will stand out against these two colors.
Be patient & wait for the perfect shot. Havasu Falls trail is a very popular hike and there will be a lot of crowds visiting the falls the same time that you are. Unless you are skilled at Photoshop, consider waiting just a little while or waking up earlier than others to take photos of the falls without a ton of other people around.
Only bringing a phone to take photos? That’s ok, these days you can still take great photos even if you only have your phone. Many newer phones, such as the iPhone, even have long exposure options and water-resistant features. However, we still recommend bringing a waterproof casing for your phone just to be on the safe side.
For details about what camera equipment we recommend for outdoor photography, check out our post on Essential Equipment for Outdoor Adventure Photography.
11) Turn-by-Turn Description of the Havasu Falls Hike
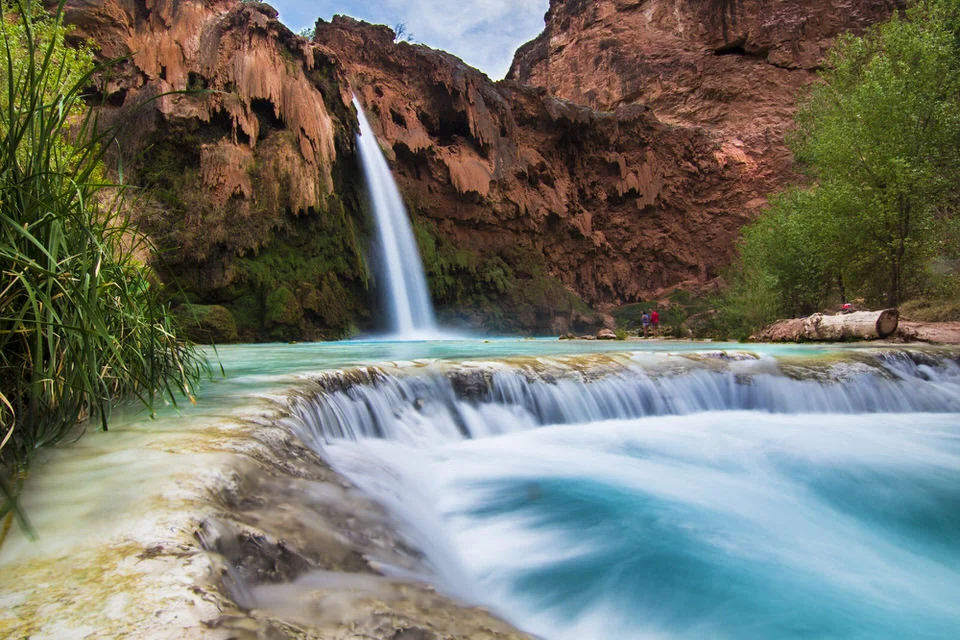
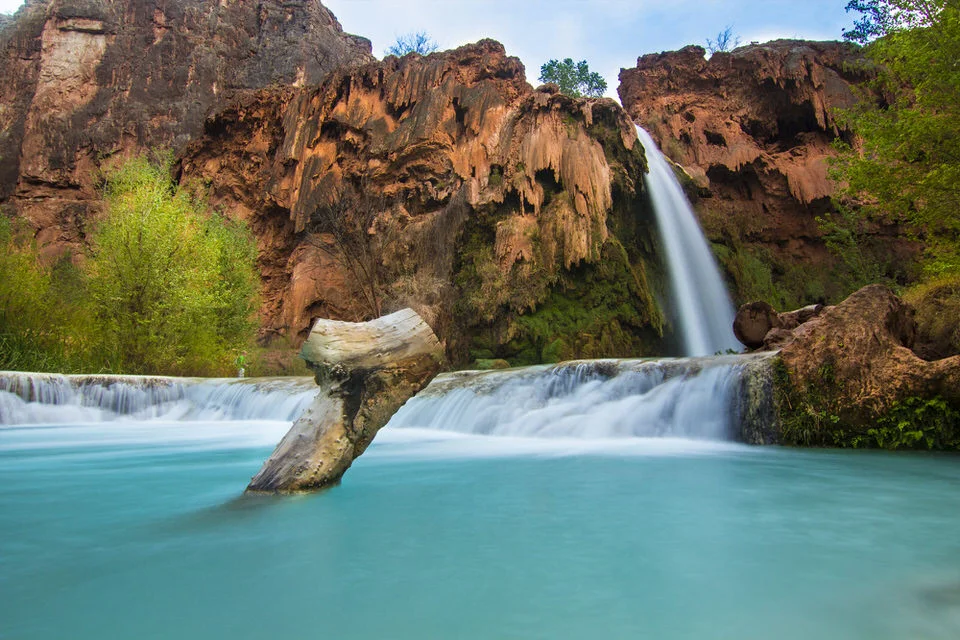
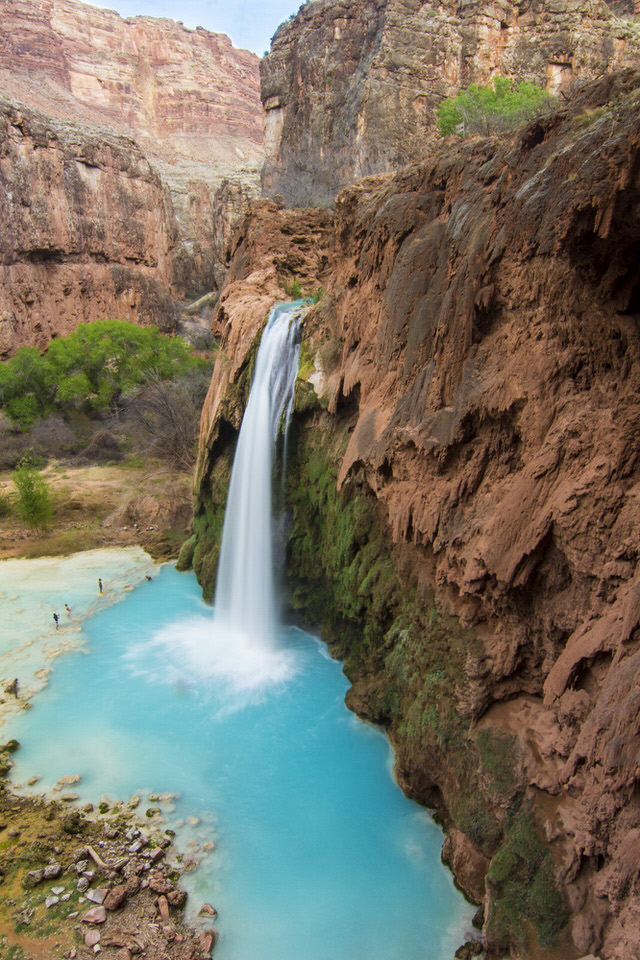
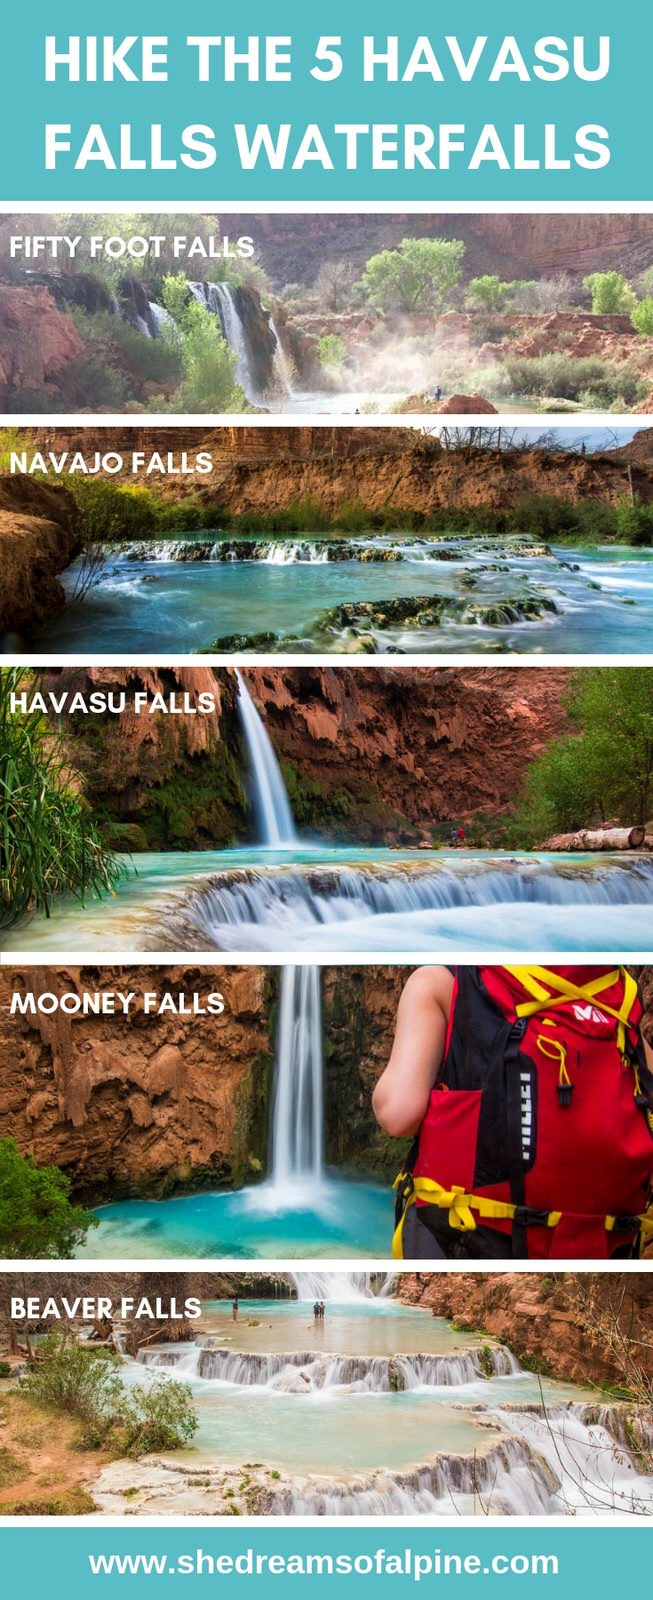
Overview: When hiking Havasu Falls Trail, you will come across 5 total waterfalls. The first set of waterfalls is Fifty Foot Falls and Navajo Falls, located shortly after Supai Village where you will check in to get your permit. Then as you keep hiking toward the Havasupai campground you will reach Havasu Falls. About a half a mile from the campground is Mooney Falls, and the last set of falls, Beaver Falls, is 2 miles past Mooney.
See the map below for a visual of the location for each of the 5 waterfalls.
Day 1: Havasupai Falls Trailhead to Havasupai Campground
When I went hiking into Havasupai Falls, I went with a small group of friends and we did the trip in 3 days and 2 nights (but as of 2019 they do not let you only book 2 nights). Our backpacks were around 30 lbs/person.
The hike in took us about 4 and a half hours from the trailhead to the campground. We spent a lot of time looking around and taking it easy on the way in. (In comparison, the hike out from the campground back to the trailhead on Day 3 also took us about 4 and a half hours, but we were hiking much faster since we had to drive back home that same day.)
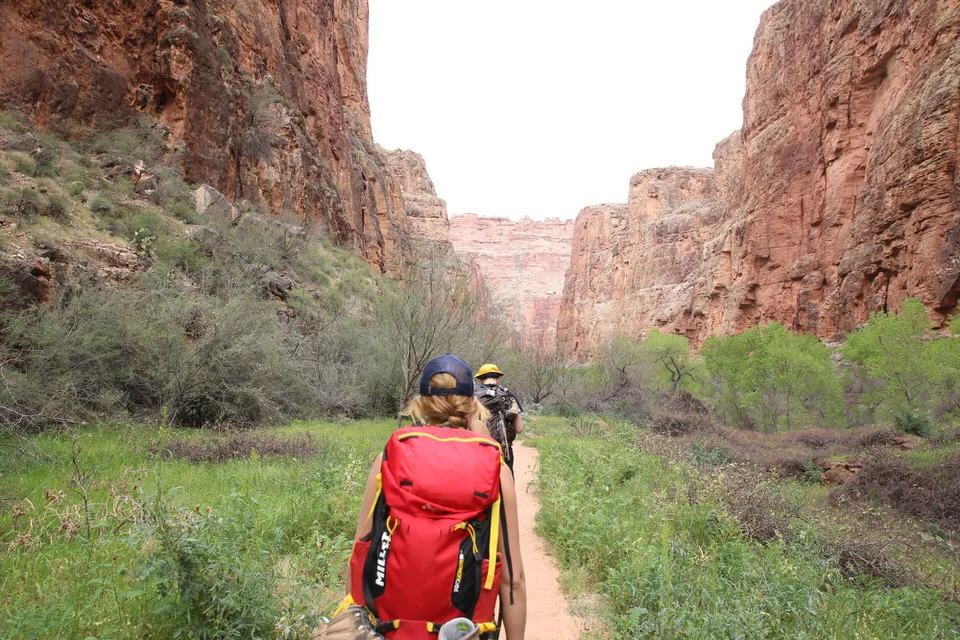
We started our descent on a Friday afternoon into the dusty Arizona Grand Canyon toward Supai Village. You get the majority of your descent, about 1800 feet, in approximately the first 2 miles. The descent is easy, and the trail was easy to follow.
We descended for 8 miles through the beautiful Arizona canyons until we reached Supai Village. Back when I did this hike, you had to pay for your permits at Supai Village on the first day of your hike. Now the permitting system is a little different and you pay in advance (see permitting section above), but you still have to check in to the village so they can confirm your reservations. At the village check-in, they gave us all a set of orange wristbands that we were to wear the remainder of the weekend.
Fifty Foot Falls
After grabbing our wristbands at the village, we continued onward on our hike until we reached the first two set of waterfalls, Fifty Foot Falls and Navajo Falls. We were already mesmerized. We spent a lot of time exploring the falls here, taking photos, playing in the water, and just in general just enjoying the beauty of life in the moment. Havasu is good for that. You sort of lose yourself in its beauty.
Navajo Falls
Eventually we continued on to the Havasupai campground area, but before you reach the campgrounds, you reach the third waterfall, Havasu Falls, 100 feet of pure beauty. We wanted to play in these waterfalls before it got dark, but we decided to find a campsite first.
There are tons of campsite options, so don't think you have to pick the first one you see. The options go on and on (about a mile) along the Havasu Creek. Since we had come later in the day, we had to choose a site that was slightly farther from the water, but it was still a pretty good location.
Havasu Falls
After unpacking, we put on our swimsuits and headed back up to Havasu Falls to play around in the water a bit and take some photos.
I'm not going to lie, since we did our hike at the beginning of March, the water was really cold. You get used to it after a while, and I am still glad we decided to do the hike in the spring because I will choose a cool day hiking over a hot day hiking every time.
Day 2: Havasupai Campground to Mooney and Beaver Falls (& Back)
Our goal on Saturday (Day 2) was to explore the rest of the waterfalls, swim around, and just enjoy Havasu Falls Trail. So that's exactly what we did. We woke up around 8am and got ready for our day. We left the majority of our gear back at the campground and packed lighter bags for day hiking.
Our first waterfall on Saturday was probably the most epic of all the waterfalls. Mooney Falls, a 190 feet drop.
Mooney Falls
Getting to the bottom of Mooney was a fun little challenge. It wasn't really very difficult, but if you are afraid of heights and exposure, it could seem a bit spicy. You should definitely take your time going down the trail to get to the bottom of Mooney Falls, be deliberate and attentive to each step and hold onto the chains that are provided for you.
I was a little skeptical of some of the chain in the rock, but maybe that is the rock climber in me... always wary of choss and loose bolts. Again, just be smart and take your time. I thought it ended up being pretty fun and exciting. The reward of getting all the way to Mooney Falls is so worth it!
You could spend a ton of time at Mooney, but we wanted to keep moving and get to Beaver. So after we took some photos and stared in awe for a bit, we continued on to the final set of waterfalls.
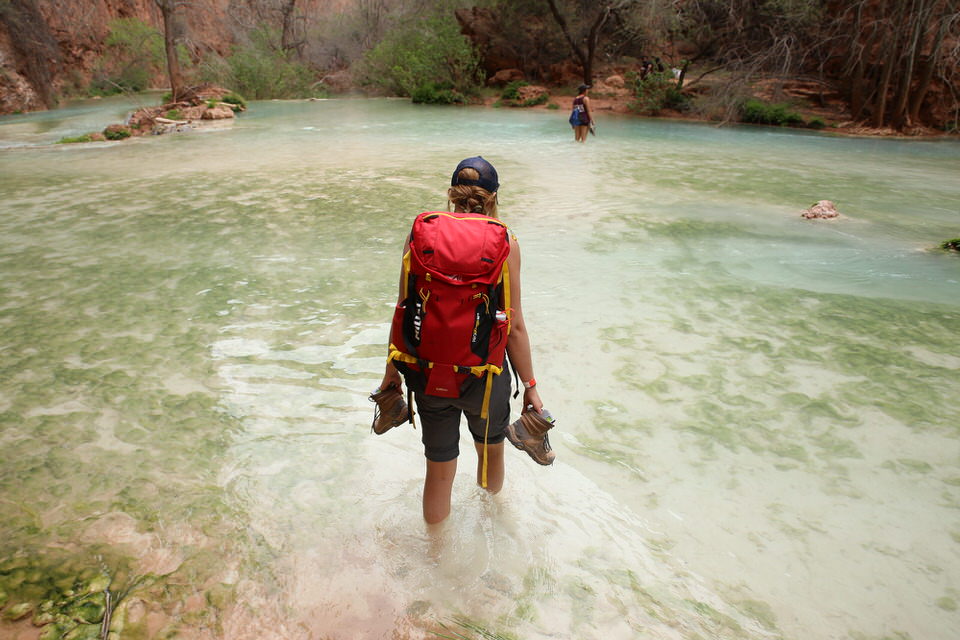
Getting to Beaver Falls involved easy hiking and some wading through the water. Water shoes could be nice here, but we did not find them necessary. We just took off our boots and socks and waded on into the water, but if that isn’t your kind of thing, bring some water shoes.
Beaver Falls was probably one of my favorite set of waterfalls, mostly because it looked so inviting, like, “Come swim in me!” kind of inviting.
Beaver Falls
And we did swim. And we jumped off rocks into the icy cold water, then did it again, and some of us a third time. In fact, there were loads of people jumping off one of the rocks and into the water. It was really entertaining to watch everyone's hesitation and against their better judgment jumping in anyways. We walked around shivering our bums off but still having a good time of it.
It was an honest-to-god good time with great people. I could re-live that Havasu Falls Trail hiking experience over and over. A lot of trips that I go on incorporate more “type 2” kinds of fun in the trips (like brutal uphill hiking or high altitude headaches), where you really only start to appreciate the fun of it all after the trip is over, but honestly, Havasu Falls Trail was entirely “type 1” fun. I really loved every second of it.
We eventually hiked back out and went back to camp on the same trail we hiked in on. Some of the boys went back to Havasu Falls that evening to do some night time photography.
Day 3: Havasupai Campground Back to the Parking Lot
On our third day, we woke up at 5am to hike out. It took us way less time (about 4 and a half hours again) than we had planned to reach the top, and we were all stuffing our faces with Chipotle before we realized that it was all over.
Honestly, if it weren't for these photos we took on our trip, I might doubt that I even ever came here. So when you go on your Havasu Trail hike, be sure to cherish all the moments. This place is one of a kind, and who knows what regulations will be like in the future when there is more and more overcrowding.
Please, don’t forget to practice Leave No Trace Principles on this hike and respect the Havasupai Tribe land. Whatever you pack in, pack it back out. Don’t make a mess of this place, use the designated bathrooms at the campground. Leave no trace. Make it so that others have the chance to come visit this place for as long as it is possible.
Q&A - COMMON HAVASU FALLS HIKE QUESTIONS & CONCERNS
1) What is the correct name for this hike? Havasu Falls Hike or Havasupai Falls Hike? I actually thought this was really confusing when I first learned about this trail. I couldn’t tell if I was reading the wrong trip report or not out there due to the frequent interchanging of names. Which is it!?
Havasu Falls is one of the 5 waterfalls along the trail, and so this trail is most commonly known as the Havasu Falls Trail. Technically, Havasupai is the Indian Reservation, and literally translates to "people of the blue-green waters". There is no waterfall on the trail called Havasupai Falls. That being said, the trail is commonly referred to as both the Havasu Falls Trail and Havasupai Falls Trail.
2) Why is Havasu Falls blue? Science! If you are like me, one of the first things I looked up after hiking this trail was, “Why is the water so blue at Havasu Falls?!”
While I’m no scientist, I actually have a background in engineering and geology, so you’d think I would know more about this… but my best guess was ‘minerals’ which isn’t quite a satisfying answer. I recommend reading this excellent description of the waters from the UC Davis Educational website.
3) How cold is the water at Havasu Falls? The water temperature is roughly 70 degrees Fahrenheit year-round.
4) Can I day hike the Havasu Falls Trail? No, you are not allowed to take a Havasu Falls day trip on this trail. Even if you are physically fit enough to hike this trail in a day, you are not allowed to. All hikers must have a wristband (after checking in with the Supai Village) before continuing on to any of the Havasu waterfalls.
Plus, why would you only want to do this trail in a day? This trail deserves 3-4 days (minimum) to fully appreciate.
Phew! That was an epic trail guide!
At this point, if I haven't convinced you to get some permits and go backpacking here, then I don't know what I'm doing with my life. :) The Havasu Falls pictures alone can speak for themselves quite honestly, so make it happen! Even if you have to keep applying for the permits year after year before you get one, it’s worth it.
Looking for More Arizona Hiking Resources?
Check Out our Arizona Hikes and Desert Hiking Trail Guides:
Arizona: Best Hikes in Sedona Arizona
Arizona: Hiking Humphreys Peak (Tallest Peak in Arizona)
Utah Desert: Kanarra Falls Hike
Utah Desert: Hiking Angels Landing
New Mexico Desert: The Ultimate Guide to White Sands National Monument in New Mexico
California Desert: The Ultimate Death Valley Weekend Getaway
Also be sure to check out these essential hiking & backpacking resources!
10 Awesome Hiking Groups and Challenges to Encourage You on Your Hiking Adventures
How to Wash a Down Jacket Properly So That You Don't Ruin It!
9 Must-Know Backpacking Safety Tips - Particularly if You Want to Go Solo
Cheers,
Allison - She Dreams of Alpine
Did you enjoy this post on Hiking to Havasu Falls? If so, please take a moment to share it on Pinterest or other social media!






















27 of the Absolute Best Hikes in Yosemite National Park to Put on Your Hiking Bucket List | Yosemite National Park is one of the most beautiful national parks in the entire United States, and one of the best ways to explore the park is via one the many amazing hiking trails. In this post, I’ve detailed 27 of Yosemite’s top hiking trails, ranging from difficult to easy, that give you epic views of Yosemite’s grand backcountry and some of Yosemite’s most famous landmarks. You’ll only fall more in love with Yosemite after going on one of these hikes! | shedreamsofalpine.com