Ultimate Guide to Backpacking the Big Pine Creek North Fork Trail

Imagine a backpacking trip in the Sierra Nevada that rewards you with epic views of truly breathtaking aquamarine alpine lakes and stunning 14er mountain peaks in the background – well, that trail is real, and it’s actually perfect for beginners!
The Big Pine Creek North Fork Trail is such an awesome trail to explore the Sierra Nevadas and build your skills as a backpacker. It’s totally doable for beginner backpackers, especially if you break it down into a few days and train for the elevation gain.
If you’re intrigued, here’s everything you need to know about backpacking the Big Pine Creek North Fork Trail!

WHAT WE WILL COVER IN THIS BIG PINE CREEK NORTH FORK TRAIL GUIDE
In this post, we will cover the following topics to help you plan and prepare for your very own successful backpacking adventure on the Big Pine Creek North Fork Trail:
Big Pine Creek North Fork Trail Stats - All the nitty-gritty details for the trail in one spot. How many miles, elevation gain, & more.
How to Get a Inyo National Forest Wilderness Permit for Backpacking - Needed for backpacking the Big Pine Creek North Fork Trail!
Best Time to Hike the Big Pine Creek North Fork Trail - Details about the best time to hike this trail and typical weather to expect on your trip.
Big Pine Creek North Fork Trail Map & GPX Files - I've created a map detailing the whole trail that you can explore, including a look at the elevation gain/profile of the hike. You can also download this file as a GPX file to upload into your own personal GPS device.
How to Get to the Big Pine Creek Trailhead - Driving and parking recommendations. Plus details on how to shuttle this backpacking trip.
Camping at the Trailhead and Along the Big Pine Creek North Fork Trail - Where to camp on and off the trail when backpacking.
Itinerary for Backpacking the Big Pine Creek North Fork Trail - I’ll walk you through my experience and suggested itinerary for backpacking this John Muir trail section hike.
Important Backpacking Safety Tips for the Big Pine Creek North Fork Trail - Info about the top hazards to be prepared for along the trail.
What to Bring on Your Big Pine Creek North Fork Trail Backpacking Trip - The essential packing list for this hike. Don’t hit the trail without these things!
Big Pine Creek North Fork Trail Trip Report - Read about my personal experience on the trail.
If you’re looking for something specific, feel free to skip ahead to the section you’re looking for!
Plus, be sure to check out the bottom of this post to find more hiking trail guides in the Sierra Nevada mountains and other additional hiking, camping, and backpacking resources!
GRAB MY [FREE] OUTDOOR BACKPACKER STARTER KIT
I created the Ultimate Outdoor Backpacker Starter Kit for you (and it's FREE)! This starter kit is filled with 14 pages of my best hiking and backpacking tips to help you learn what it takes to become a safe, confident, and self-sufficient outdoor backpacker!
1. BIG PINE CREEK NORTH FORK TRAIL STATS
If you’re anything like me, the first thing you want to know about a trail is the high-level stats and information so you can quickly figure out what the hike is all about. So here you go!

BIG PINE CREEK NORTH FORK TRAIL QUICK FACTS
Trail Name: Big Pine Creek North Fork Trail
Trail Type: Out & back
Trailhead Name: Big Pine Creek Trailhead
Total Mileage: ~12.6 miles (with an optional zero day) or ~16 miles (with an optional active rest day)
Total Elevation Gain: ~3,546 (about the same total descent)
How long does it take to hike the Big Pine Creek North Fork Trail? It’s recommended that you spend 4 days and 3 nights on this trail.
Do you need a permit to backpack this trail? Yes, you need an Inyo County Wilderness Permit to backpack this trail. See the permit section below for more info.
How difficult is backpacking the Big Pine Creek North Fork Trail? This is a very doable backpacking trip for beginners, especially if you take 3 or 4 days.
Is there drinking water available along the Big Pine Creek North Fork hike? Yes! There’s plenty of water fill-up options on this trail. Check out my packing list below for my recommended water filters.
Other Important Notes: Bear cans are REQUIRED in the Sierra Nevada backcountry.

2. HOW TO GET AN INYO WILDERNESS PERMIT FOR BACKPACKING THIS TRAIL
You will need an Inyo National Forest Wilderness Permit in order to go backpacking on the Big Pine Creek North Fork Trail.
WHEN TO APPLY?
Most trails in the Inyo National Forest can be reserved up to 6 months in advance. So, for reservations in the summer months (July through October), you will be looking to make reservations starting in January to April.
There is a 25 person (15 reservation and 10 walk-in) trail quota for Big Pine Creek North Fork from June to mid-September. More details from the Forest Service about permit quotas can be found here.
WHERE TO APPLY?
A wilderness permit is required for overnight trips in the Inyo National Forest. Online reservations for Inyo National Forest Wilderness Permits can be made at recreation.gov. You’ll need to sign up for an account if you don’t already have one.

HOW TO APPLY?
1) Go to recreation.gov website and search for Inyo National Forest Wilderness permits.
2) Click “Explore Available Permits”
3) Then you will be taken to a huge list of trailheads, availability, and quotas. To narrow your search, use the top to filter. Input “Overnight”, put your start date, group size, and you can filter further by typing in “Big Pine Creek North Fork” or “JM23” into the filter search box. Also, mark if this is a guided trip or not.
The permit you’ll need is Big Pine Creek North Fork JM 23.
Then you’ll be shown a list of available permits. If there are permits available, they will show up as “numbers”, otherwise they usually show W meaning “walk-in” only. You can flip through a list of dates to see alternative availability if your original start date isn’t available.
4) If you find a date that are available, click on the date, and then “Book Now”
5) At this point, you’ll be taken to a long order form like page where you fill in all your information
6) Finally you’ll check out and pay for your permit.
HOW MUCH DOES A PERMIT COST?
The transaction fee for reservations is $6 per application plus an additional $5 per person for the actual permit (unless you are entering the Mt. Whitney Zone which is $15 per person).
>> Find out more about getting popular California hiking & camping permits here.
3. BEST TIME TO HIKE THE BIG PINE CREEK NORTH FORK TRAIL
September is my favorite time of the year to backpack or hike peaks in the Sierra Nevada. The weather is typically lovely, and there are fewer mosquitos (which can be really bad when it is warm). You could also plan to go in July and August but expect the weather to be a bit hotter (with a chance of relentless mosquitos).
June and October are hit or miss on the Big Pine Creek North Fork Trail. If it was a big snow year in California, there may be too much snow on the trail in June. Alternatively, in October, the mountains can start to get their first snowfalls of the season.
Check out the Big Pine CA weather average temperature graph below for reference:

Be prepared before you go. Just like I teach my students in my backpacking program. It’s important that you research your weather conditions before you go, both weeks and days before your trip. You can check the weather conditions here:
Mountain Forecast – One of my favorite sources for mountain weather forecasts when checking a few days before a trip
4. BIG PINE CREEK NORTH FORK TRAIL MAP & GPX FILES
The Big Pine Creek North Fork Trail is not too difficult to follow, but when you’re in the backcountry, it’s always a good idea to take a GPS map to navigate so you don’t get off course.
I’ve created a map detailing the whole Big Pine Creek North Fork Trail that you can explore here, including a look at the elevation gain/profile of the hike. You can also download this file as a GPX file to upload into your own personal GPS device.

I always recommend downloading a GPX file onto a GPS device, that way you can check in from time to time to be sure you’re on the right trail.
DOWNLOAD THE BIG PINE CREEK NORTH FORK TRAIL GPX FILES FOR YOUR GPS HERE:
Knowledge is power my friend, and I'm a girl who loves data. Get access to the Big Pine Creek North Fork Trail GPX file PLUS my library of GPX files with tracks and waypoints for all the trails loaded onto the She Dreams of Alpine blog.
Load this puppy into your trusted GPS and rest easy knowing you have tracks to follow on your next hike or backpacking trip.
DON’T HAVE A GPS? YOU SHOULD.
I believe every hiker and backpacker should strive to be self-sufficient, and that includes knowing how to practice smart navigational skills in the outdoors.
This is an important safety skill set that I teach in-depth inside of my backpacking program. There’s no reason to risk getting lost in the outdoors.
Here’s what I recommend to get started:
(Note: This list contains affiliate links)
Gaia is offering a special 10% discount on a premium account to those who subscribe online through my link.
Don’t know where to start? If you need help with some Gaia GPS basics, download my quick Gaia GPS navigation 101 guide.
2) Get an SOS Device: Once you are able to, I recommend investing in some sort of SOS communication device like the Garmin inReach Mini or the Garmin inReach Explorer+ . These devices provide not only GPS tracking capabilities, but also an SOS satellite search and rescue communicator and text communication abilities in the backcountry.
My Go-To Trail Setup: The Gaia GPS app (premium subscription) + the Garmin inReach Mini.
Alternative to Garmin: Pair your Gaia GPS App with the Zoleo SOS device . With this set up, the Gaia GPS App serves as your GPS navigation device, and the Zoleo serves as an SOS/communication device.
Learn more about the best GPS devices for hiking here.
5. HOW TO GET TO THE BIG PINE CREEK TRAILHEAD
If you’re flying into the area, there are several major airport options near Inyo National Forest.

Bishop and Mammoth Lakes are smaller airports that do have commercial flights. However, the schedules are limited to a few flights a day from select cities.
The other most common places to fly into with more flight options are Los Angeles, Las Vegas (which allows for an easy, pretty drive through Death Valley National Park), Reno, or Fresno.
Driving times will vary depending on where you are coming from, but here are a few estimates from the closest airports:
Bishop: 45 min
Mammoth Lakes: 1 hr 15 min
Reno: 4 hrs 20 min
Las Vegas: 4 hrs 40 min
Los Angeles: 4 hrs 40 min
Fresno: 5 hrs 25 min
Local tip: if you’re planning to spend some time in the Eastern Sierra I definitely recommend checking out Mammoth Lakes. It’s one of my favorite mountain towns, and there are some really awesome outdoorsy things to do in Mammoth Lakes.

DRIVING TO BIG PINE CREEK TRAILHEAD
To get to the Big Pine Creek trailhead, you’ll take US-395 to the town of Big Pine and then turn on to Glacier Lodge Road. You’ll reach the trailhead about 10 miles down Glacier Lodge Road.
Note: There are two parking areas near the trailhead – one for day use and one for overnight. Make sure you park in the overnight one when you’re backpacking Big Pine Creek North Fork!
6. CAMPING AT THE TRAILHEAD AND ALONG THE BIG PINE CREEK NORTH FORK TRAIL
Here are some pre-trip and on the trail camping options for the Big Pine Creek North Fork Trail.
CAMPING NEAR THE TRAILHEAD (PRE-HIKE)
There are a few campground options near the Big Pine Creek Trailhead. We stayed at the Big Pine Canyon Group Campground for a night before our hike to help acclimate to the altitude, and it was super convenient.
CAMPING ALONG THE BIG PINE CREEK NORTH FORK TRAIL
You’ll find plenty of great sites to spend the night along the Big Pine Creek North Fork Trail. Seriously, there are so many good camping spots here!

Campsite Night 1 – Near Second Lake
I would recommend camping near Second Lake on your first night on the trail if you feel good making it that far. Our group ended up stopping at First Lake and making that our basecamp for the whole trip, which is also an option.
Campsite Night 2 – Near FIFTh Lake
Fifth Lake makes an awesome campsite for night 2 on the Big Pine Creek North Fork Trail. It’s absolutely beautiful, and there are plenty of spots for camping.
Honestly, there are so many options to camp between First and Fifth Lake that you can really find whatever feels good for you when you get there. I will say that Fourth Lake was a little more marshy, so I probably wouldn’t recommend camping there.
7. ITINERARY FOR THE BIG PINE CREEK NORTH FORK TRAIL
There are tons of itineraries you could plan on the Big Pine Creek North Fork Trail, but I would recommend a 3 night trip to savor your time in this stunning place.

A TYPICAL BIG PINE CREEK NORTH FORK TRAIL ITINERARY
Here is a 4-day/3-night backpacking itinerary for this trail:
Day 1 – ~5 miles from Big Pine Creek Trailhead to Second Lake
5 miles mostly uphill to Second Lake (10,162 ft)
The mileage isn’t too much for this day, but it is one of the more difficult days because there is quite a bit of elevation gain to get to Second Lake.
Day 2 – ~2 miles from Second Lake to Fifth Lake
This is the easiest day with just a couple mile jaunt up to Fifth Lake to camp by this amazing aquamarine alpine lake.
It’s about 800 feet of elevation gain for this day.
Day 3 – Side Trip to Sam Mack Meadow or Palisade Glacier
Don’t move camp this day and take a fun side trip to hike to Sam Mack Meadow, which is GORGEOUS, or if you’re feeling ambitious, all the way to Palisade Glacier.
Day 4 – ~6.5 miles from Fifth Lake to Big Pine Creek Trailhead
The final day is mostly downhill from Fourth Lake back to the trailhead.
8. IMPORTANT BACKPACKING SAFETY TIPS FOR THE BIG PINE CREEK NORTH FORK TRAIL
When planning your Big Pine Creek North Fork Trail backpacking trip, you should pay particular attention to these hazards you might encounter on the trail.
ALTITUDE SICKNESS
One key thing to take into consideration when backpacking the Big Pine Creek North Fork Trail is altitude. This trail begins at nearly 8,000 feet, and you’ll be camping above 10,000 feet.
Altitude sickness is extremely serious, and you should be prepared to turn around and descend if you or anyone in your hiking party starts showing symptoms of Acute Mountain Sickness (AMS). The main symptoms include persistent headache, difficulty sleeping, dizziness, fatigue, loss of appetite, and nausea or vomiting.
I would recommend spending the night at at least 7,000 ft to acclimate before heading off on this trail. For instance, my group slept at Big Pine Canyon Group Campground near the trailhead the night before our backpacking trip.
Also be sure to drink plenty of water, before and during your backpacking trip. Staying hydrated will help your body handle the altitude better.

BLACK BEARS
Another thing to remember is that the Big Pine Creek North Fork Trail is in bear country. You are required to use a bear canister to hold your food and anything else with an odor or scent that might attract a bear.
Also, definitely don’t leave food in your car at the trailhead – use a bear locker for anything you don’t bring with you on the trail.
>> Check out more backpacking safety tips here.
SUN & HEAT
Although you might not think this would be a concern in the mountains, if you backpack the Big Pine Creek North Fork Trail in the summer, you should definitely be prepared for it to get hot. Parts of this trail are very exposed with no shade, so make sure you bring sun protection like a sun shirt, a hat, and sunglasses - and, of course, sunscreen!
9. WHAT TO BRING ON YOUR BIG PINE CREEK NORTH FORK TRAIL BACKPACKING TRIP
Here are a few absolutely essential items you should make sure to pack when you’re prepping for backpacking the Big Pine Creek North Fork Trail. This is NOT a comprehensive list though, so be sure to check out our Ultimate 3-5 Day Backpacking Packing List to dive in deep on what I recommend bringing on a backpacking trip.
*Please note that this list contains affiliate links.
The Therm-A-Rest NeoAir XTherm sleeping pad is my favorite sleeping pad. It's lightweight and easy to pack. It's super comfortable (no body parts touch the ground), and it's warm!
Good To-Go Dinners are usually my dehydrated meal choice to bring on backpacking trips. The ingredients are great, and they are super delicious. My favorites are the Thai Curry and the Herbed Mushroom Risotto!
Remember that this is not a full gear list for backpacking the Big Pine Creek North Fork Trail, just some of the most important things. For a complete checklist of gear to pack, check out my printable backpacking packing list here.
DOWNLOAD OUR BACKPACKING PACKING CHECKLIST
Never leave any crucial items behind when you head out on a backpacking trip! I’ve compiled all the essentials here for you so that you’ll never forget anything vital. PLUS, as a bonus, I’ve included a list of 20+ of my favorite backpacking food snacks and meals inside of this list for inspiration.
10. BIG PINE CREEK NORTH FORK TRAIL TRIP REPORT
Our first day, we hiked out from the trailhead with a plan to make it to Second Lake. But our group included a lot of backpacking beginners, so we ended up stopping to camp at First Lake instead.

Most of this early part of the trail is easy and well-graded, but there is a section of steep switchbacks near Second Falls. Along with the elevation gain, a lot of the trail in this section doesn’t have shade, so people were getting hot and tired. There is another steep section right before First Lake, and it seemed like a good idea to stop early after that.
At that point, we had a better idea of the level of what would be fun and enjoyable for our group, so we changed up our planned itinerary and decided to just keep our camp at First Lake for the whole trip and do some hiking from there each day instead of moving camp.
The second day we all hiked up to Second Lake and spent the day enjoying the area, because, seriously, it is just so beautiful! And on our third day, a few of us hiked up to Fourth and Fifth Lake to check that out. Finally, on our fourth day, we said goodbye to the alpine lakes and headed back to the trailhead.
As you can see, backpacking the Big Pine Creek North Fork Trail is really choose your own adventure! There are so many options for how to split up your days depending on what your goals are. But no matter how you do this trail, I promise you’ll love it!

Hope this guide helped get you ready to hit the Big Pine Creek North Fork Trail and see these breathtaking blue alpine lakes on your own backpacking trip! If you’ve hiked this trail, let us know below in the comments!
MORE CALIFORNIA HIKING ADVENTURES!
If you’re looking for more trails & places to explore in California, check out these blog posts:
MORE HIKING & BACKPACKING RESOURCES
Also be sure to check out these essential hiking & backpacking resources!
Cheers,
Allison - She Dreams of Alpine


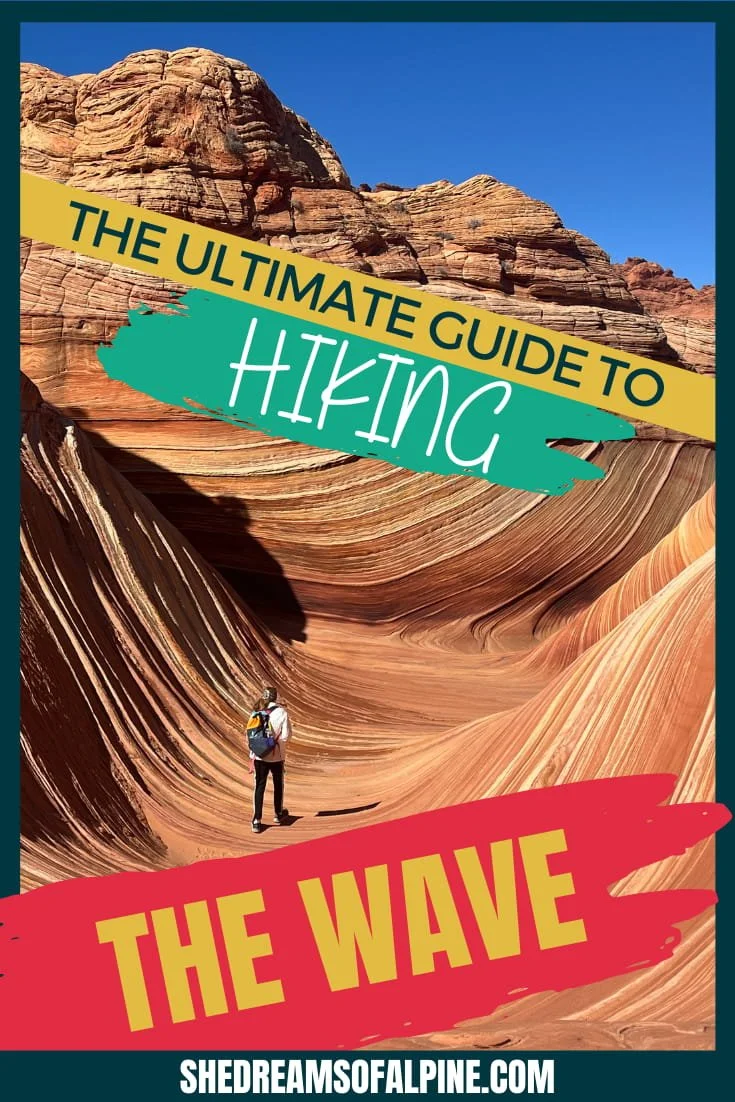


How to Get The Wave Permit - Understanding The Wave Lottery Process | The Wave is an iconic desert hiking destination that will blow your mind - if you can get a permit! This undulating sandstone formation is simply stunning, but getting The Wave permit is not a simple task. It took me several years to win The Wave permit lottery, and this guide to getting The Wave permits can help you make your Wave dreams come true, too! | shedreamsofalpine.com